
Steps
Below is going to be the full tutorial! Remember to check the materials page to double check that you have everything you need! If you're looking for a specific step, you can jump to it with the links below!
Please keep in mind this is not an afternoon project, Pearl took me about a week or two's worth of time spread out over a month. Take your time, it'll turn out better if you've got the patience for it.
Through this tutorial I'll be showing how I built Pearl's tentacle-hair-headpiece-thing. You may need to modify steps along the way for other styles (especially for characters with long tentacles or specifc styles).
Making the Helmet Pattern
Assuming at this point you have all your references together and have a clear idea of what you're making it's time to get started!
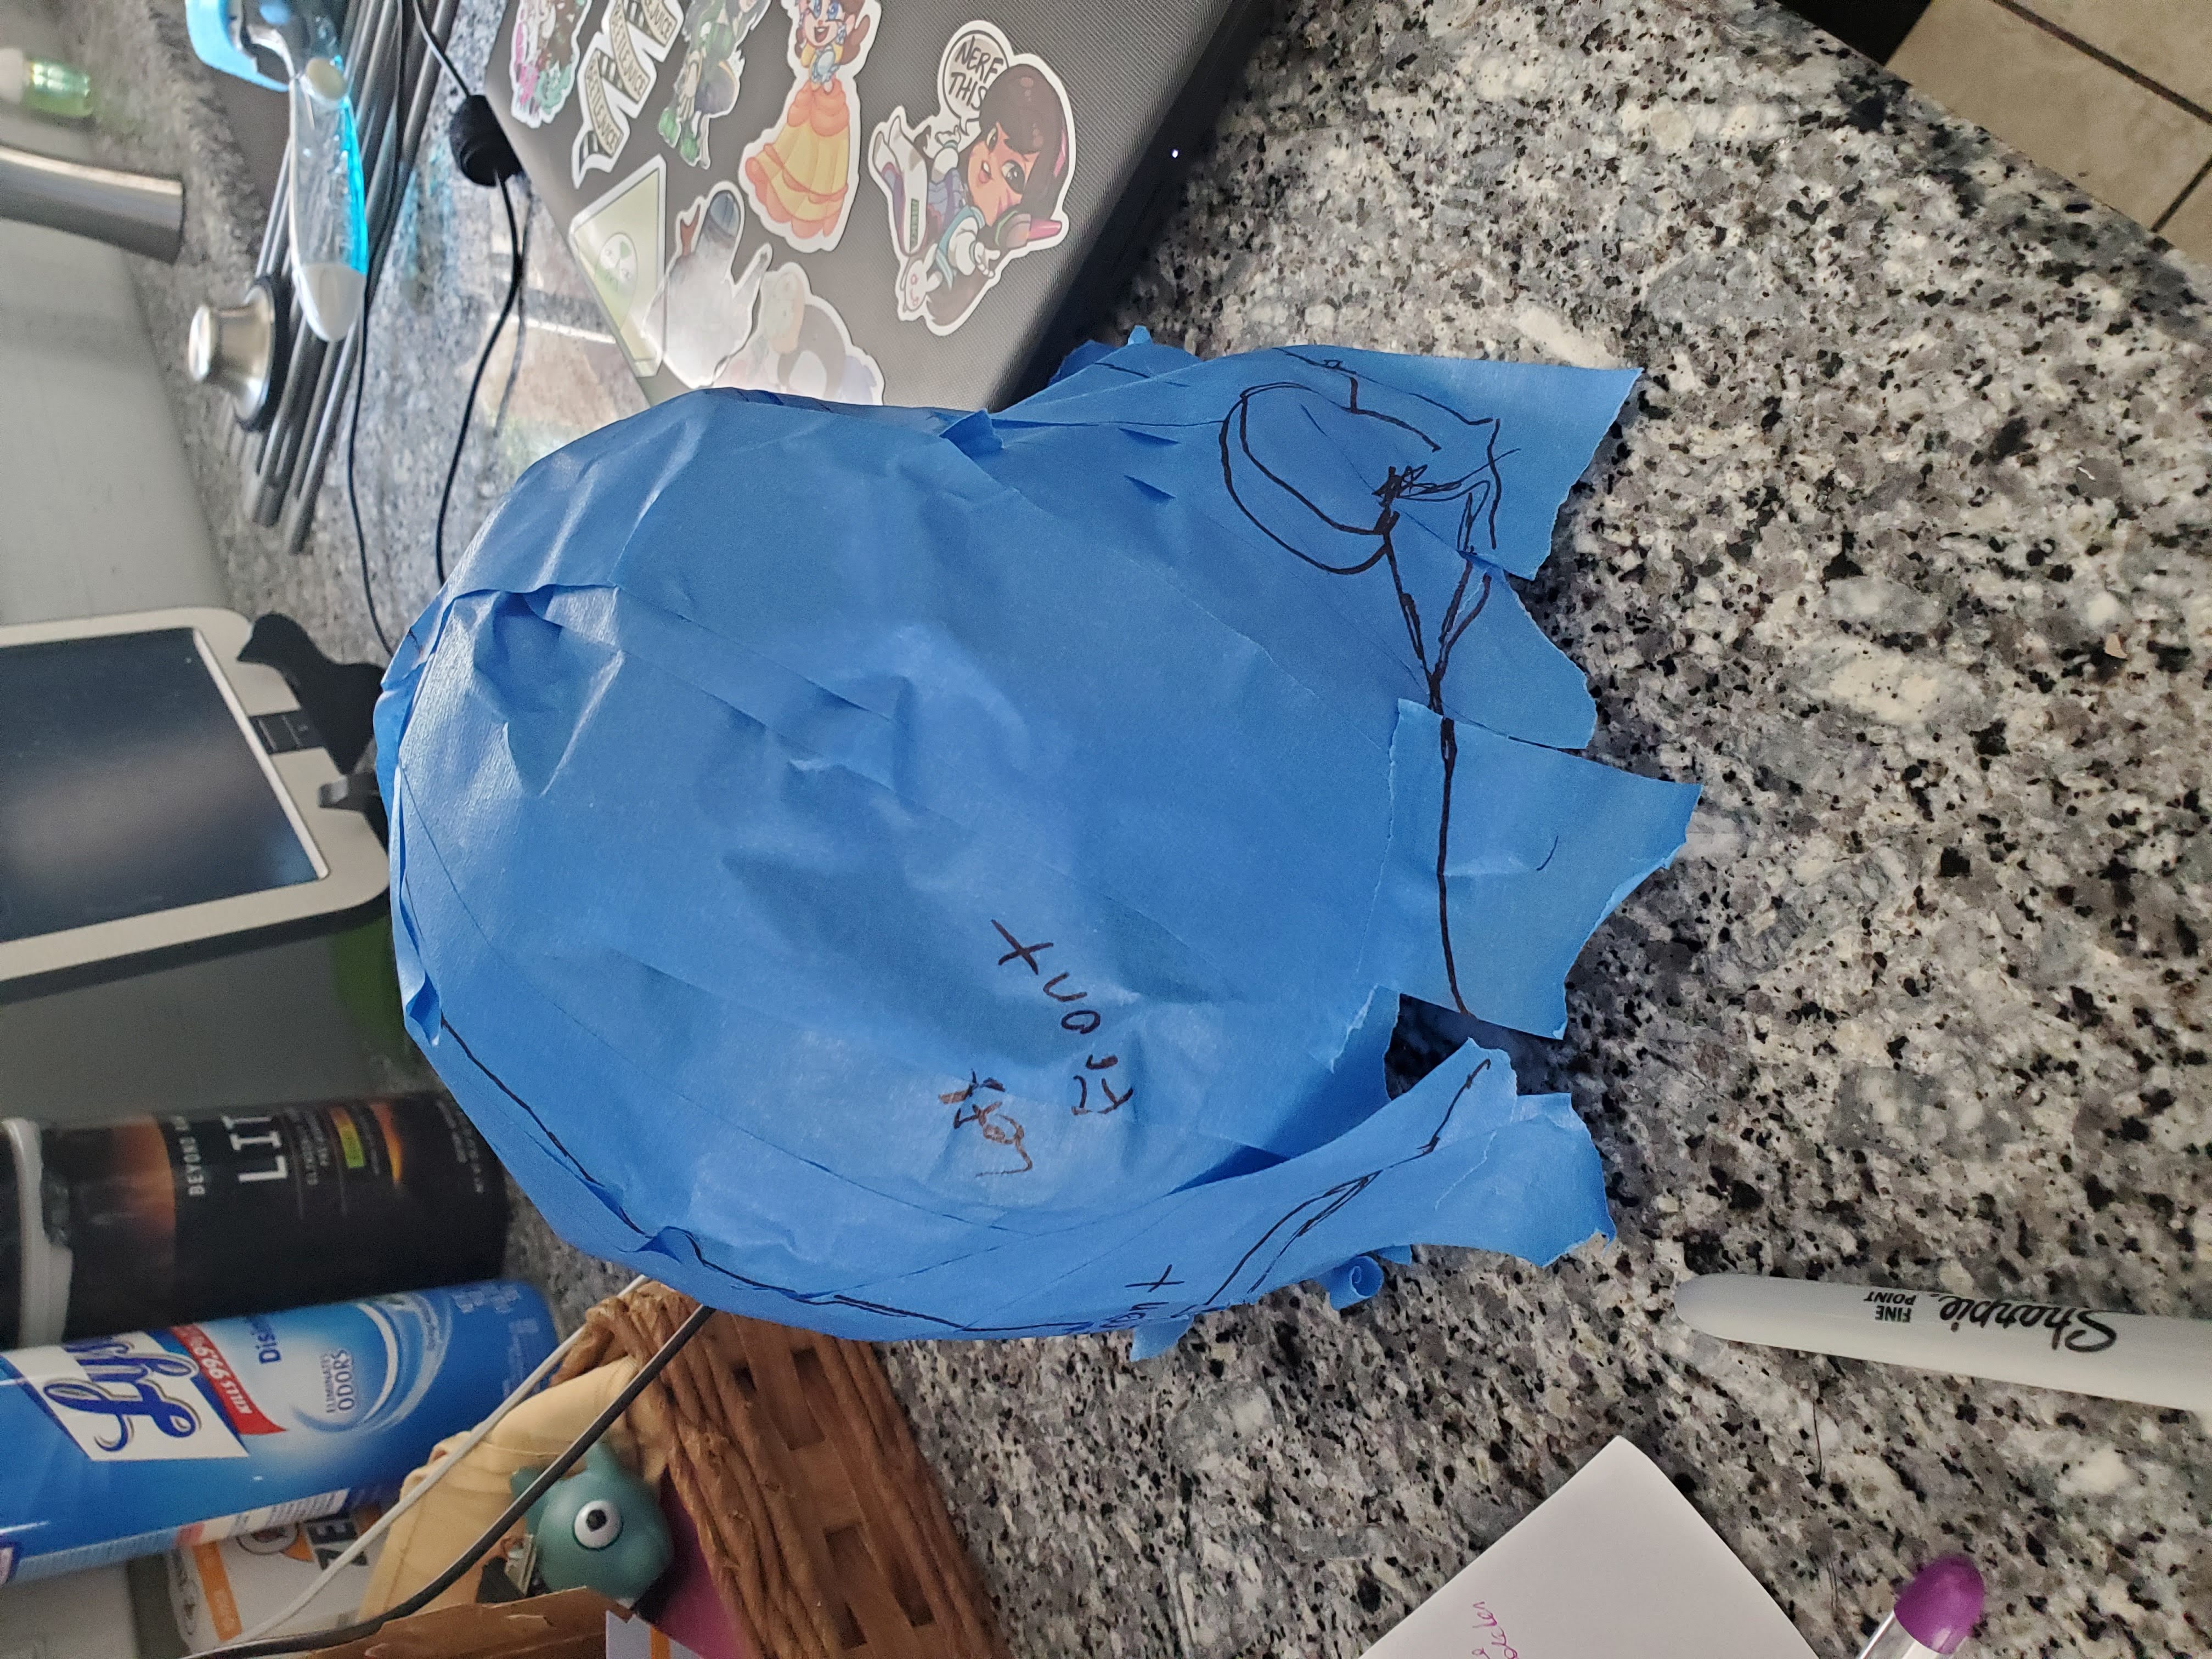
Start by gathering up all of your hair into a wig cap like you normally would, get situated, and grab your masking tape and cling wrap. Wrap your head in cling wrap and tape over it entirely (anywhere a wig would normally cover, from the from of your scalp to the base of your neck) When in doubt, do extra, we'll clean this pattern up in a second.
Take a marker, and draw out where your hairline is from front to back, as well as holes for your ears. Next make a line from the back of your ear to the other across the base of your head, and then a line from the center of the previous line to center of your forehead edge: these will be your pattern pieces.
(You may want to add more lines to make smaller pieces for later, but this is up to you.)
Prepare Your Pattern
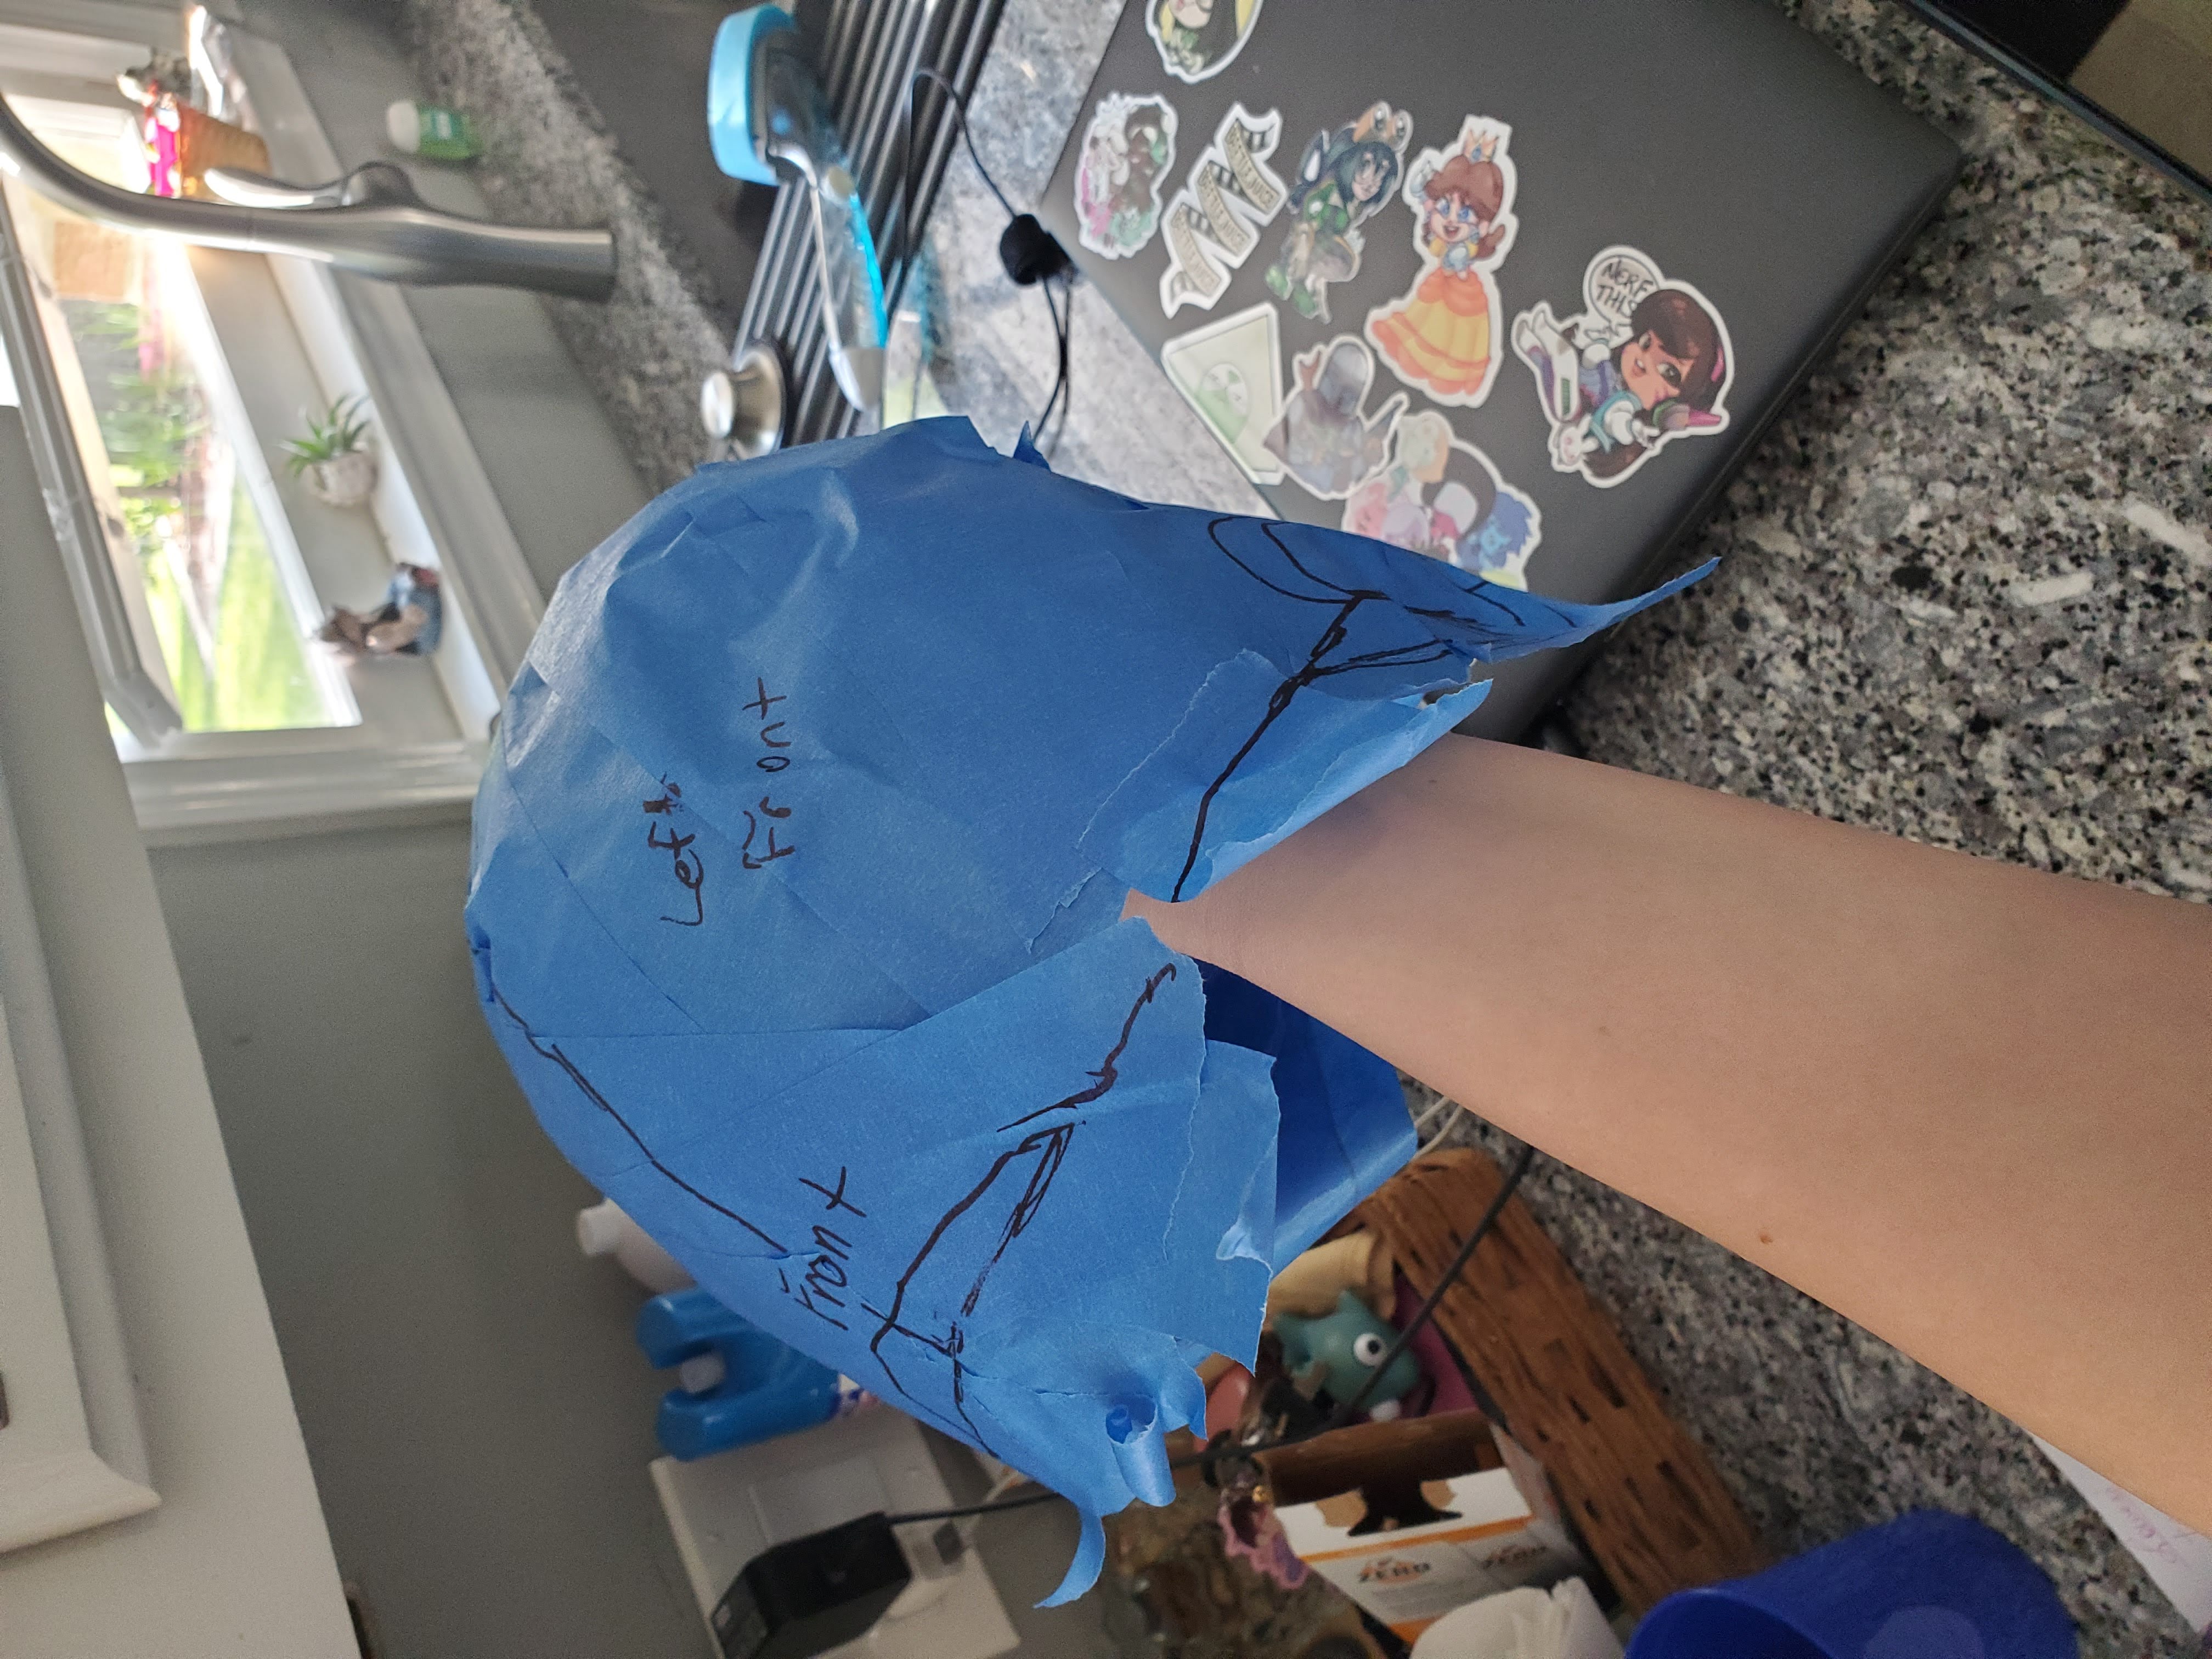
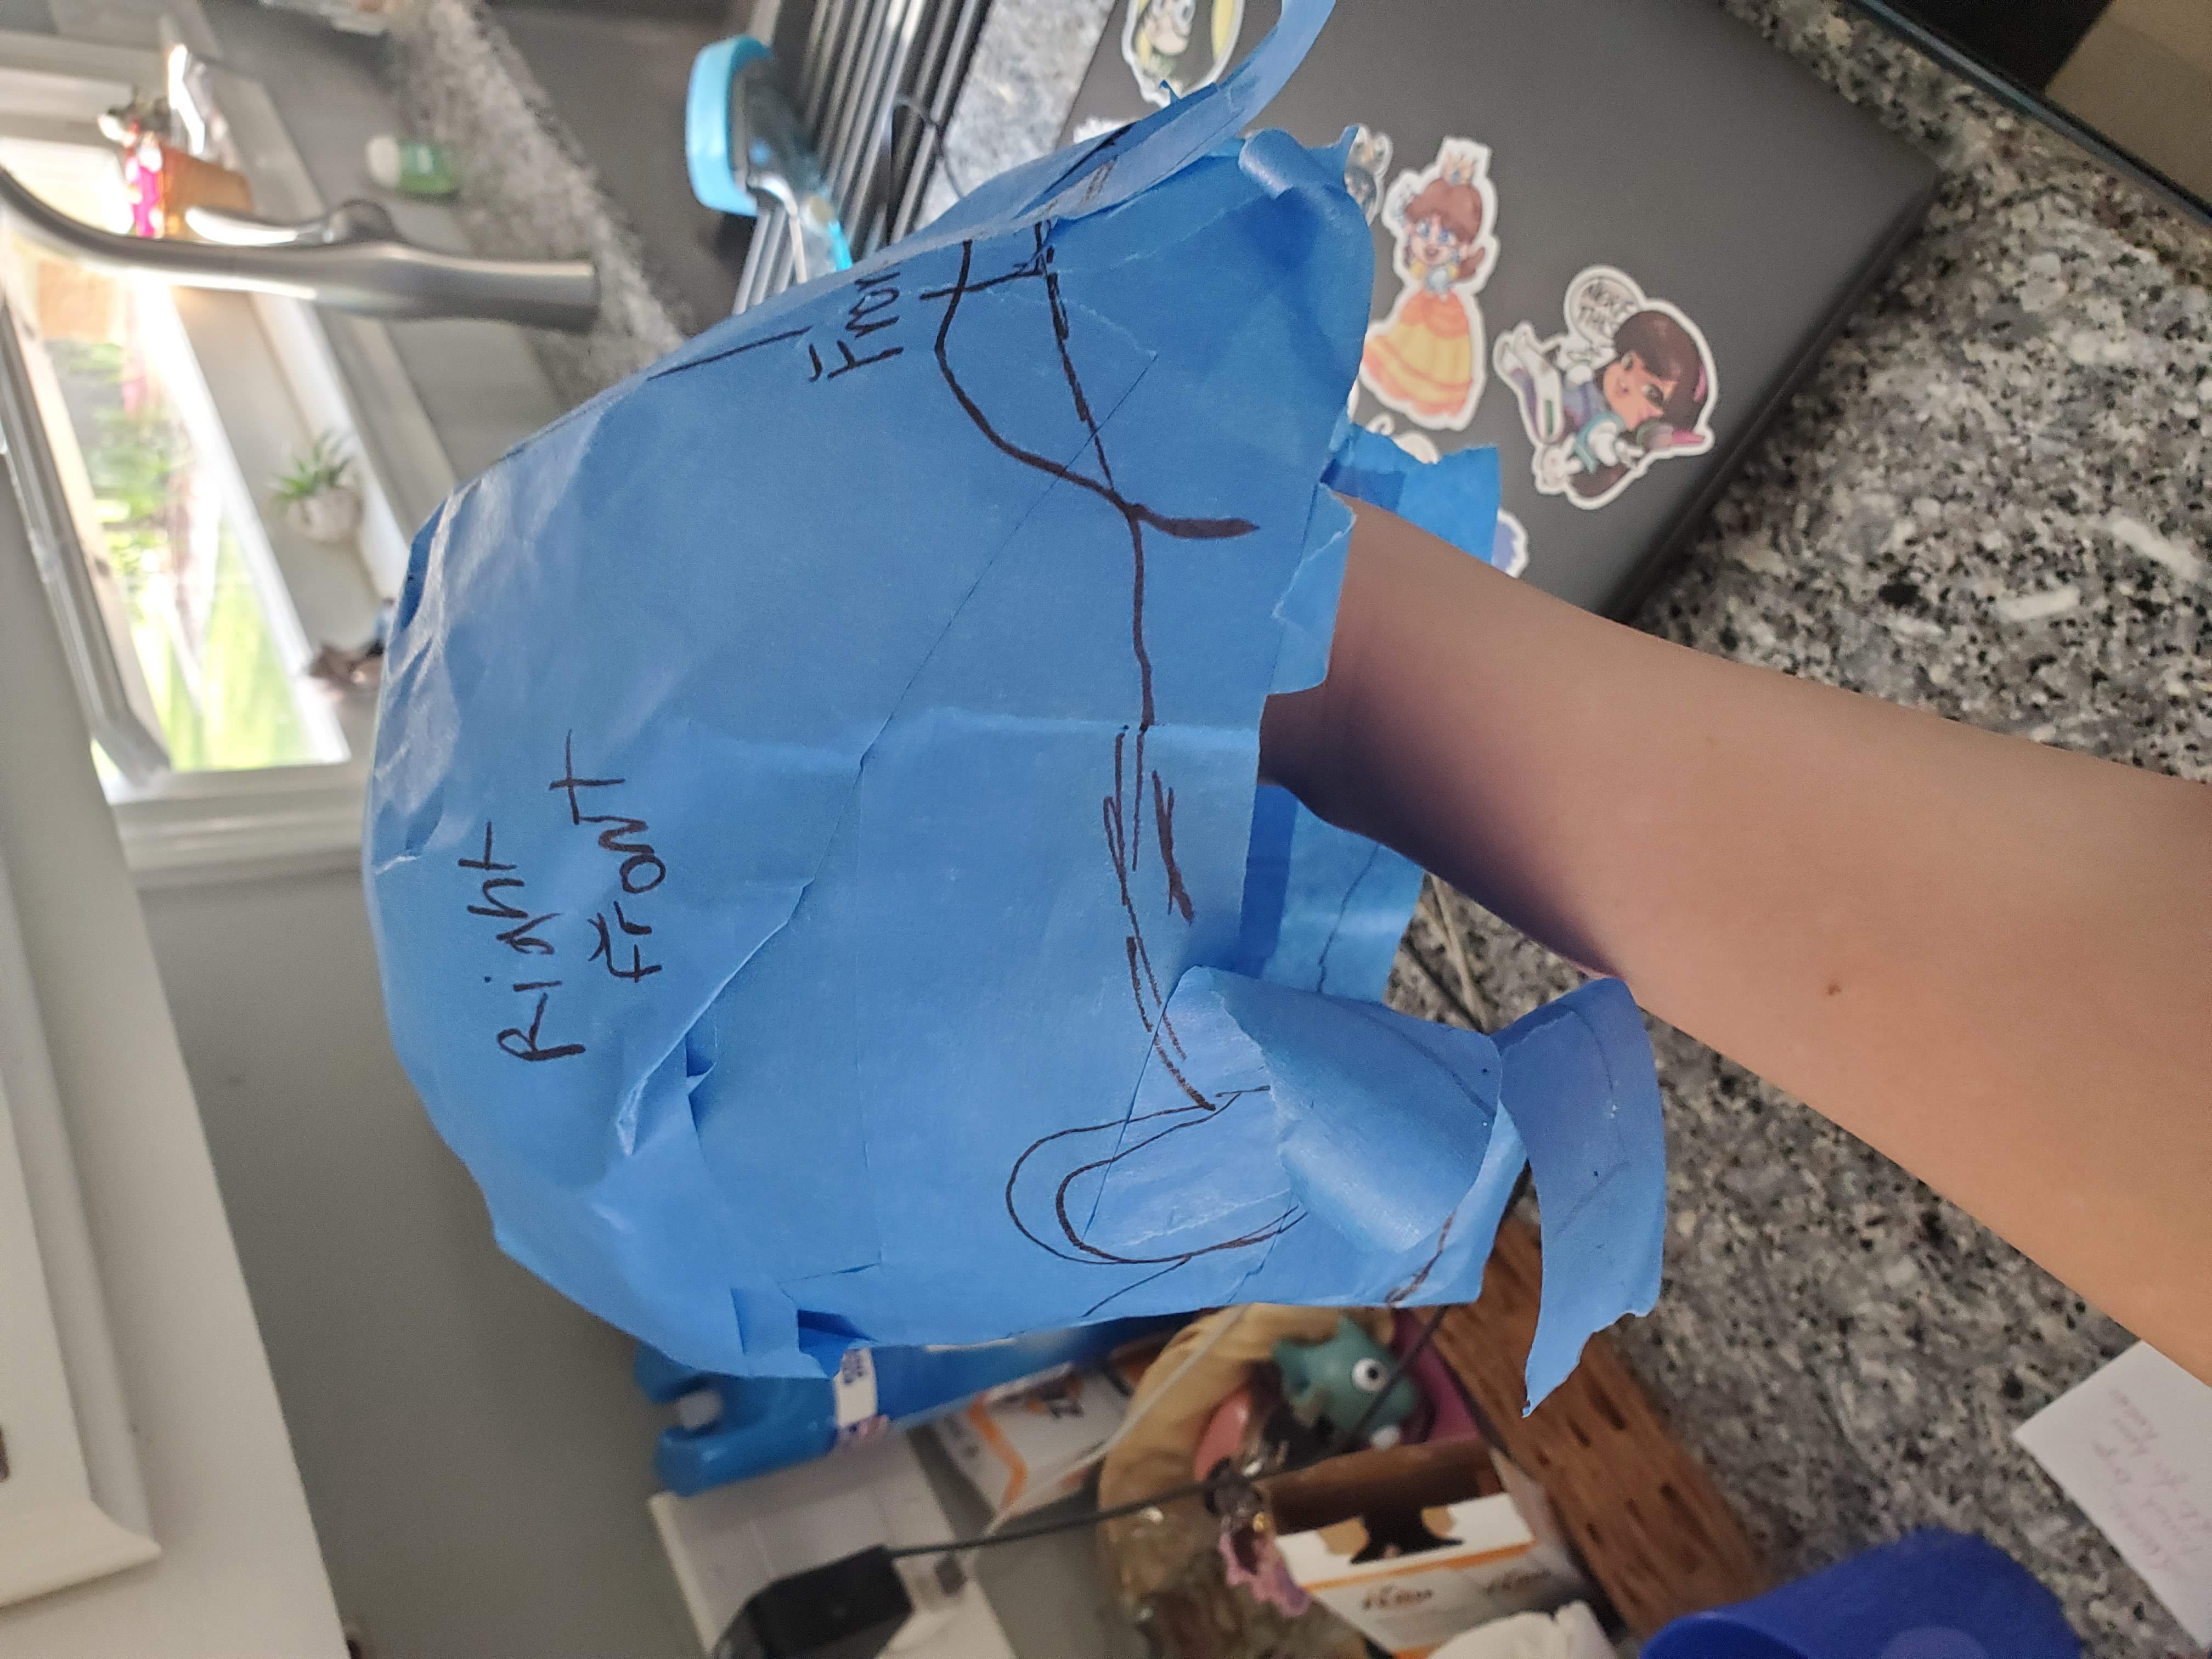
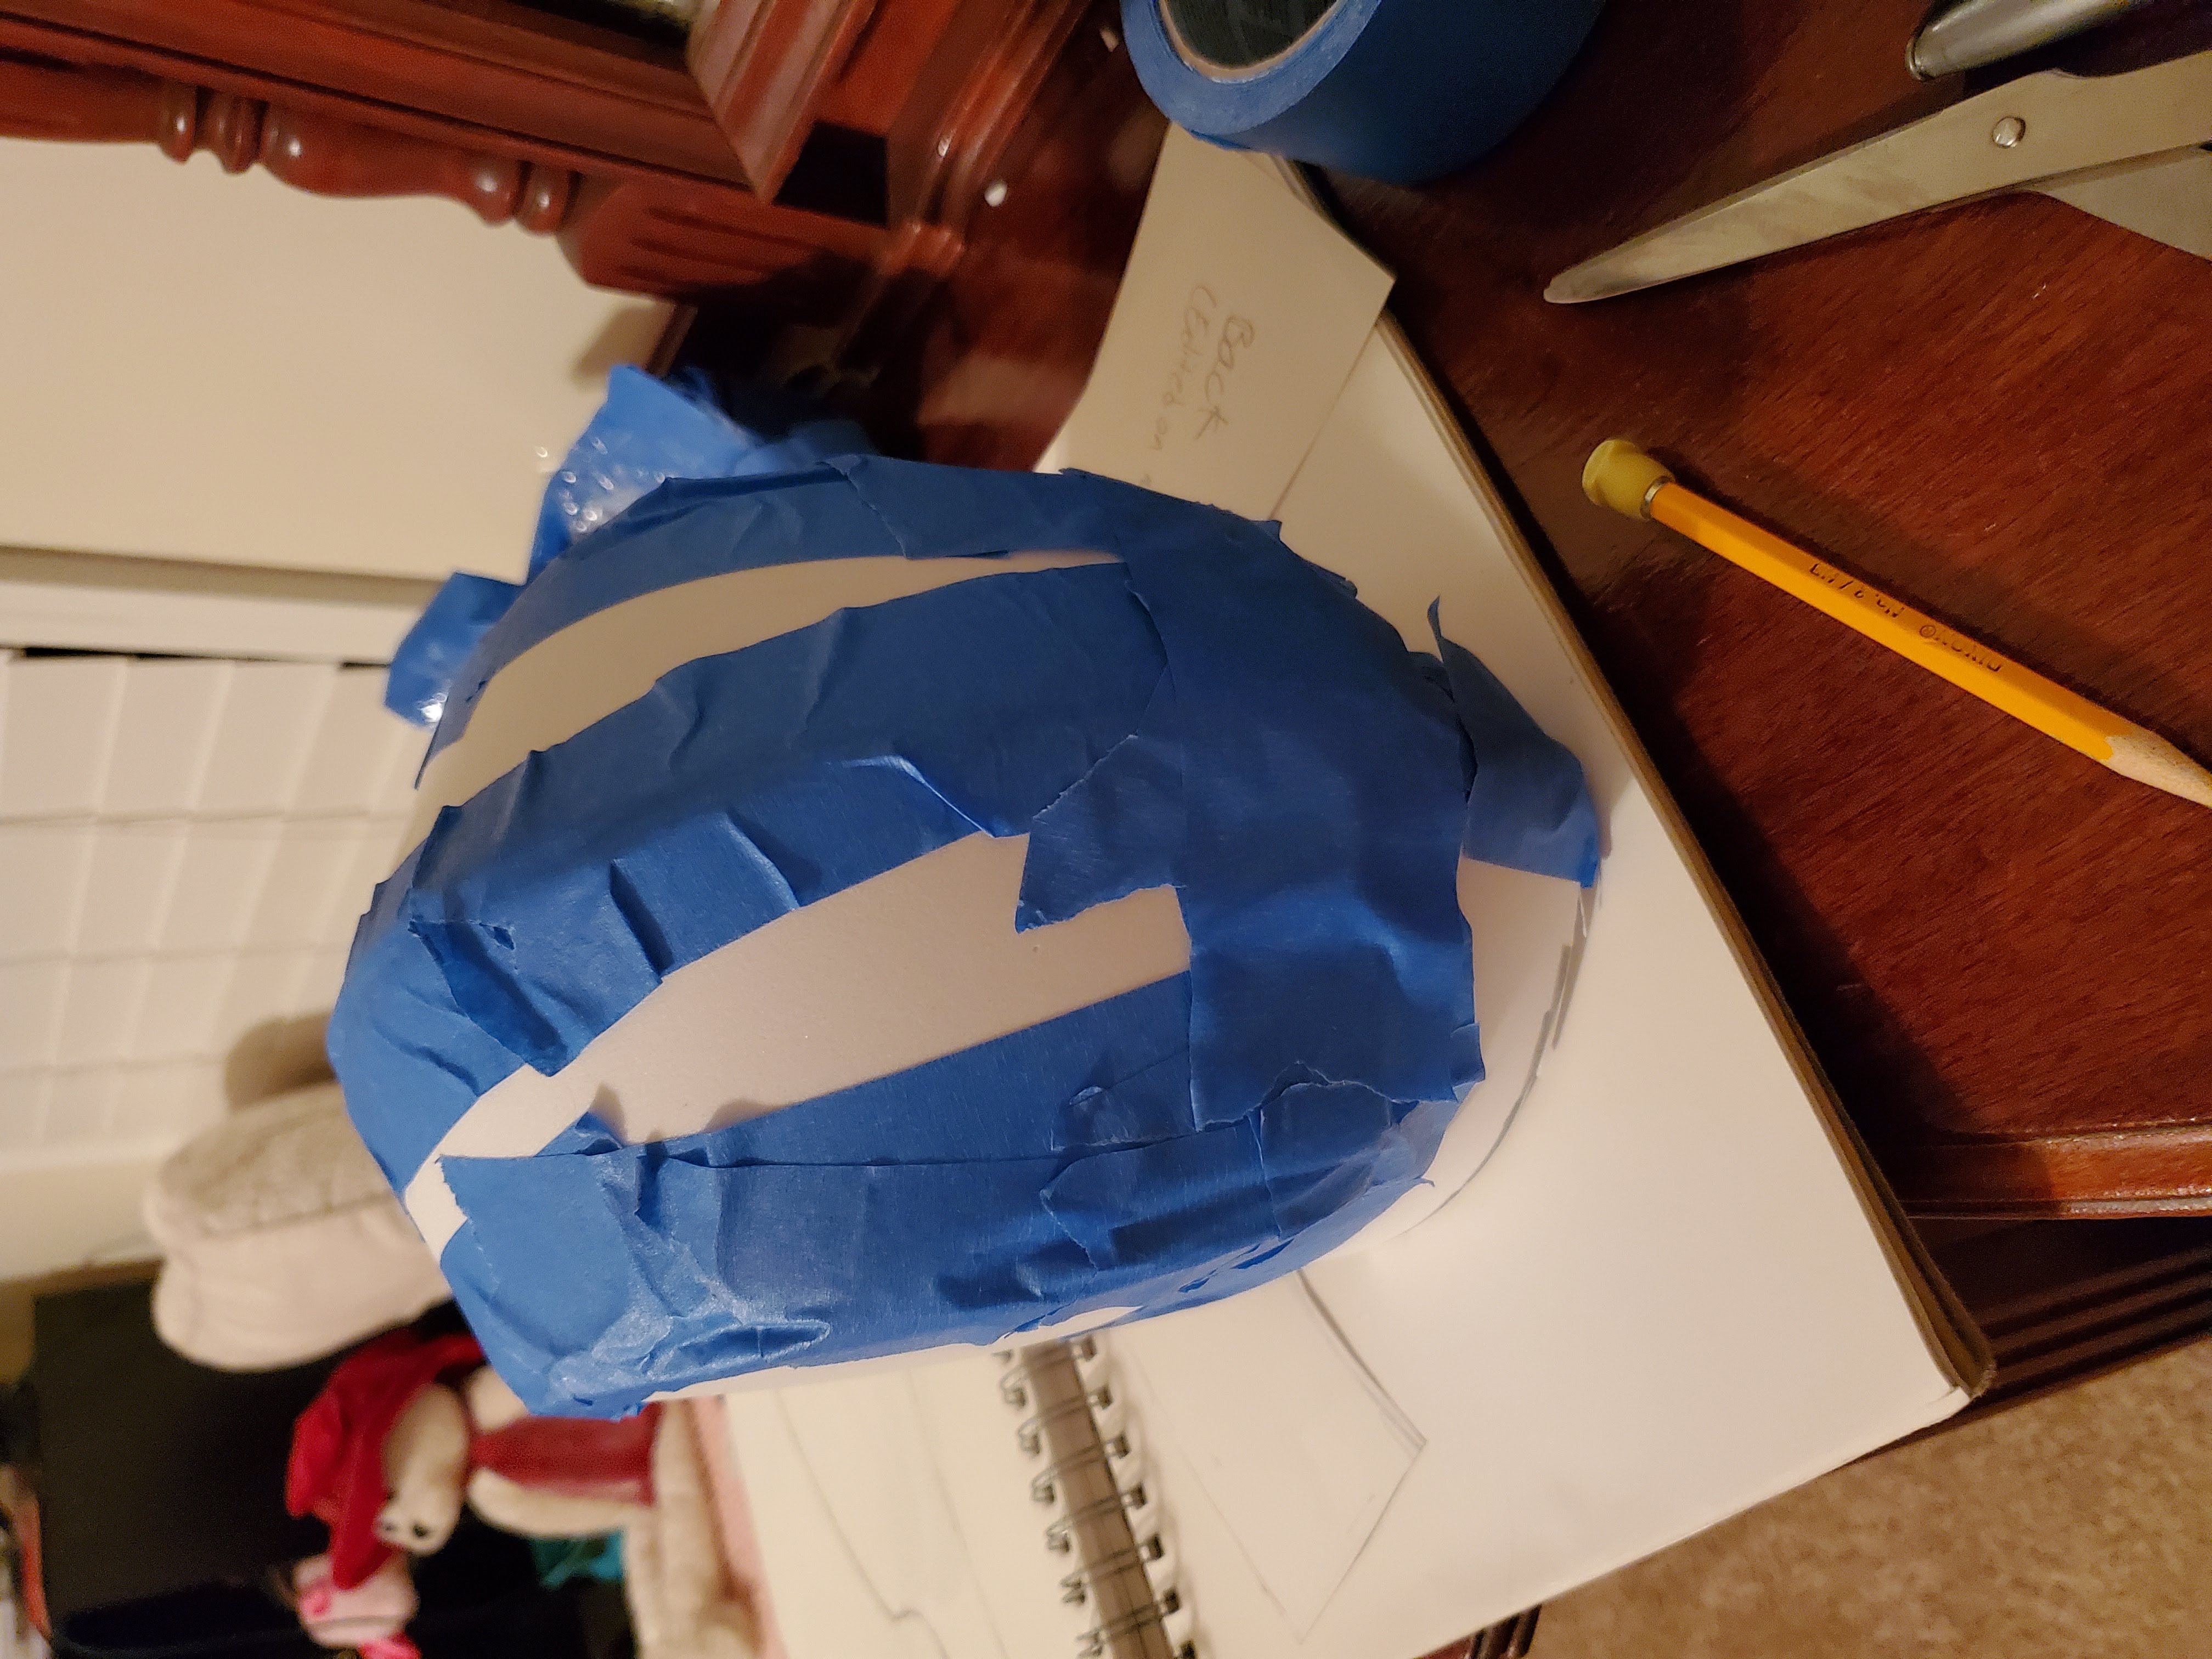
Take off your tape helmet and use your scissors to cut along the lines you drew to get your pattern pieces (you may also want to edit the pieces to be more symetrical/ neat). Write on each of them what each piece is to not get confused later.

Cutting Your Foam
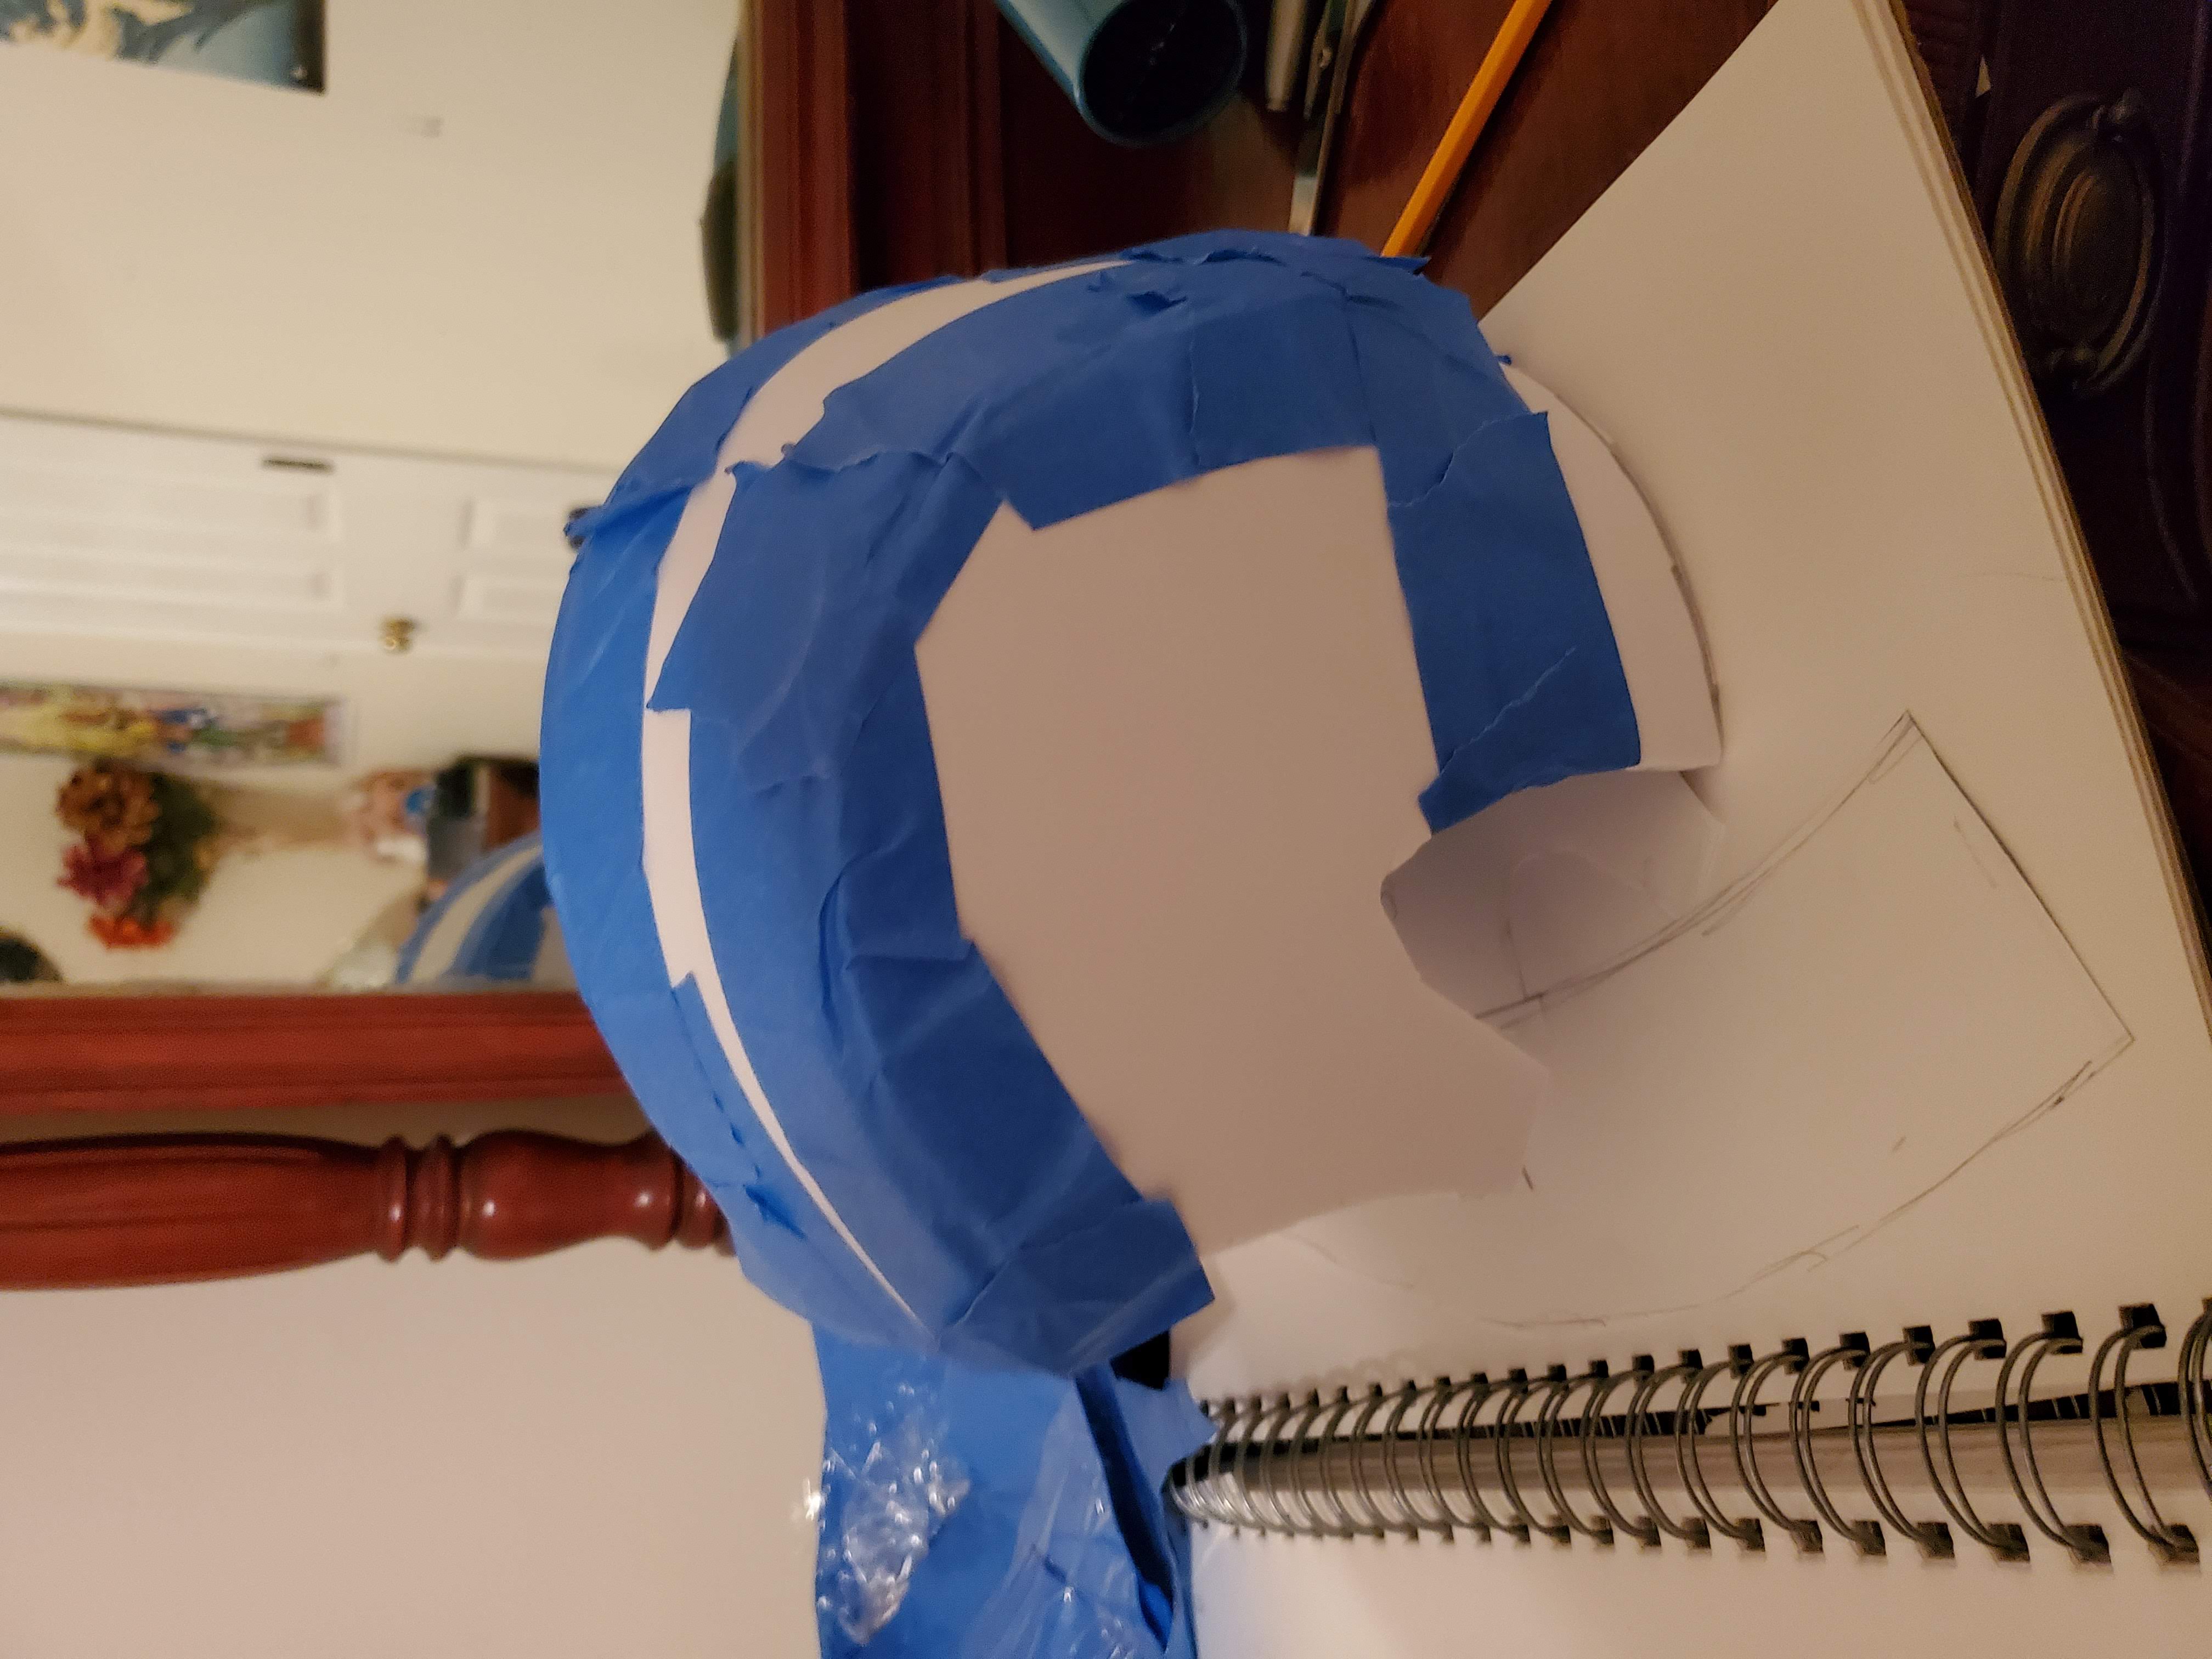
Grab your foam and trace along your pattern pieces (you may need to add some darts/ to get the right sizes given the bend of your pattern). Label the inside of each piece.
At this point I took all of my foam pieces and taped them together to try it on (it isn't bent to shape yet, but this may help get an idea of how it'll look). This is your time to re-cut any pieces, modify your pattern, add pieces, etc (I added a little piece in the front for Pearl's baby bangs at this point), etc.

Shaping and Gluing Your Foam
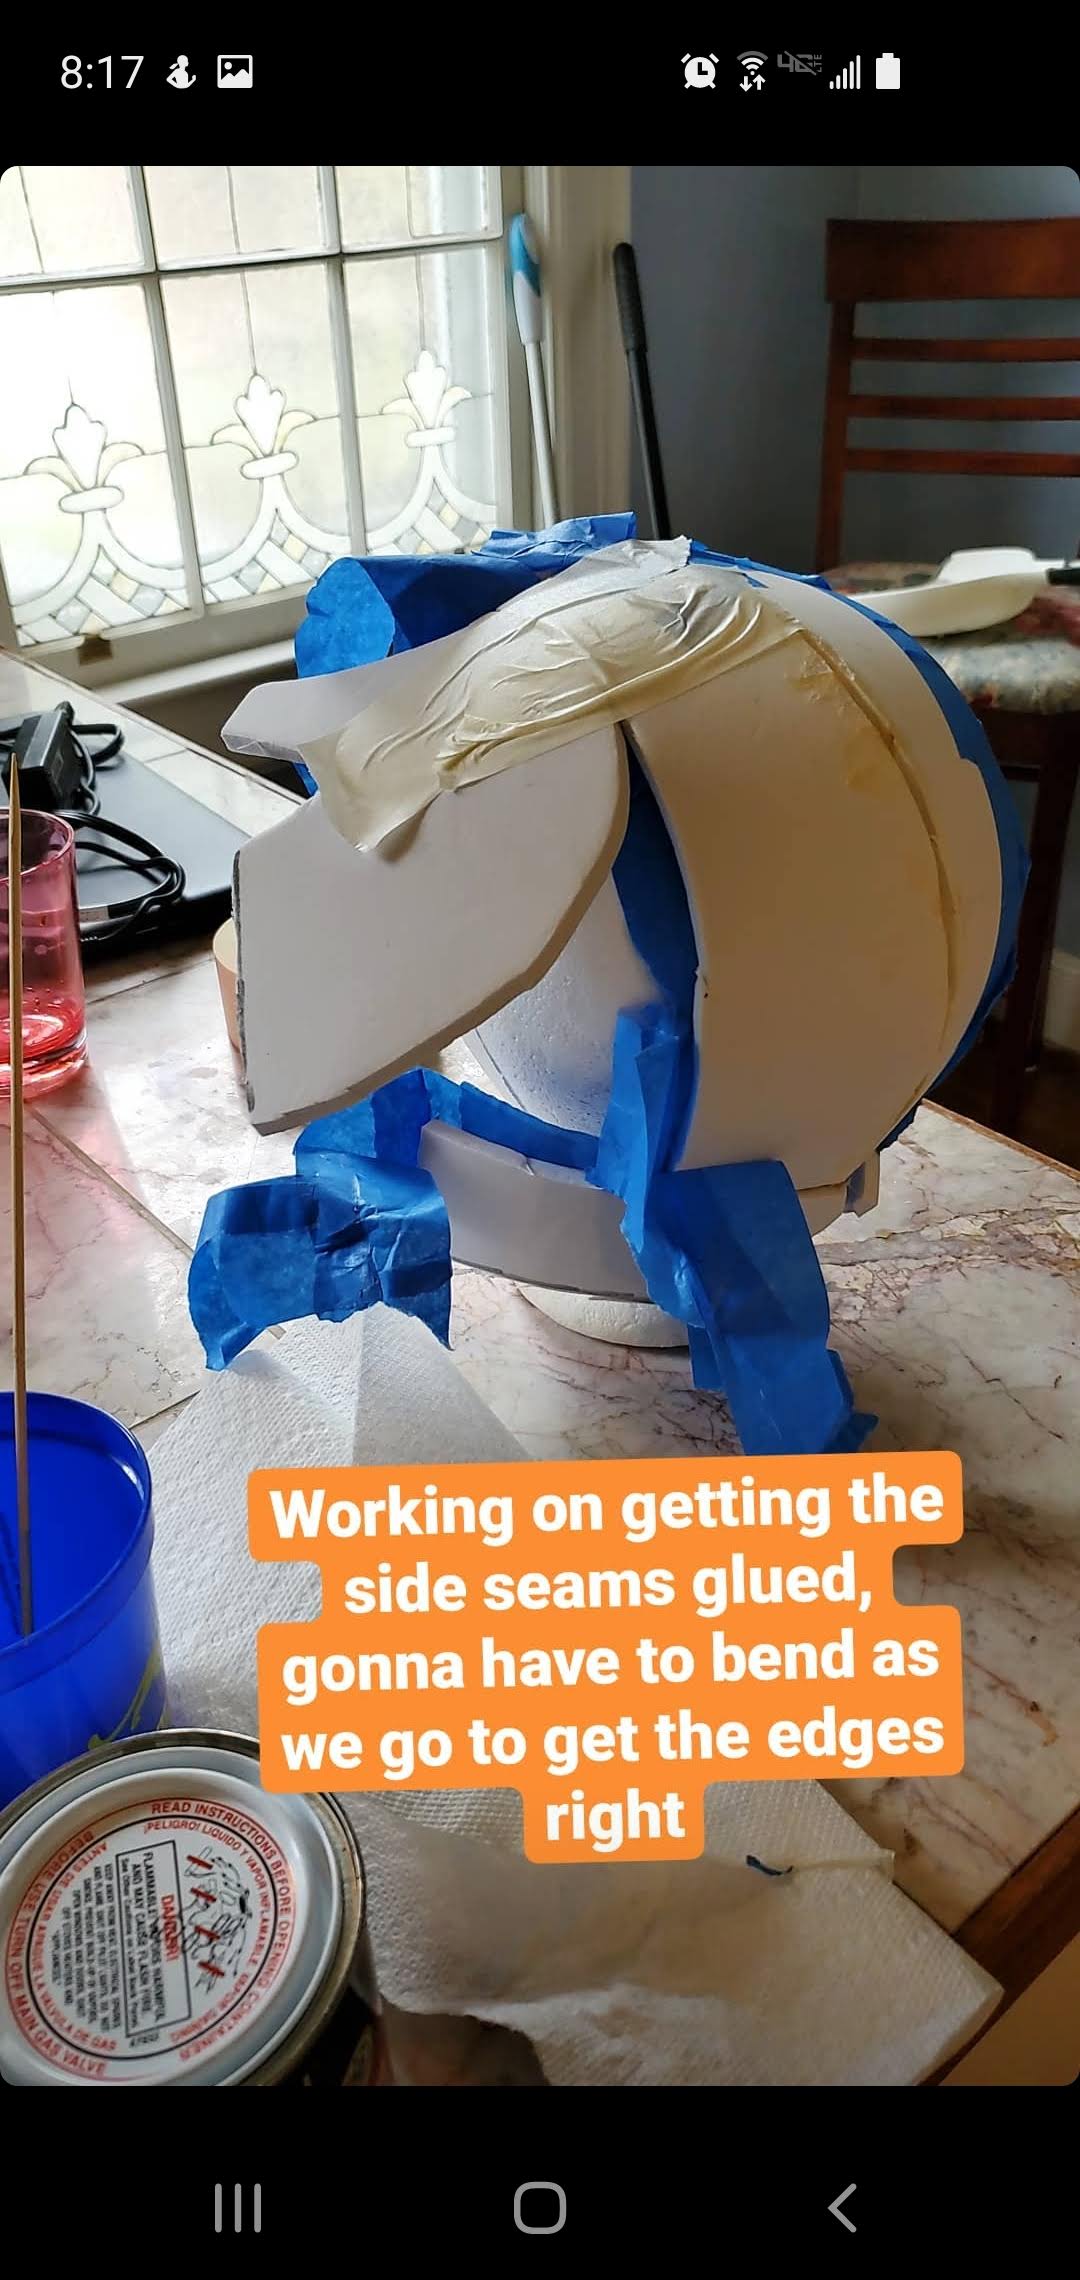
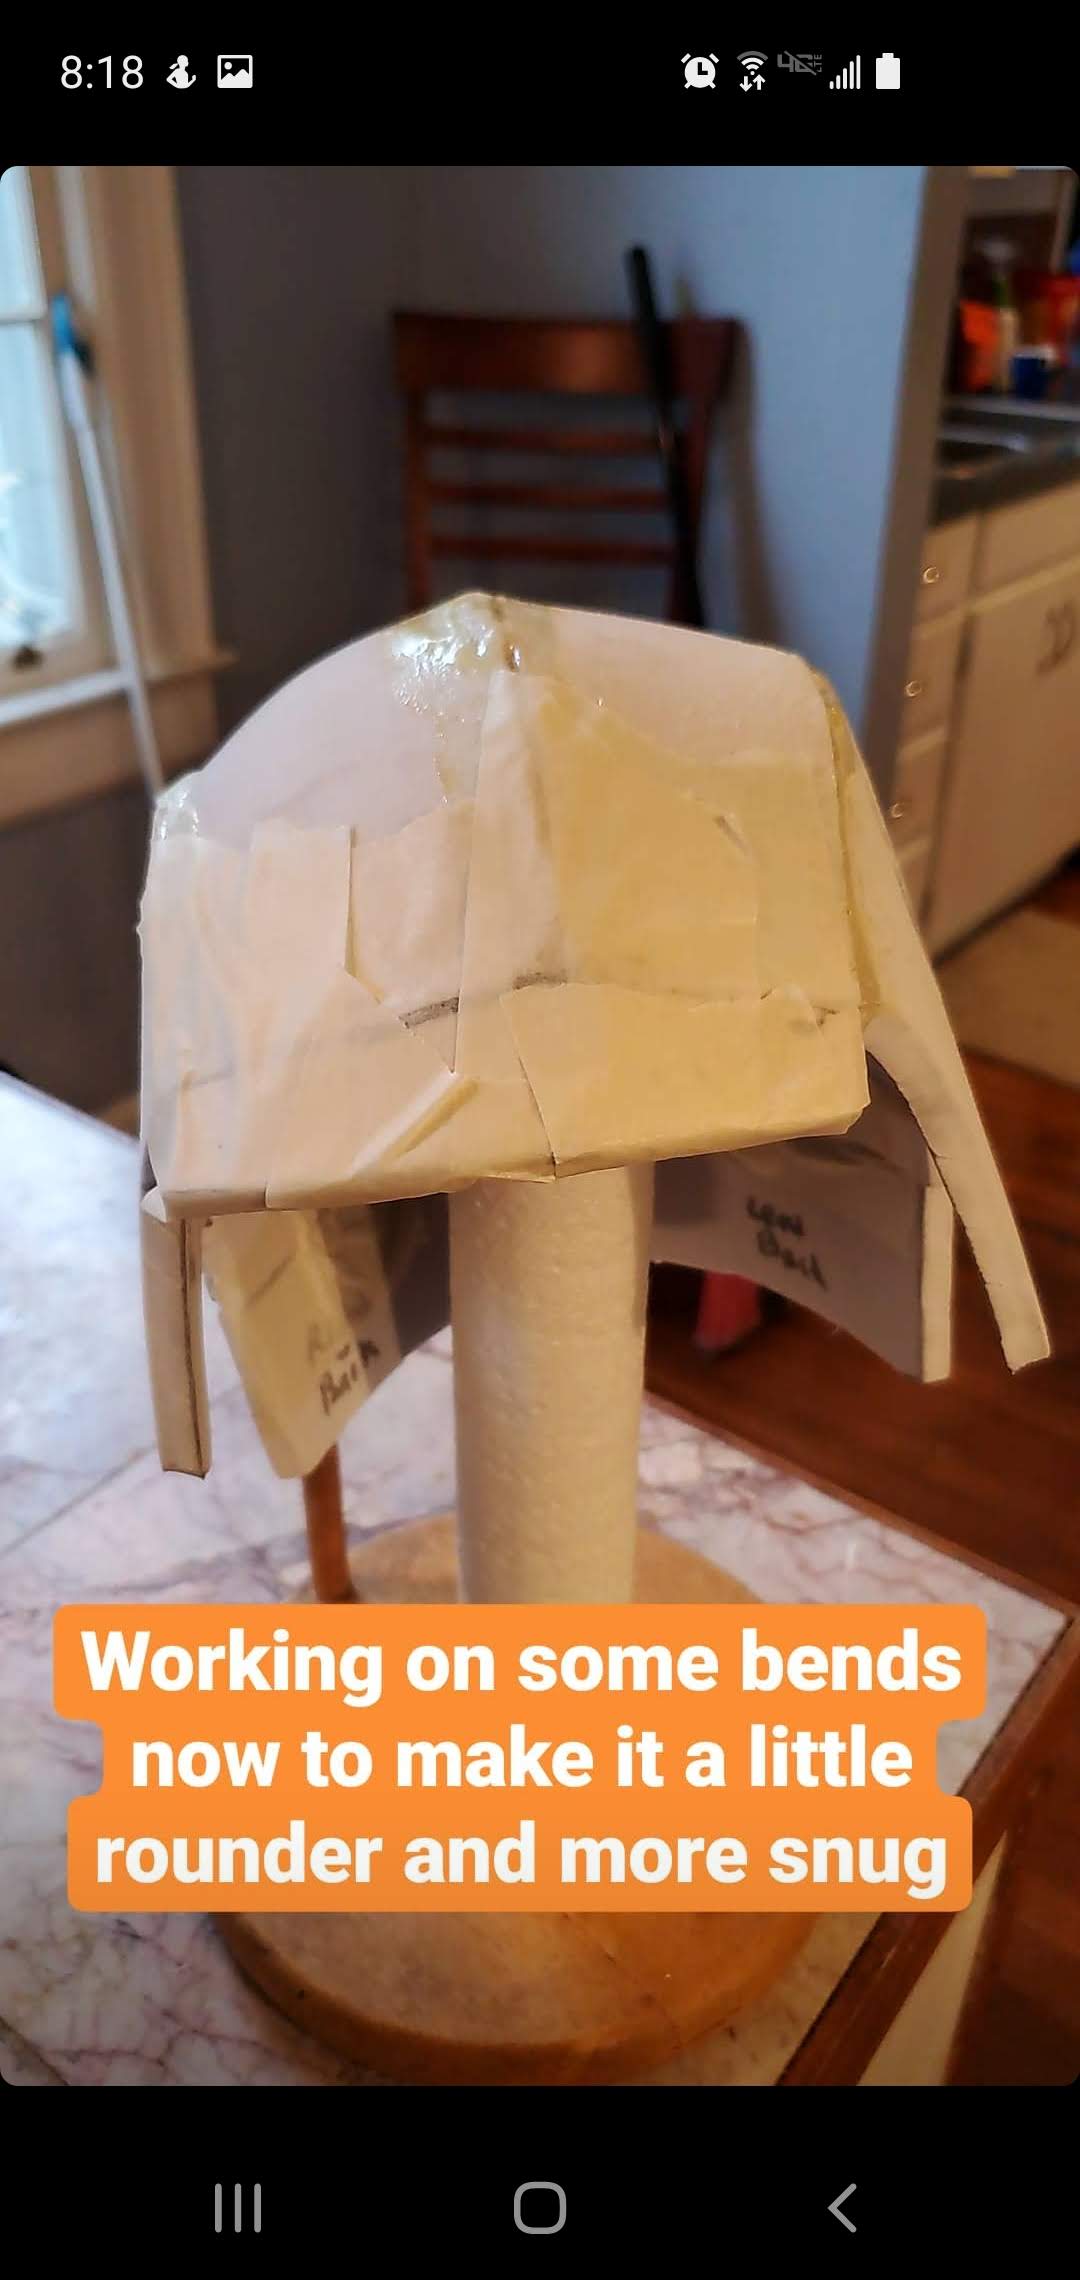
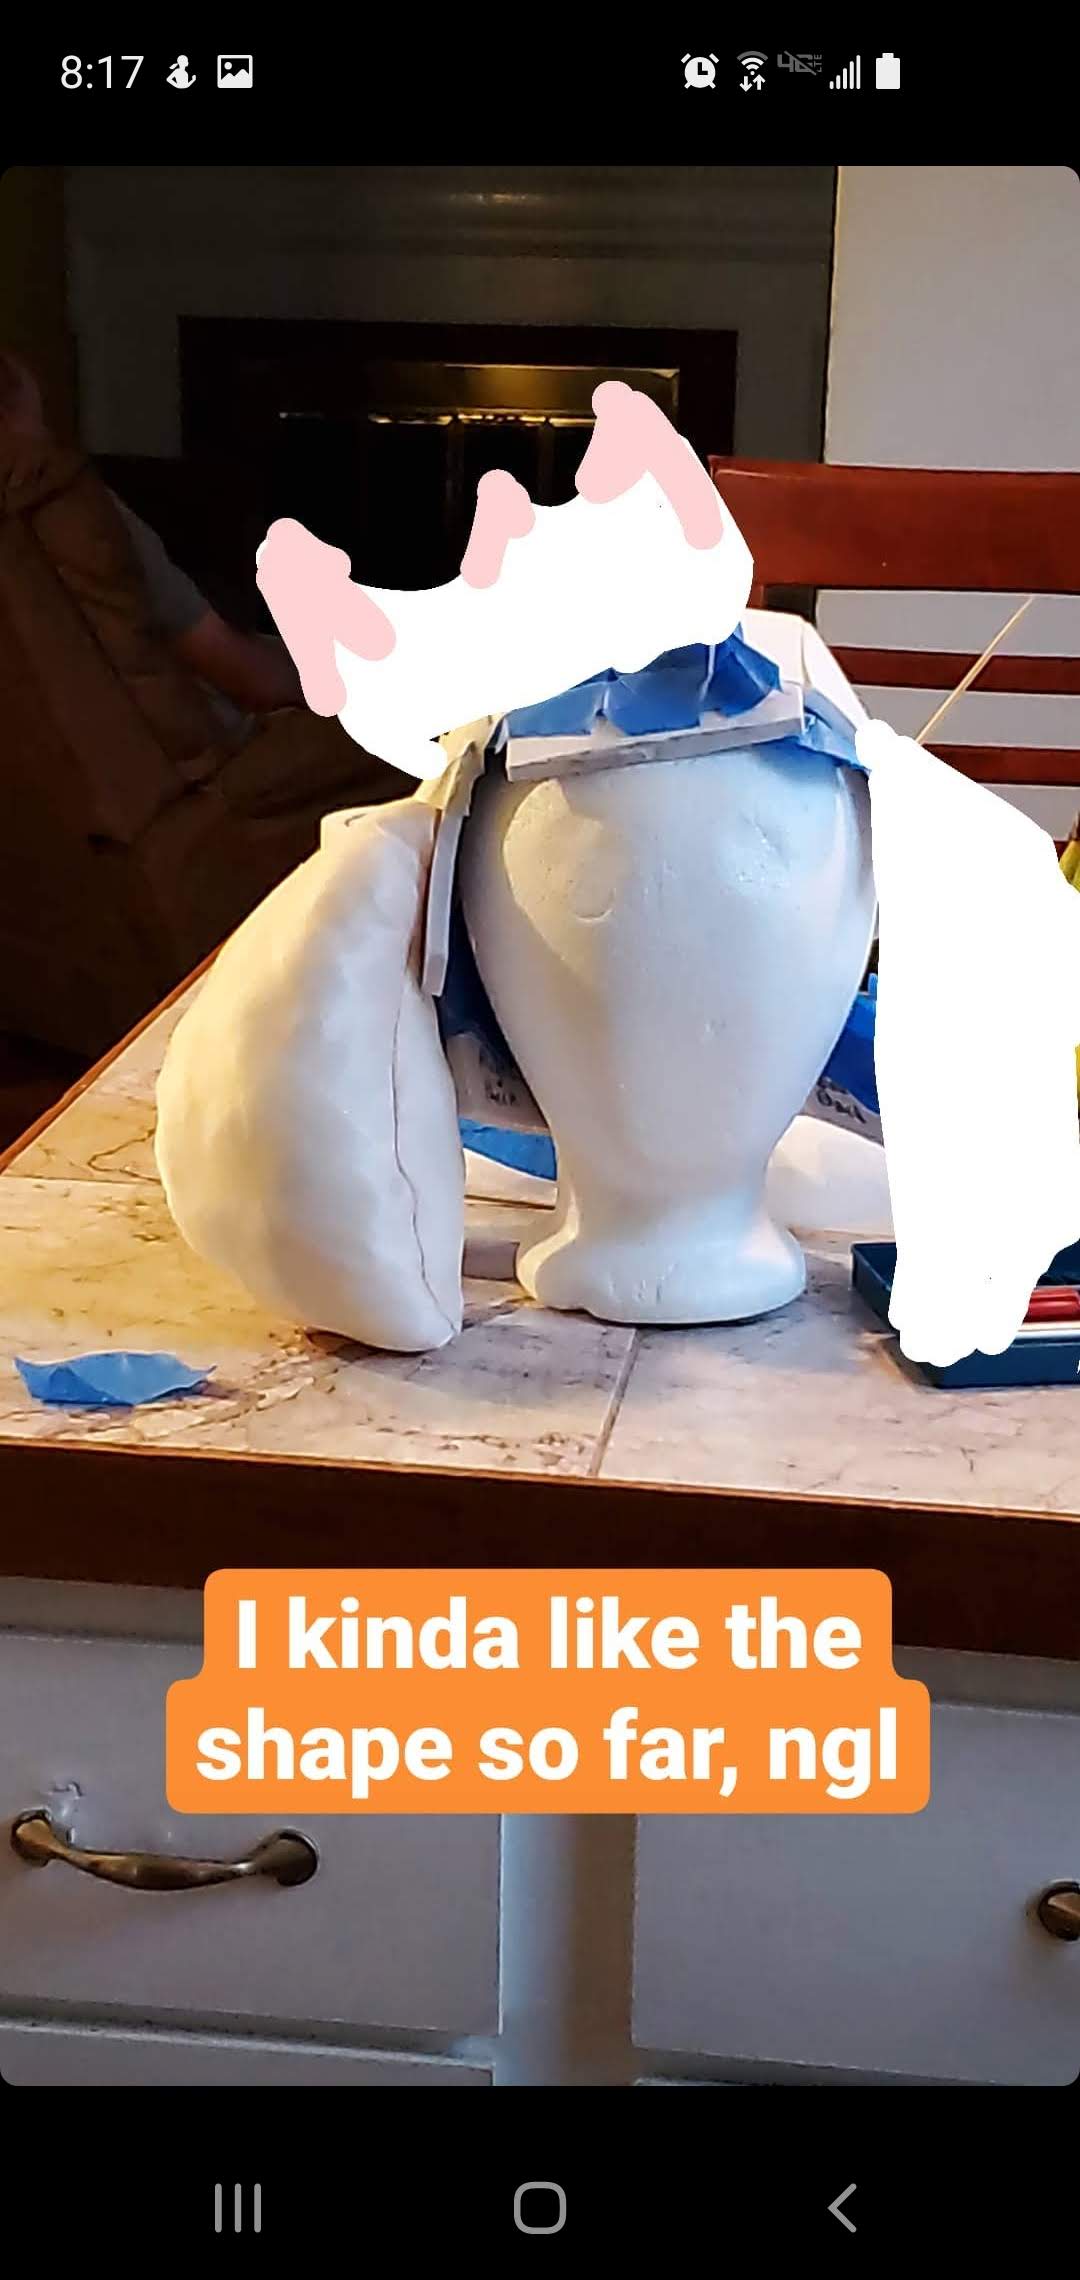
Using your heat gun or hair dryer, you're going to want to start bending your foam pieces to the shape you want them, to be safe tape all your pieces together again and try them on again to make sure the fit is right, it's hard to go back after gluing. I used a styrofoam head to put everything on while gluing, this shouldn't alter the size or shape once the pieces are heat bent correctly to fit you. (Try it on one more time before gluing!!!)
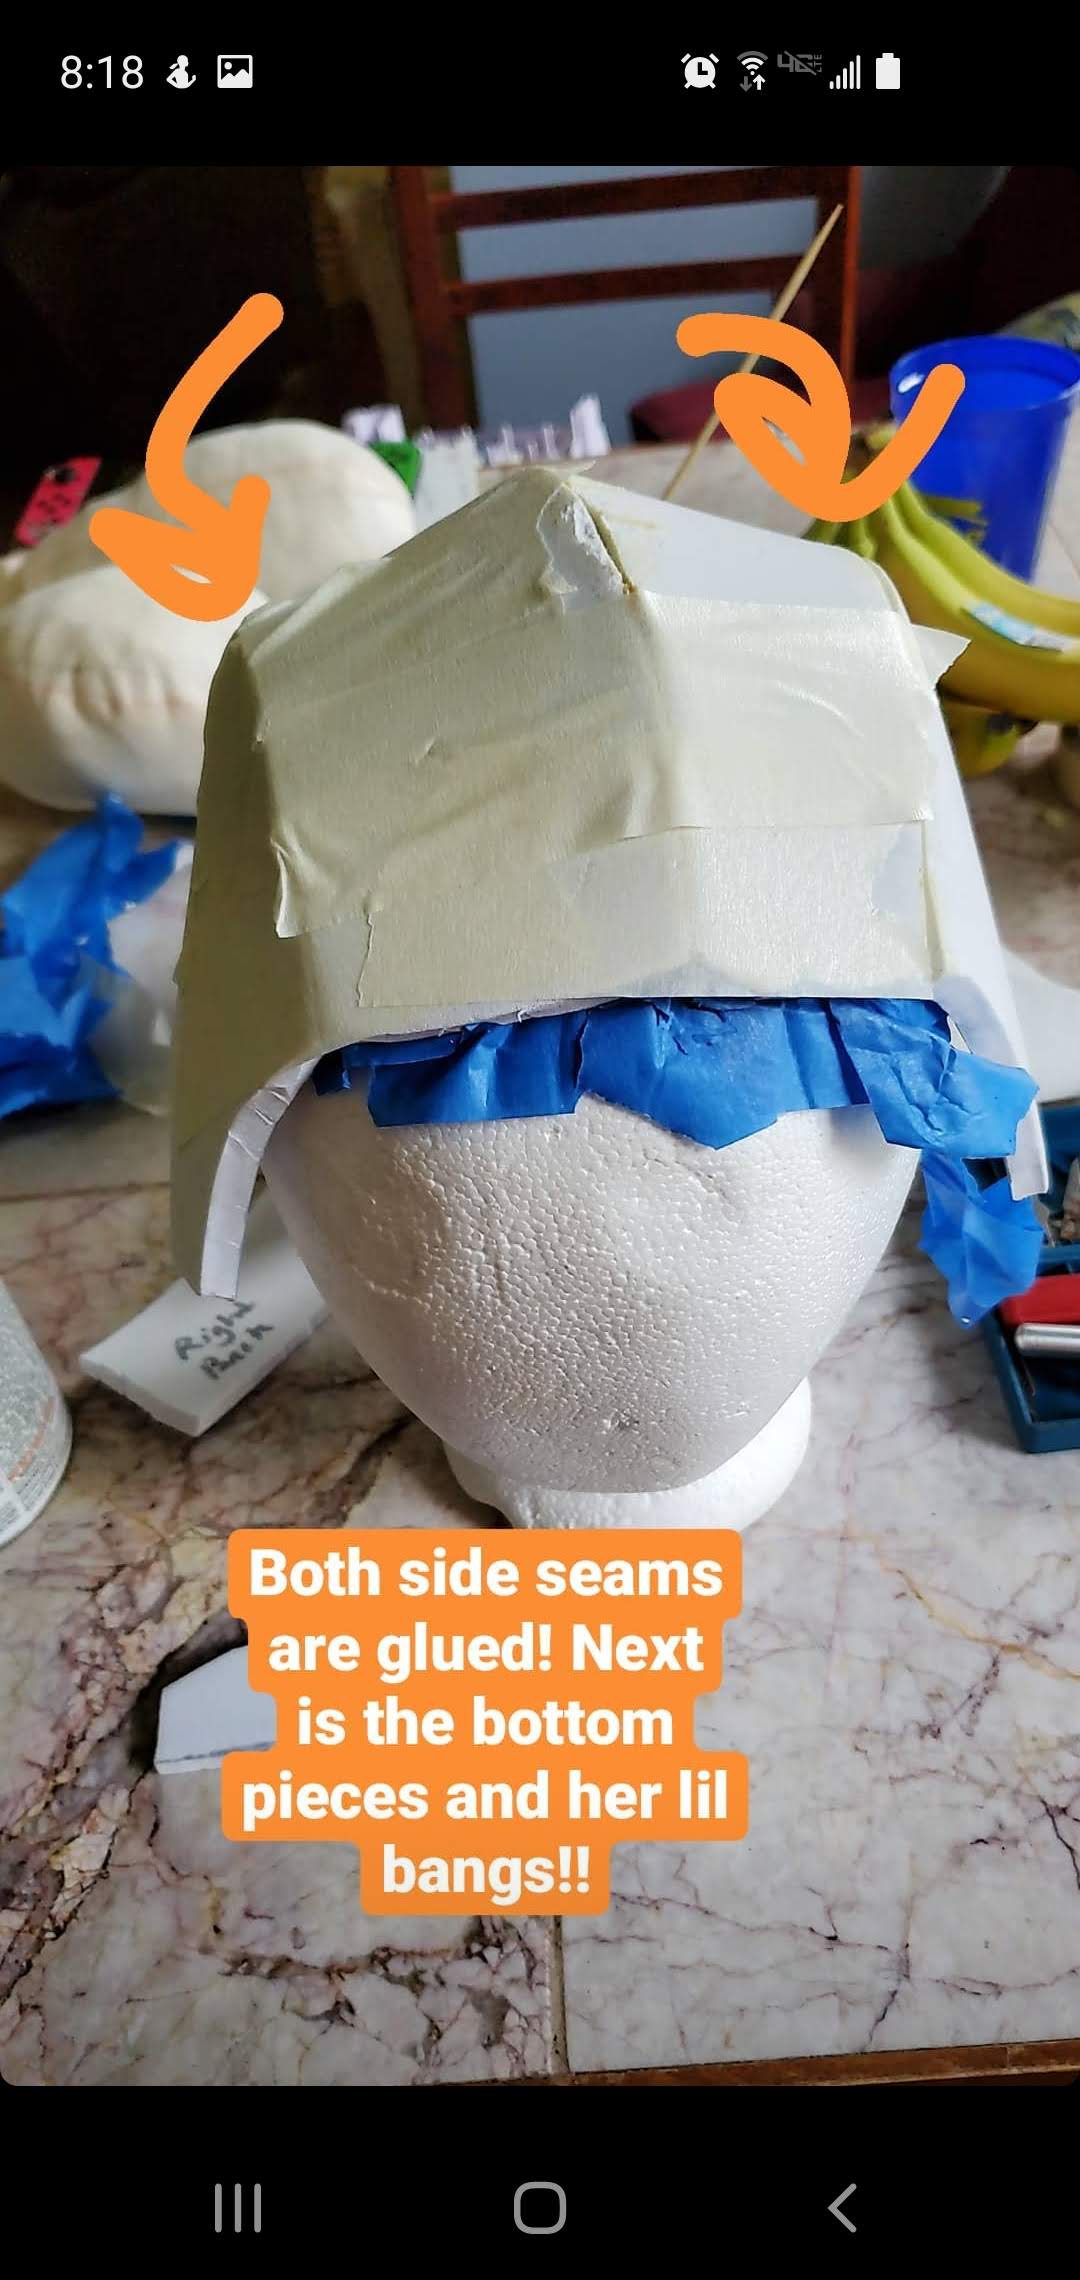
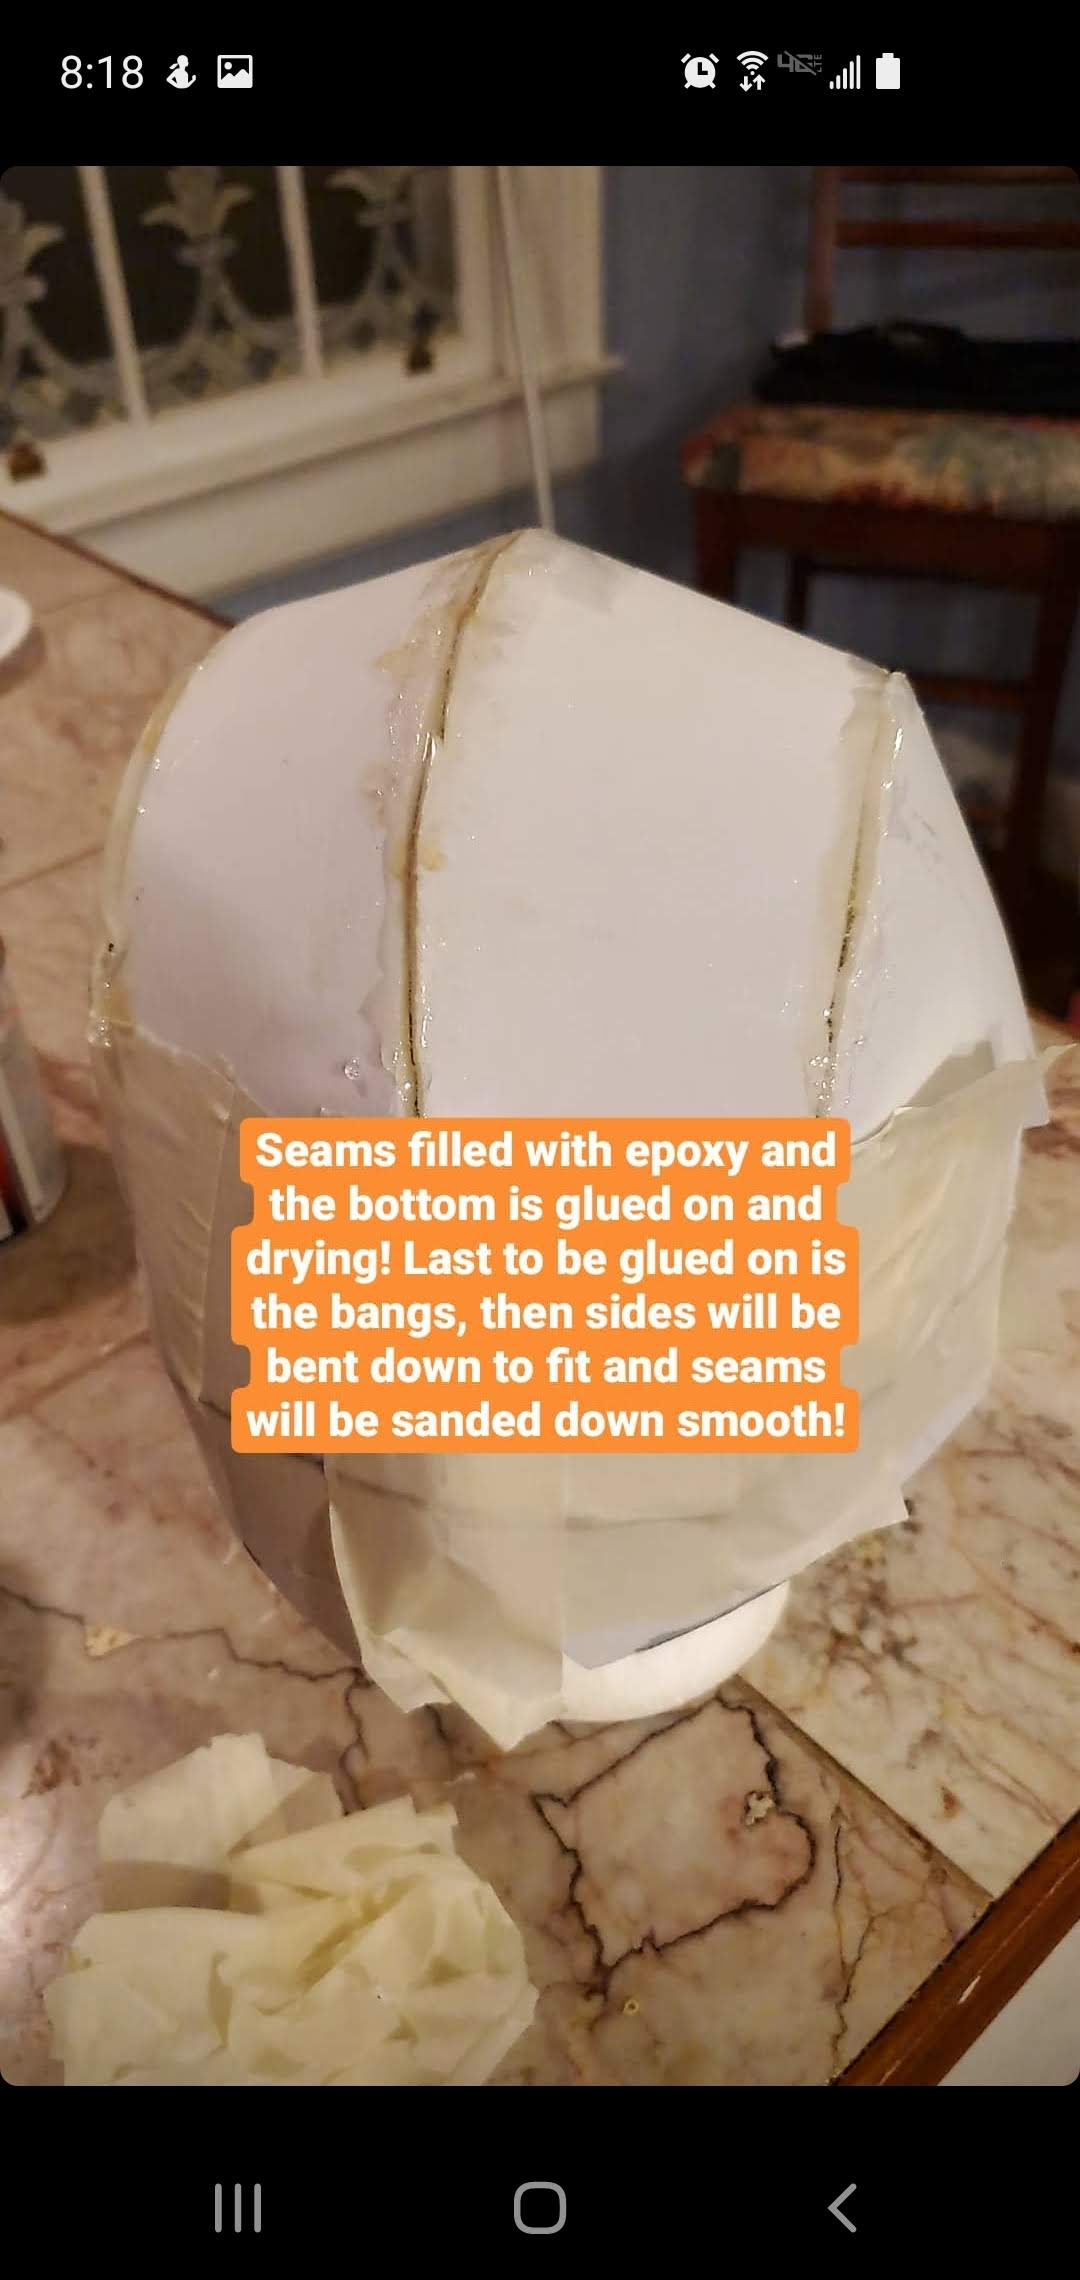
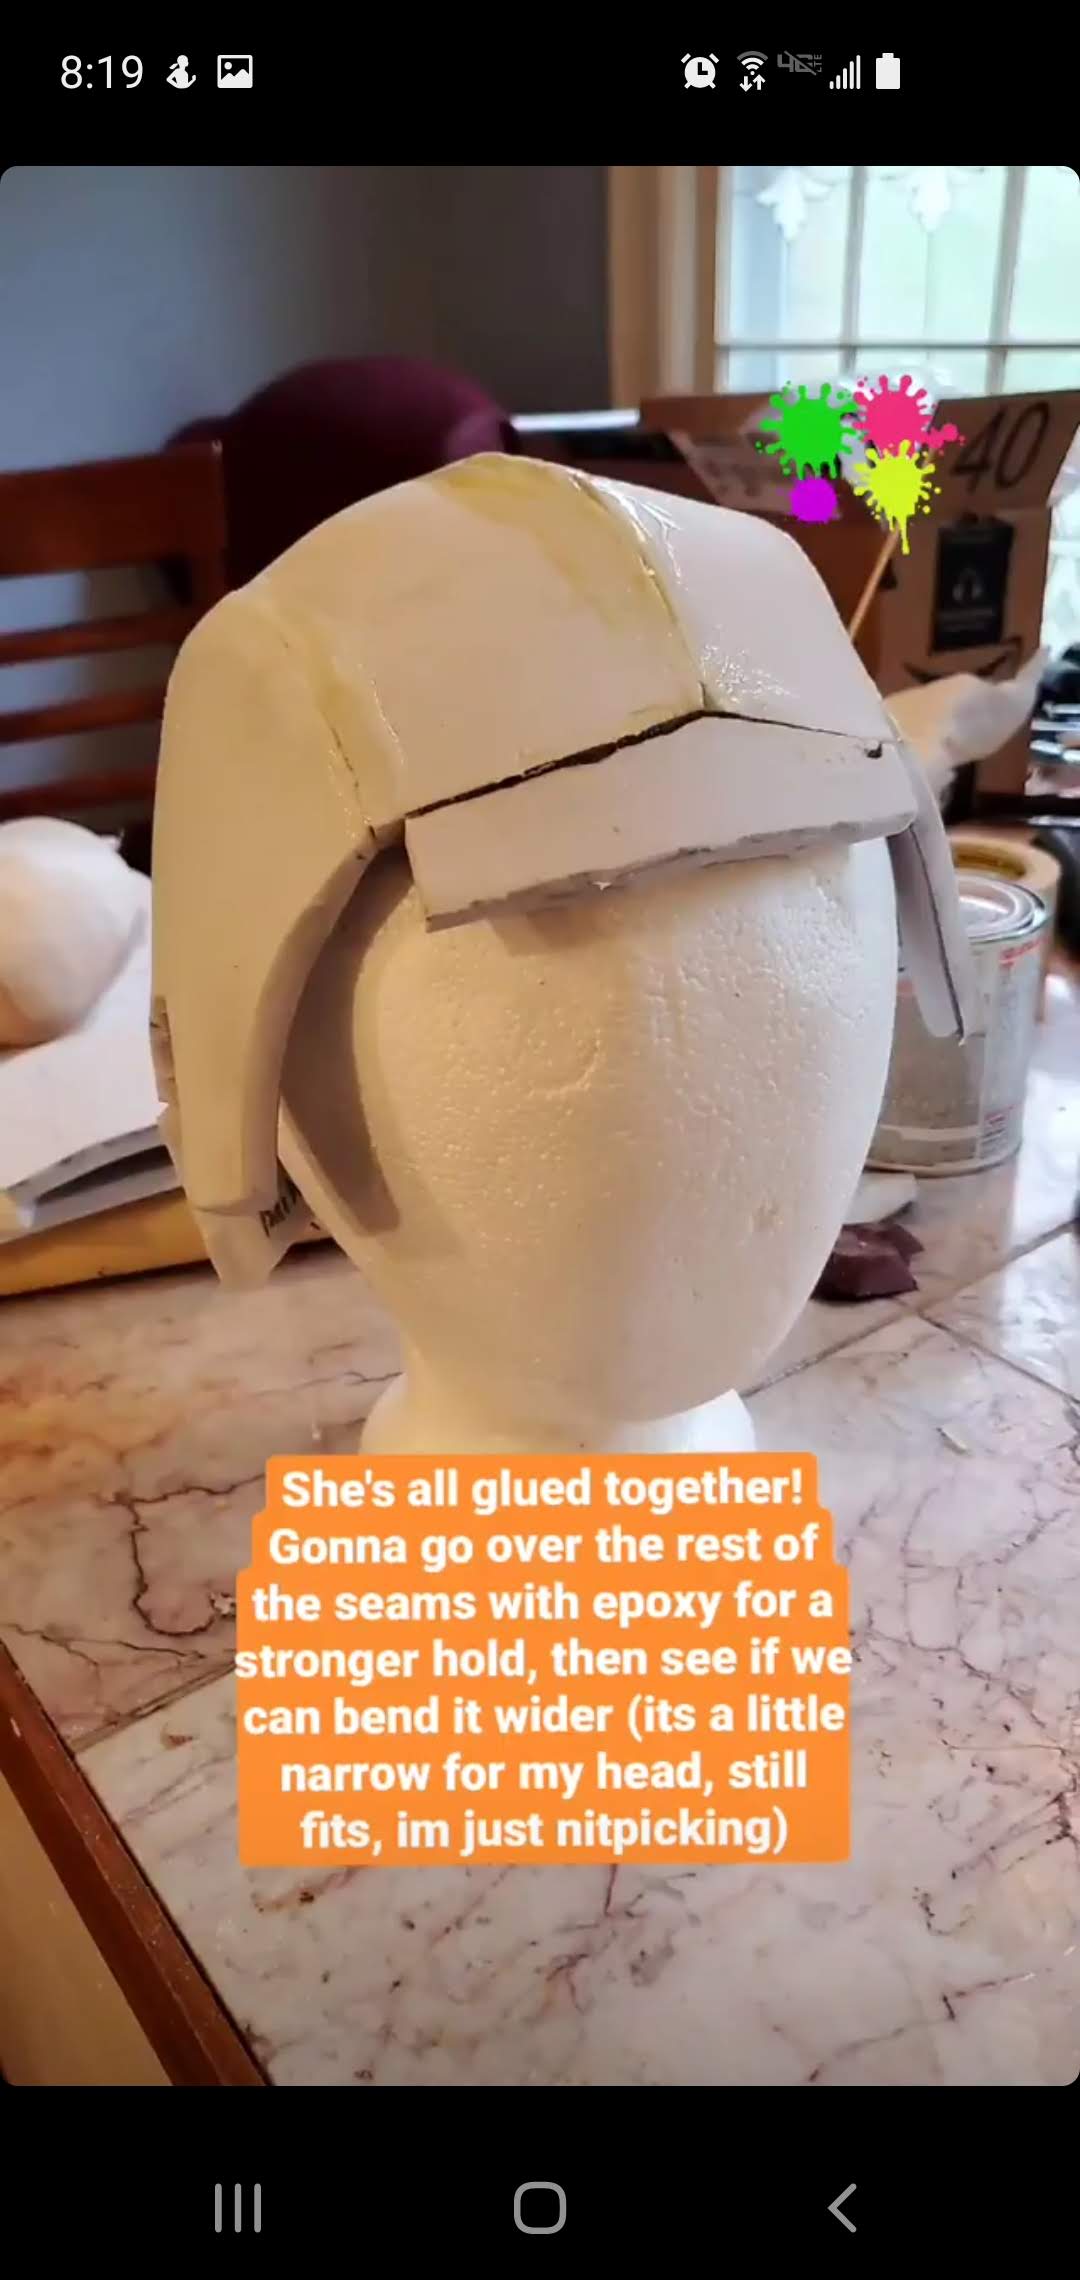
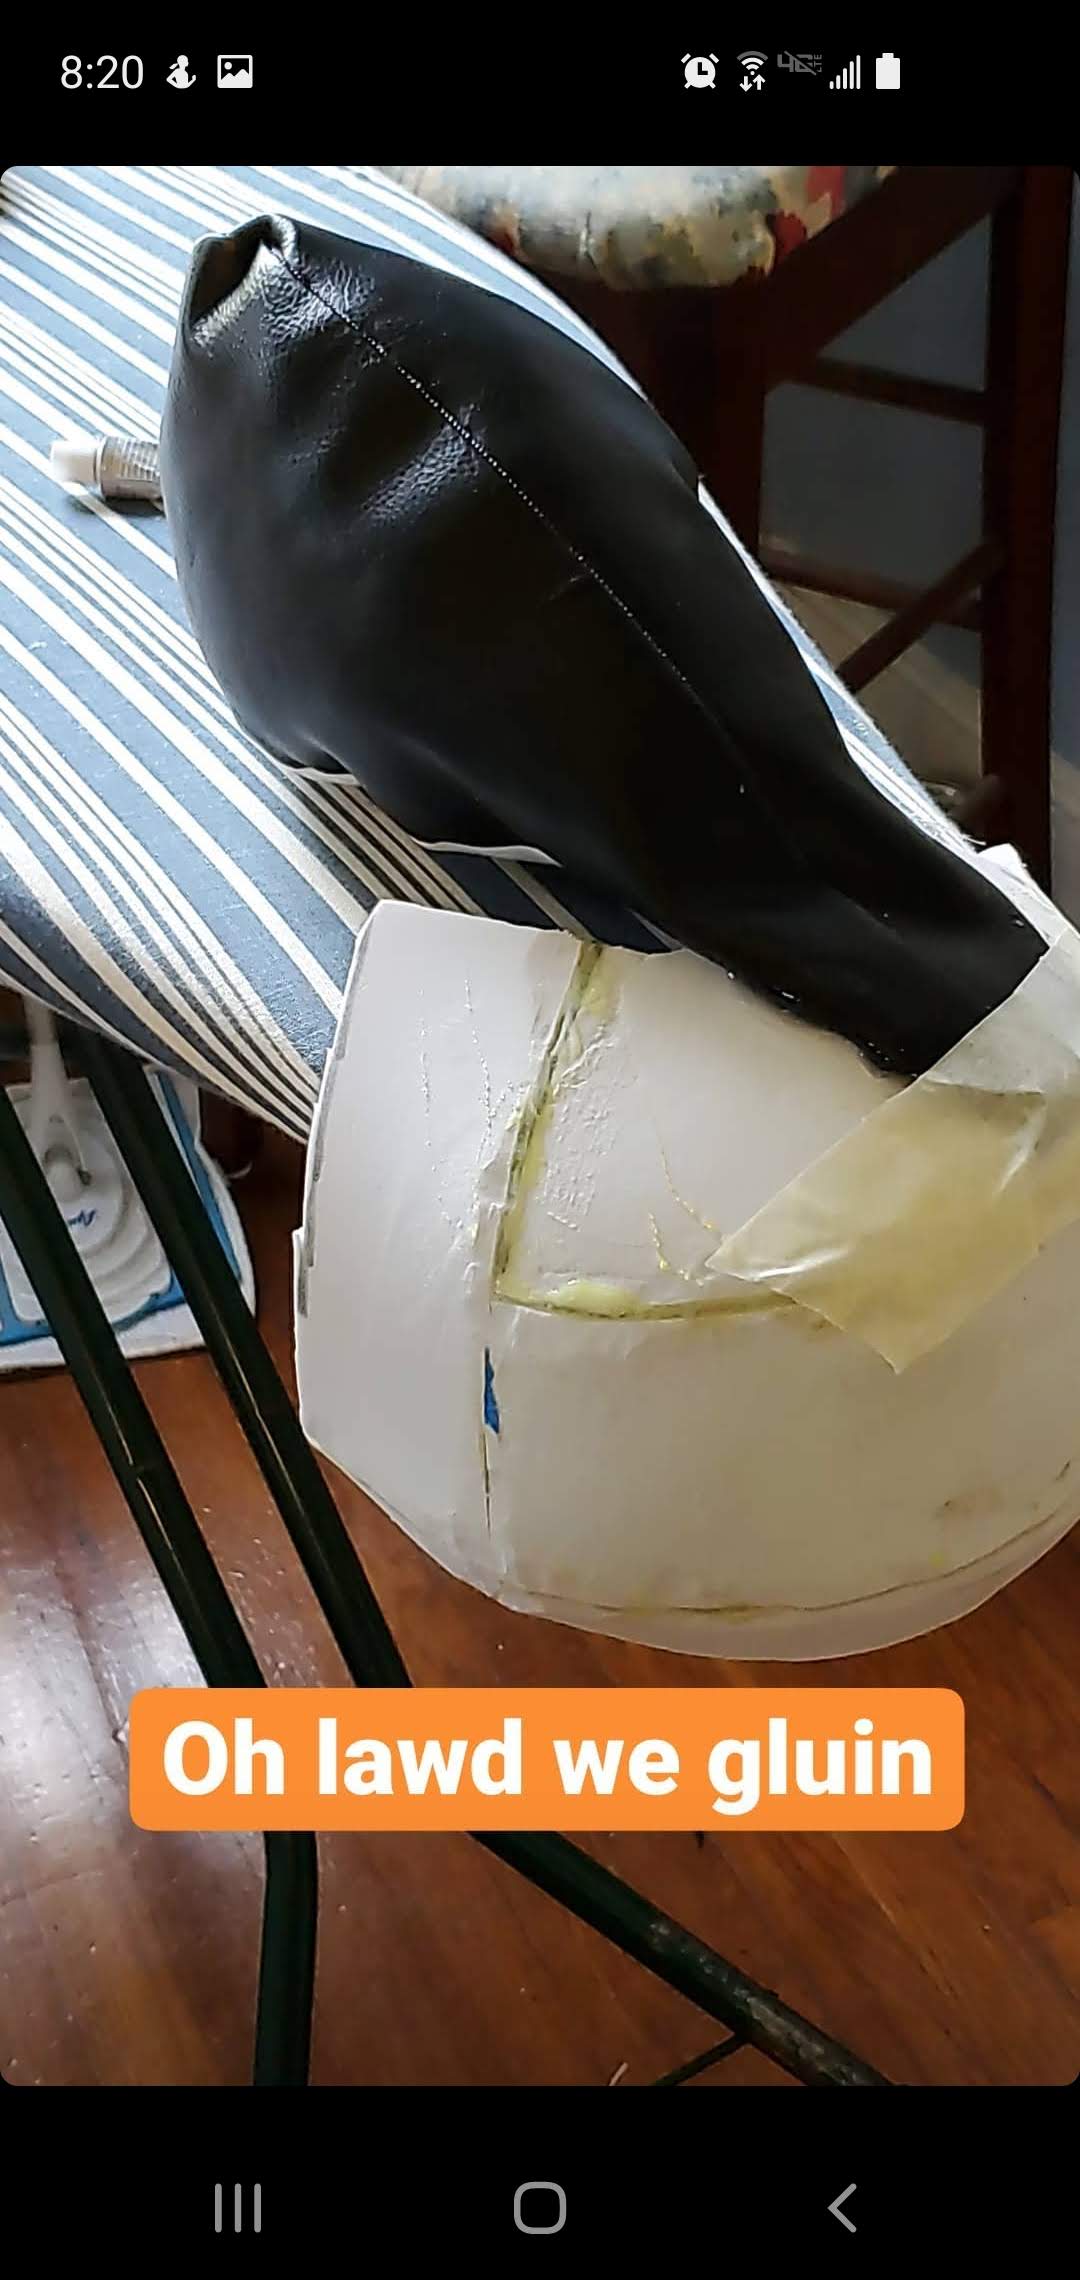
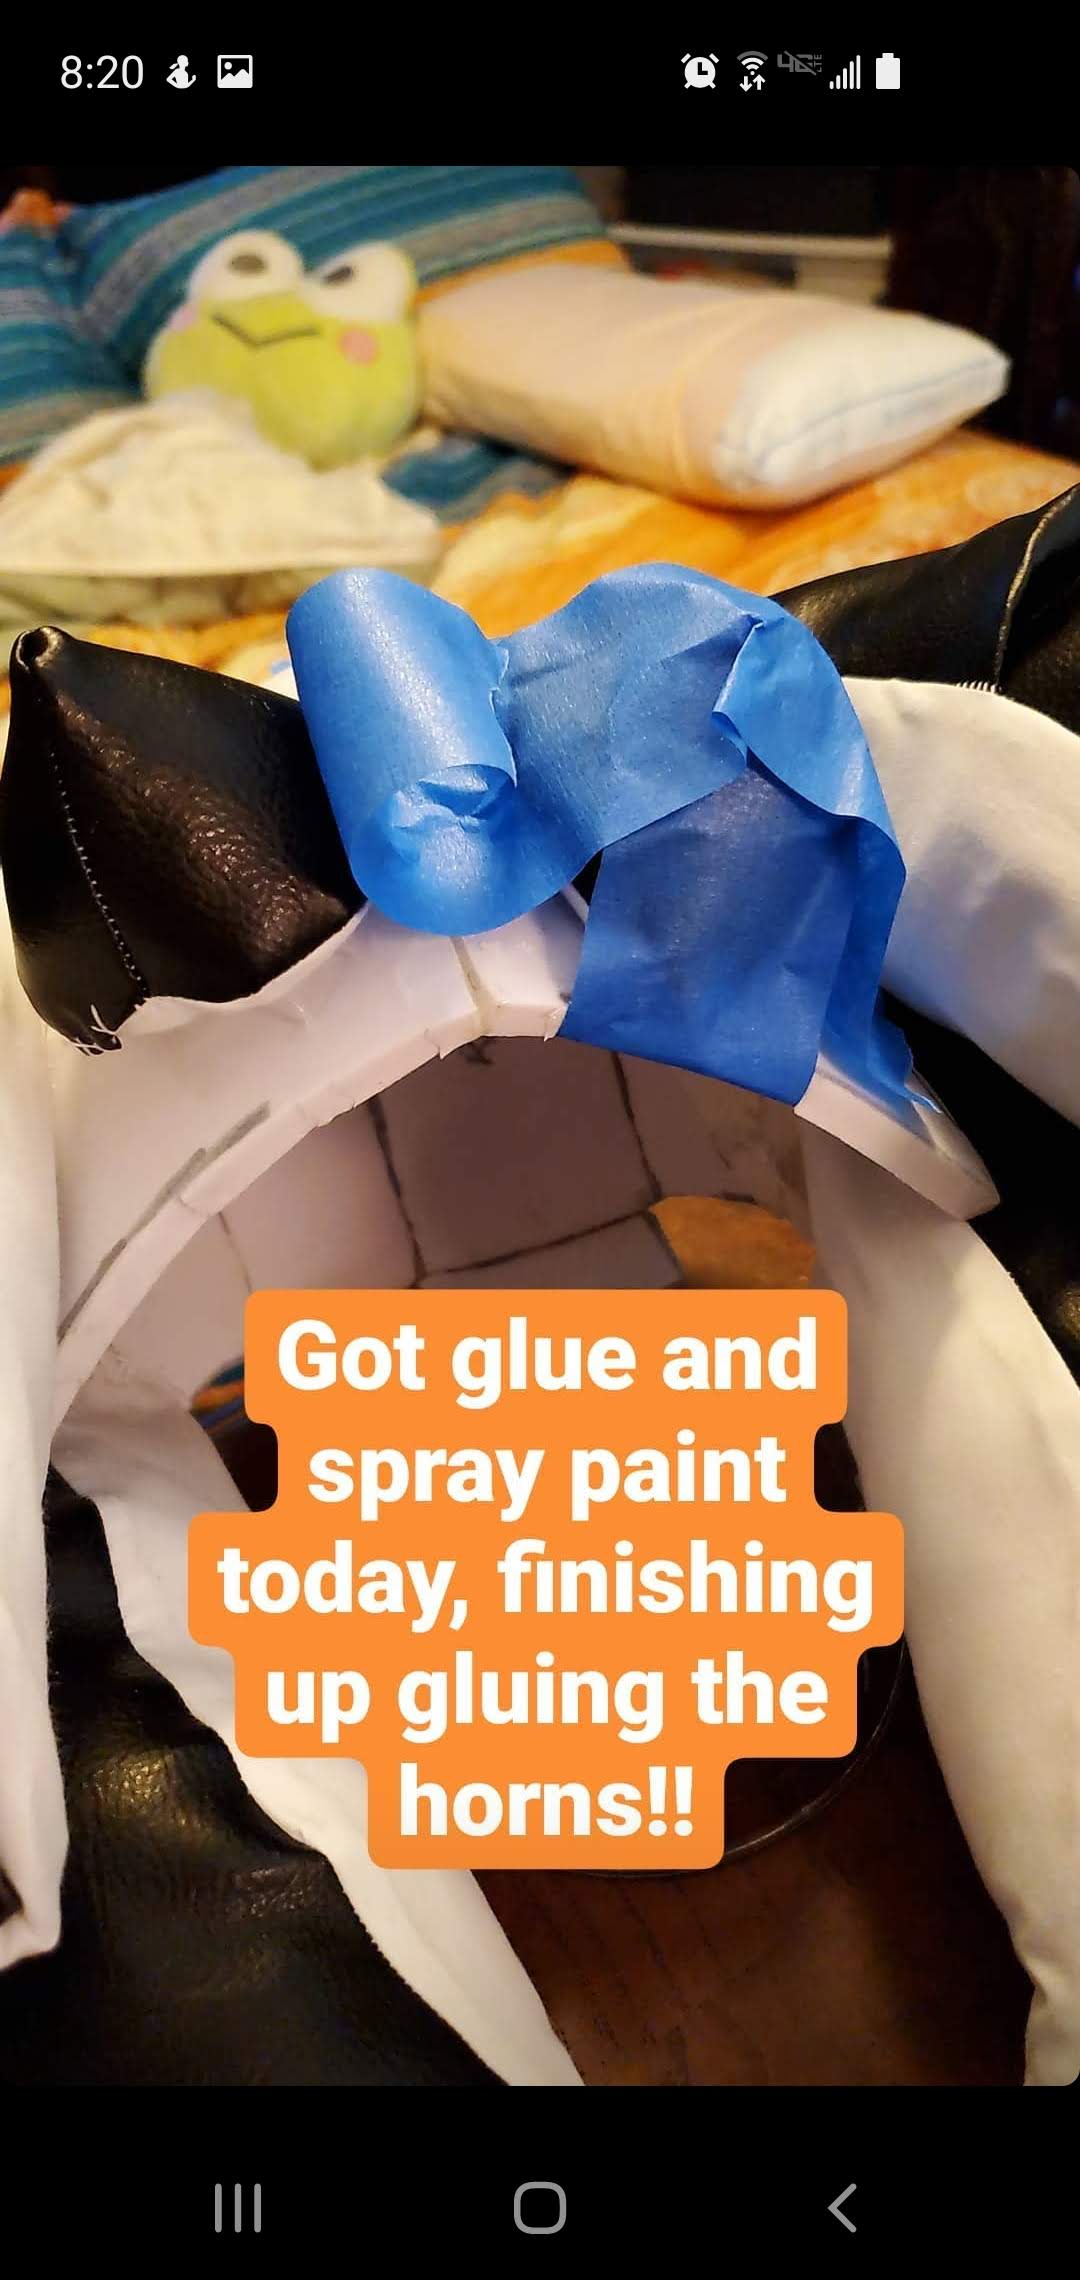
Once everything is looking right, you're ready to grab your contact cement and get gluing! I did one piece at a time, starting with the main seam down the center of the skull.
Later I went back in with Resin Epoxy Glue to make sure nothing would come apart. This is entirely optional! (I would fill in any spots that I was worried about coming apart, and then taping over them to keep the glue from dripping onto the rest of the piece.)
Making the Tentacles
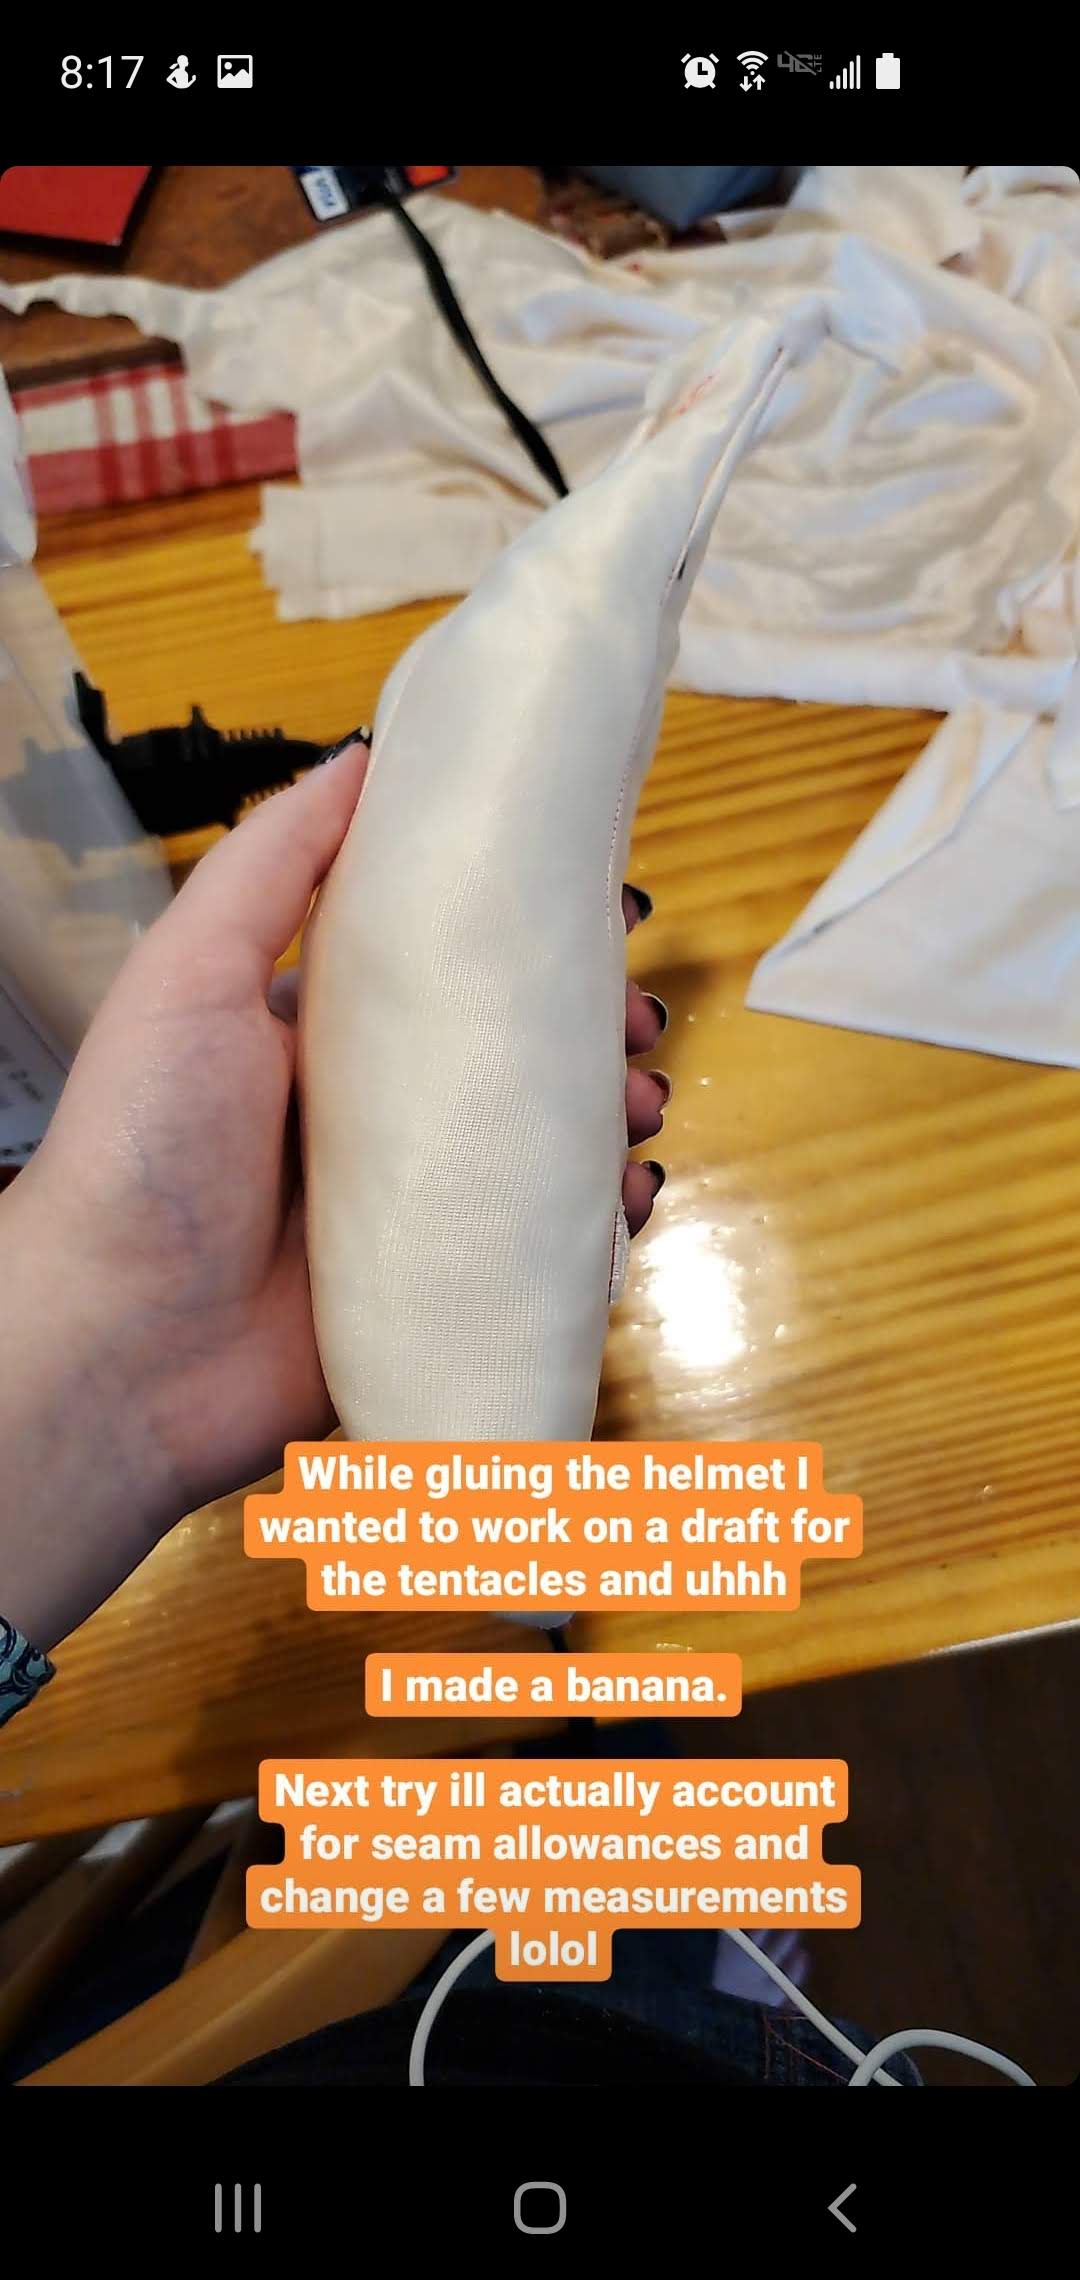
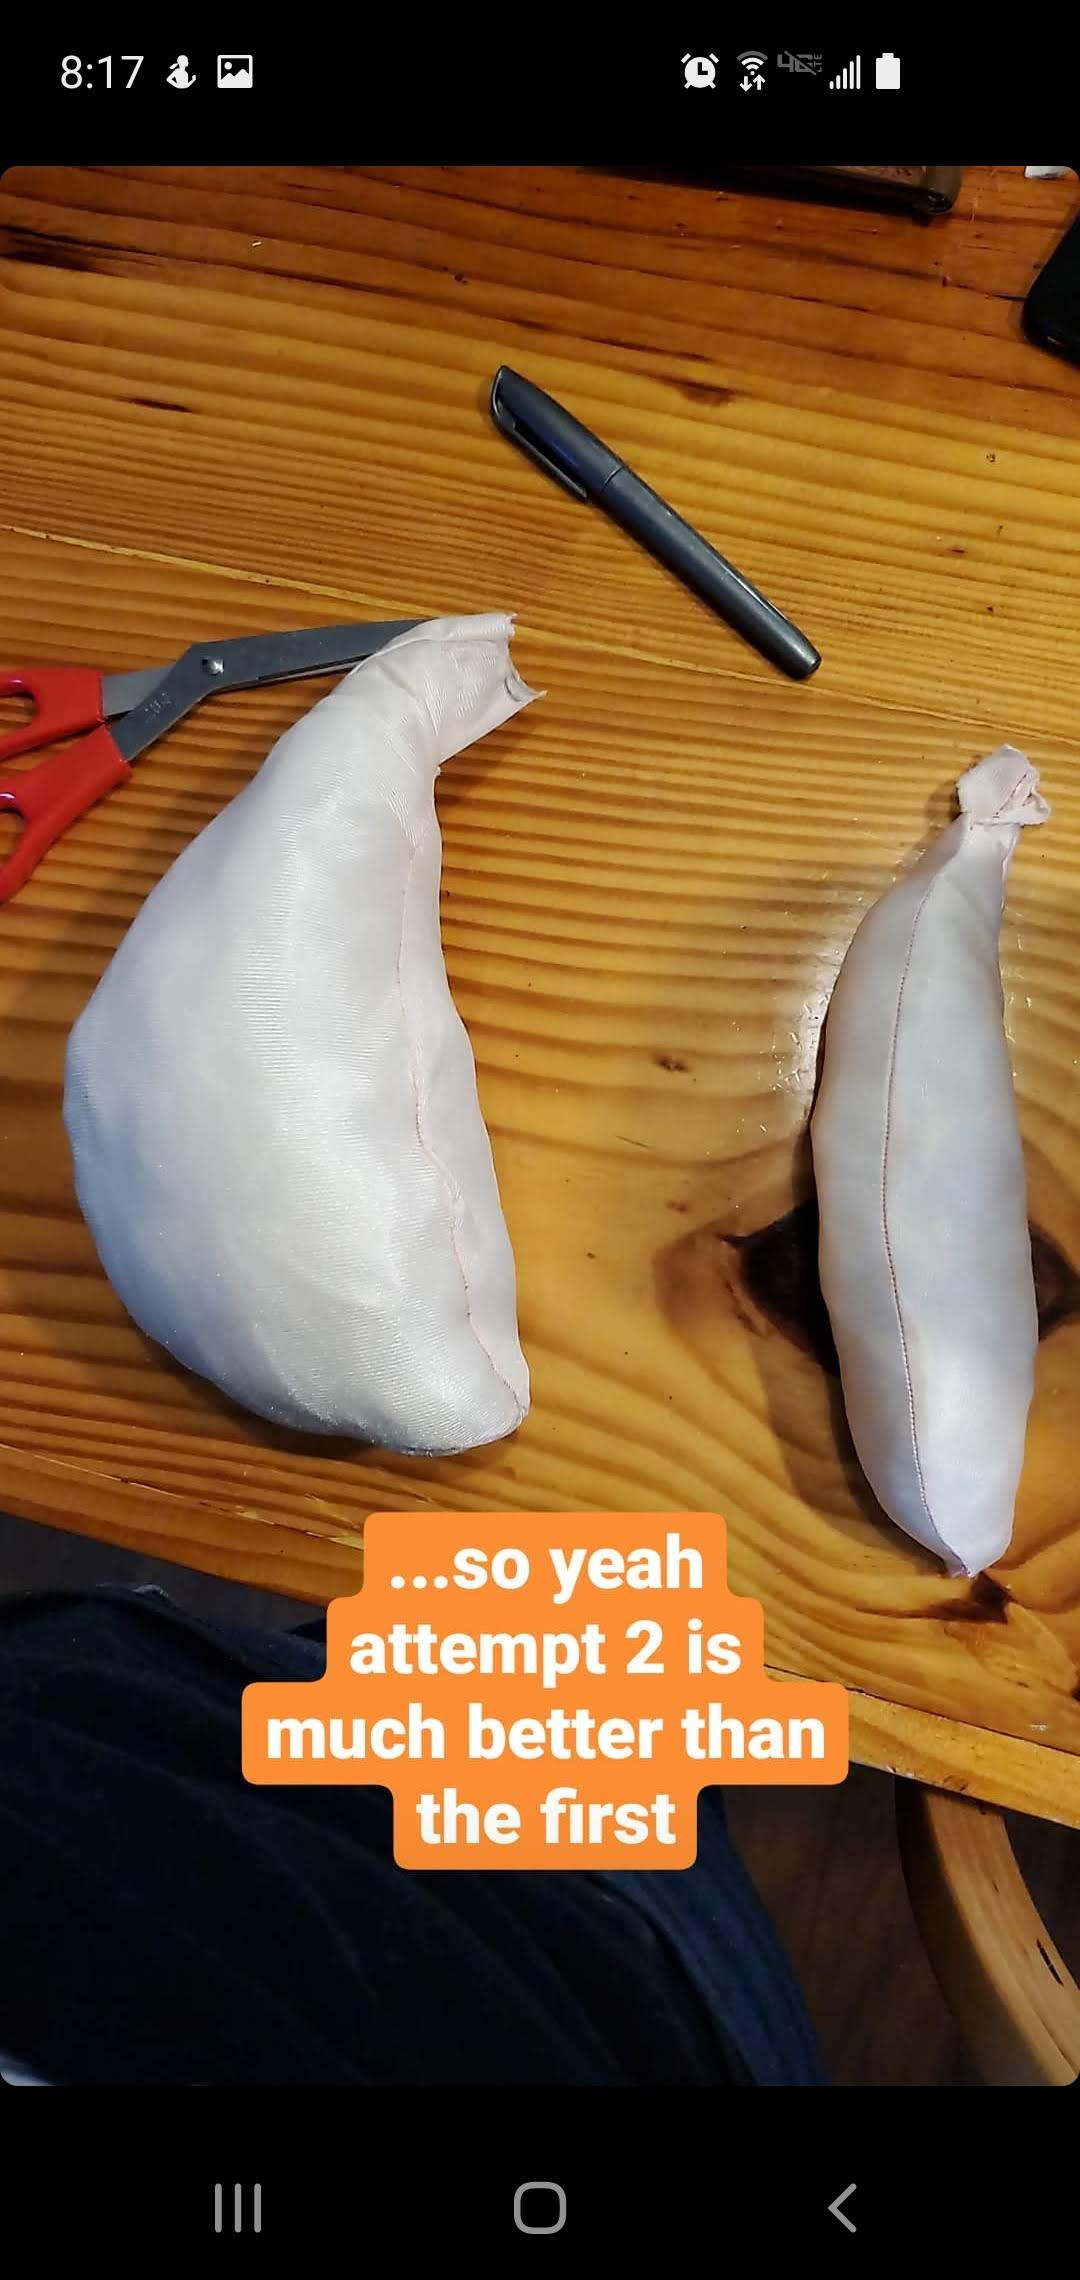
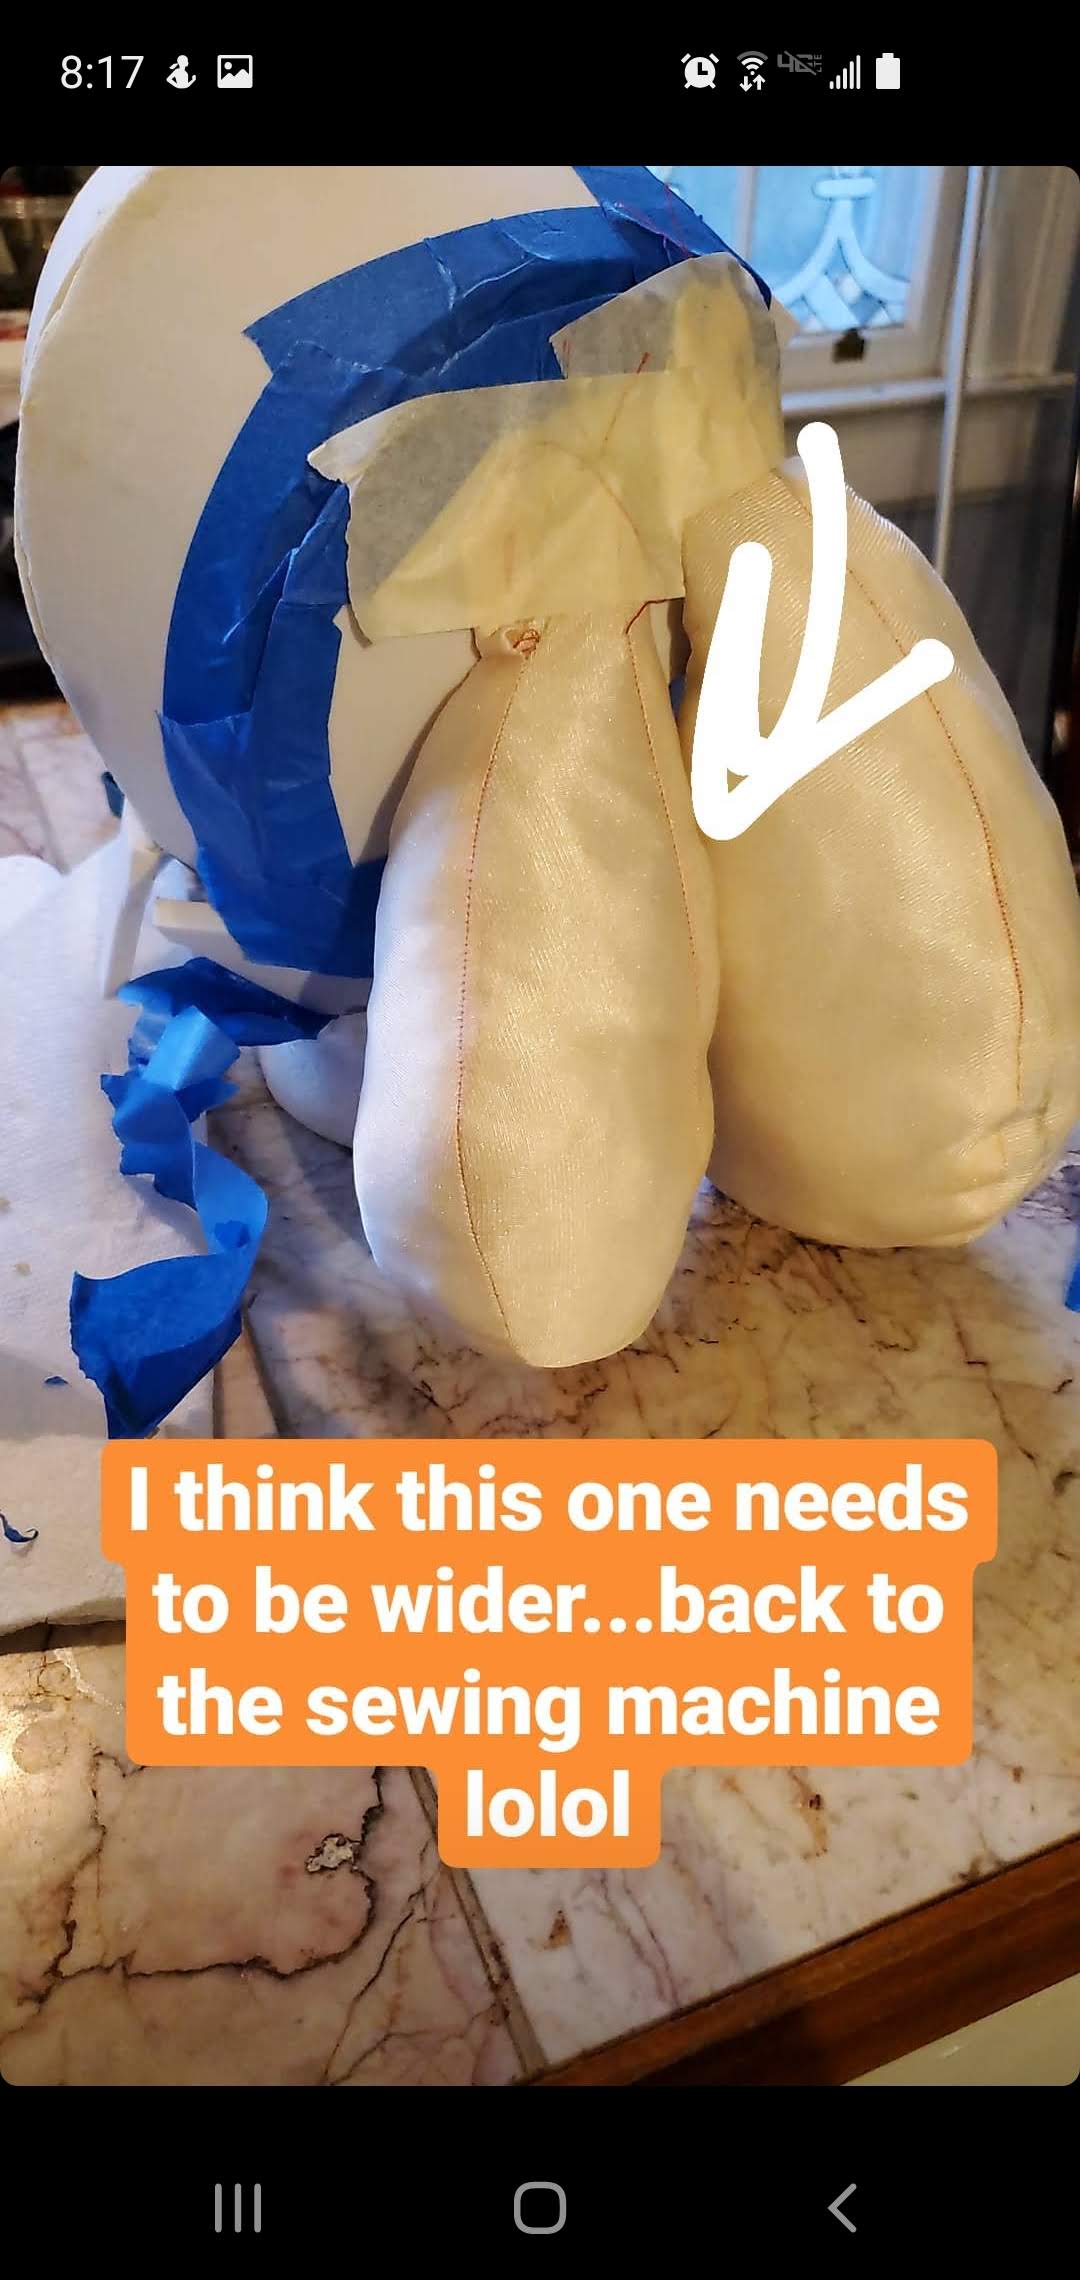
Imbetween all the time gluing the foam together, I worked on making the tentacles! I started by sketching out an idea of what kind of shape I wanted and used some scrap fabric to play around with different ideas. For Pearl I ended up settling on a pattern made up of 3 pieces: 2 outer and 1 inner.
Once you have your tentacle patterns the way you want, you're ready to cut your fabric. For any parts that will be touching your skin of facing towards you, use your white cotton/ skin comfy fabric; otherwise use your pleather/shiny fabric.
For Pearl, I stuffed her tentacles with cotton so they would look poofy/ retain shape while staying comfortable and fairly lightweight.
For very short styles (like the short inkling girl style from splatoon 2), you could likely use small inserts made of foam to get that rounded shape without stuffing. As for very large shapes (Marina comes to mind) you may want to consider building a wireframe underneath since stuffing would make them far too heavy. I can't help you much there since I haven't built a large length tentacle head, so my apologies. If I ever do or I know someone that does, I'll update this page!
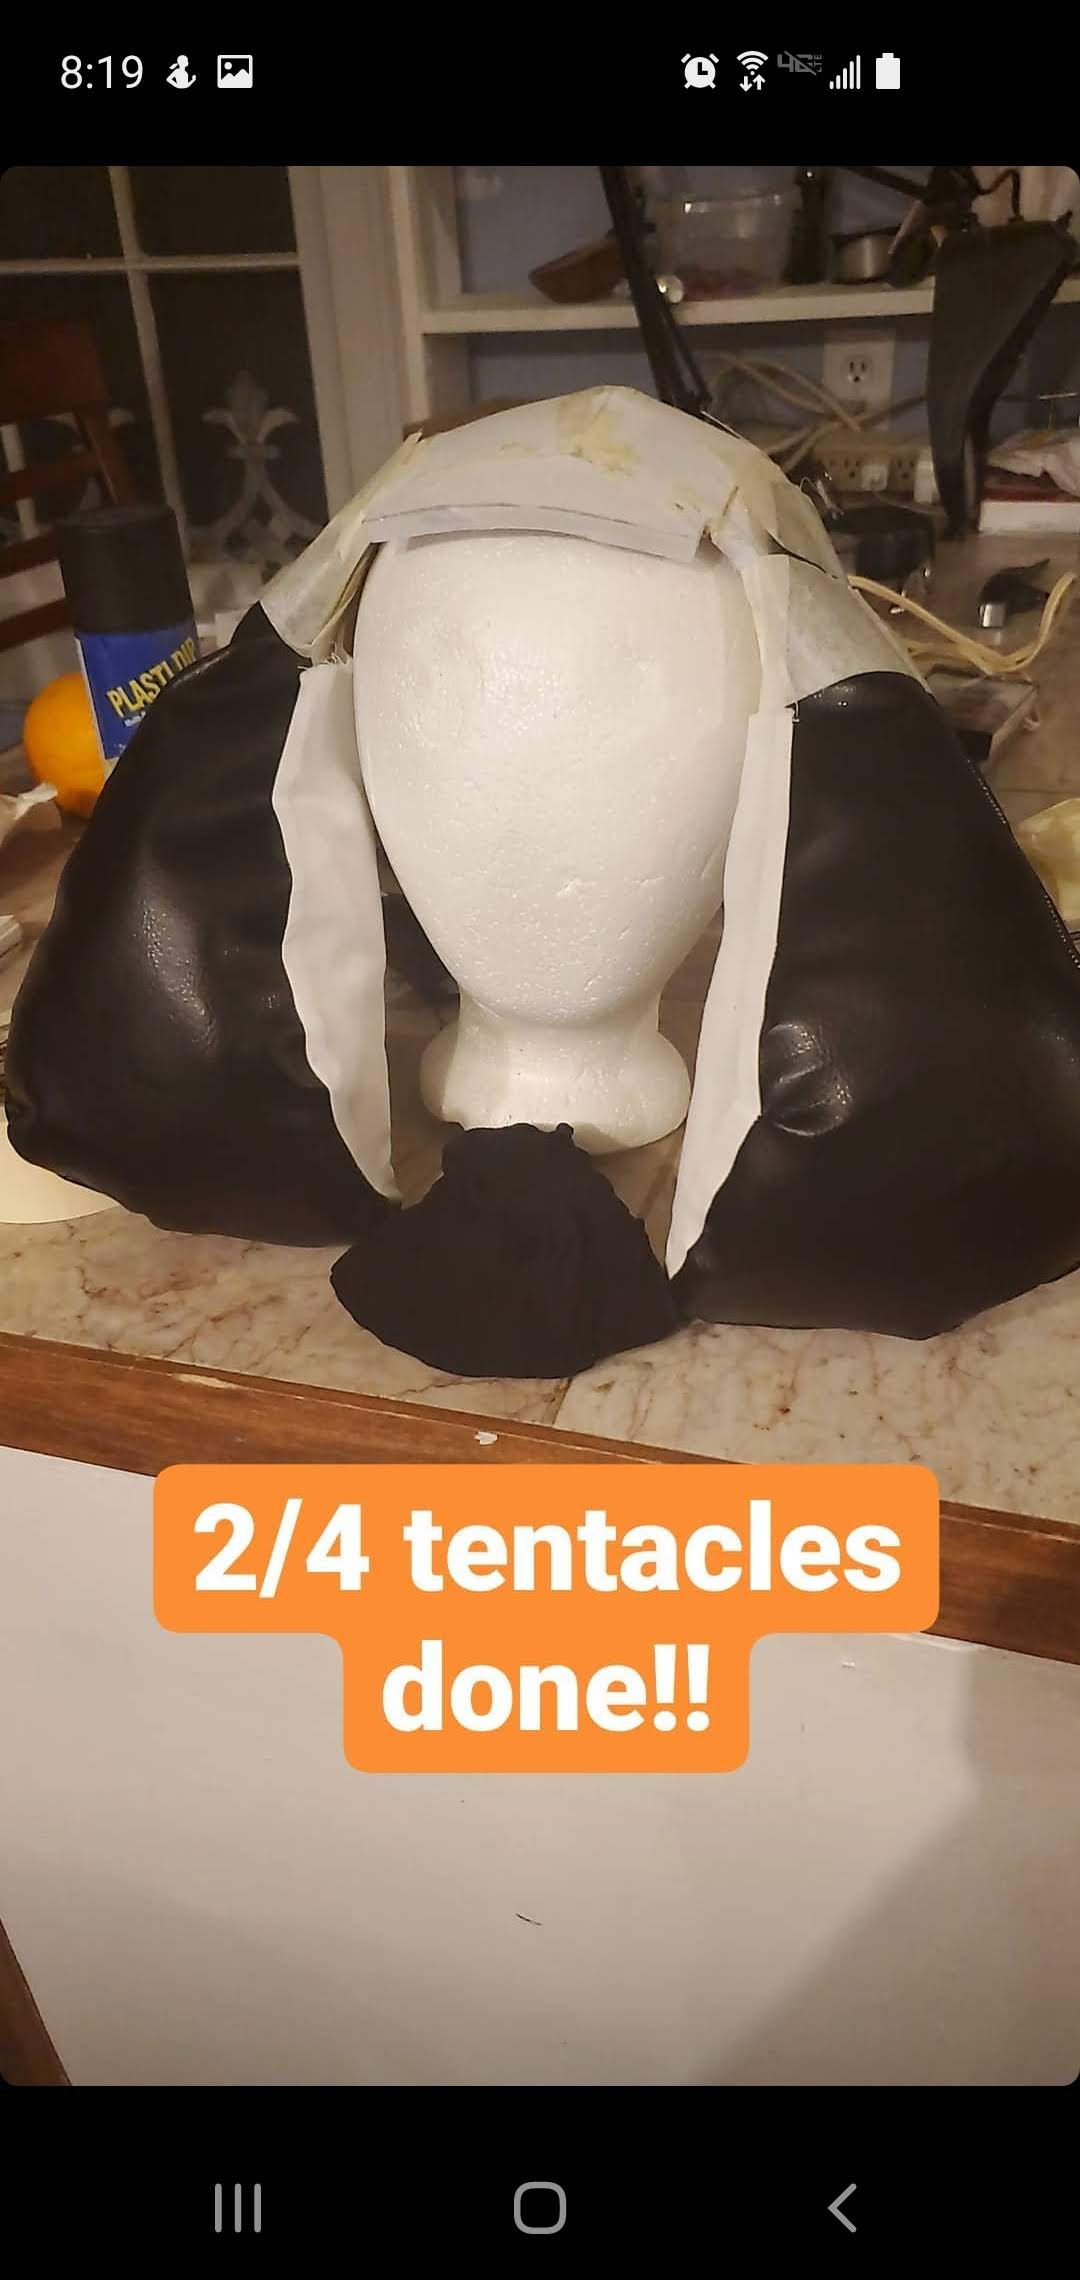
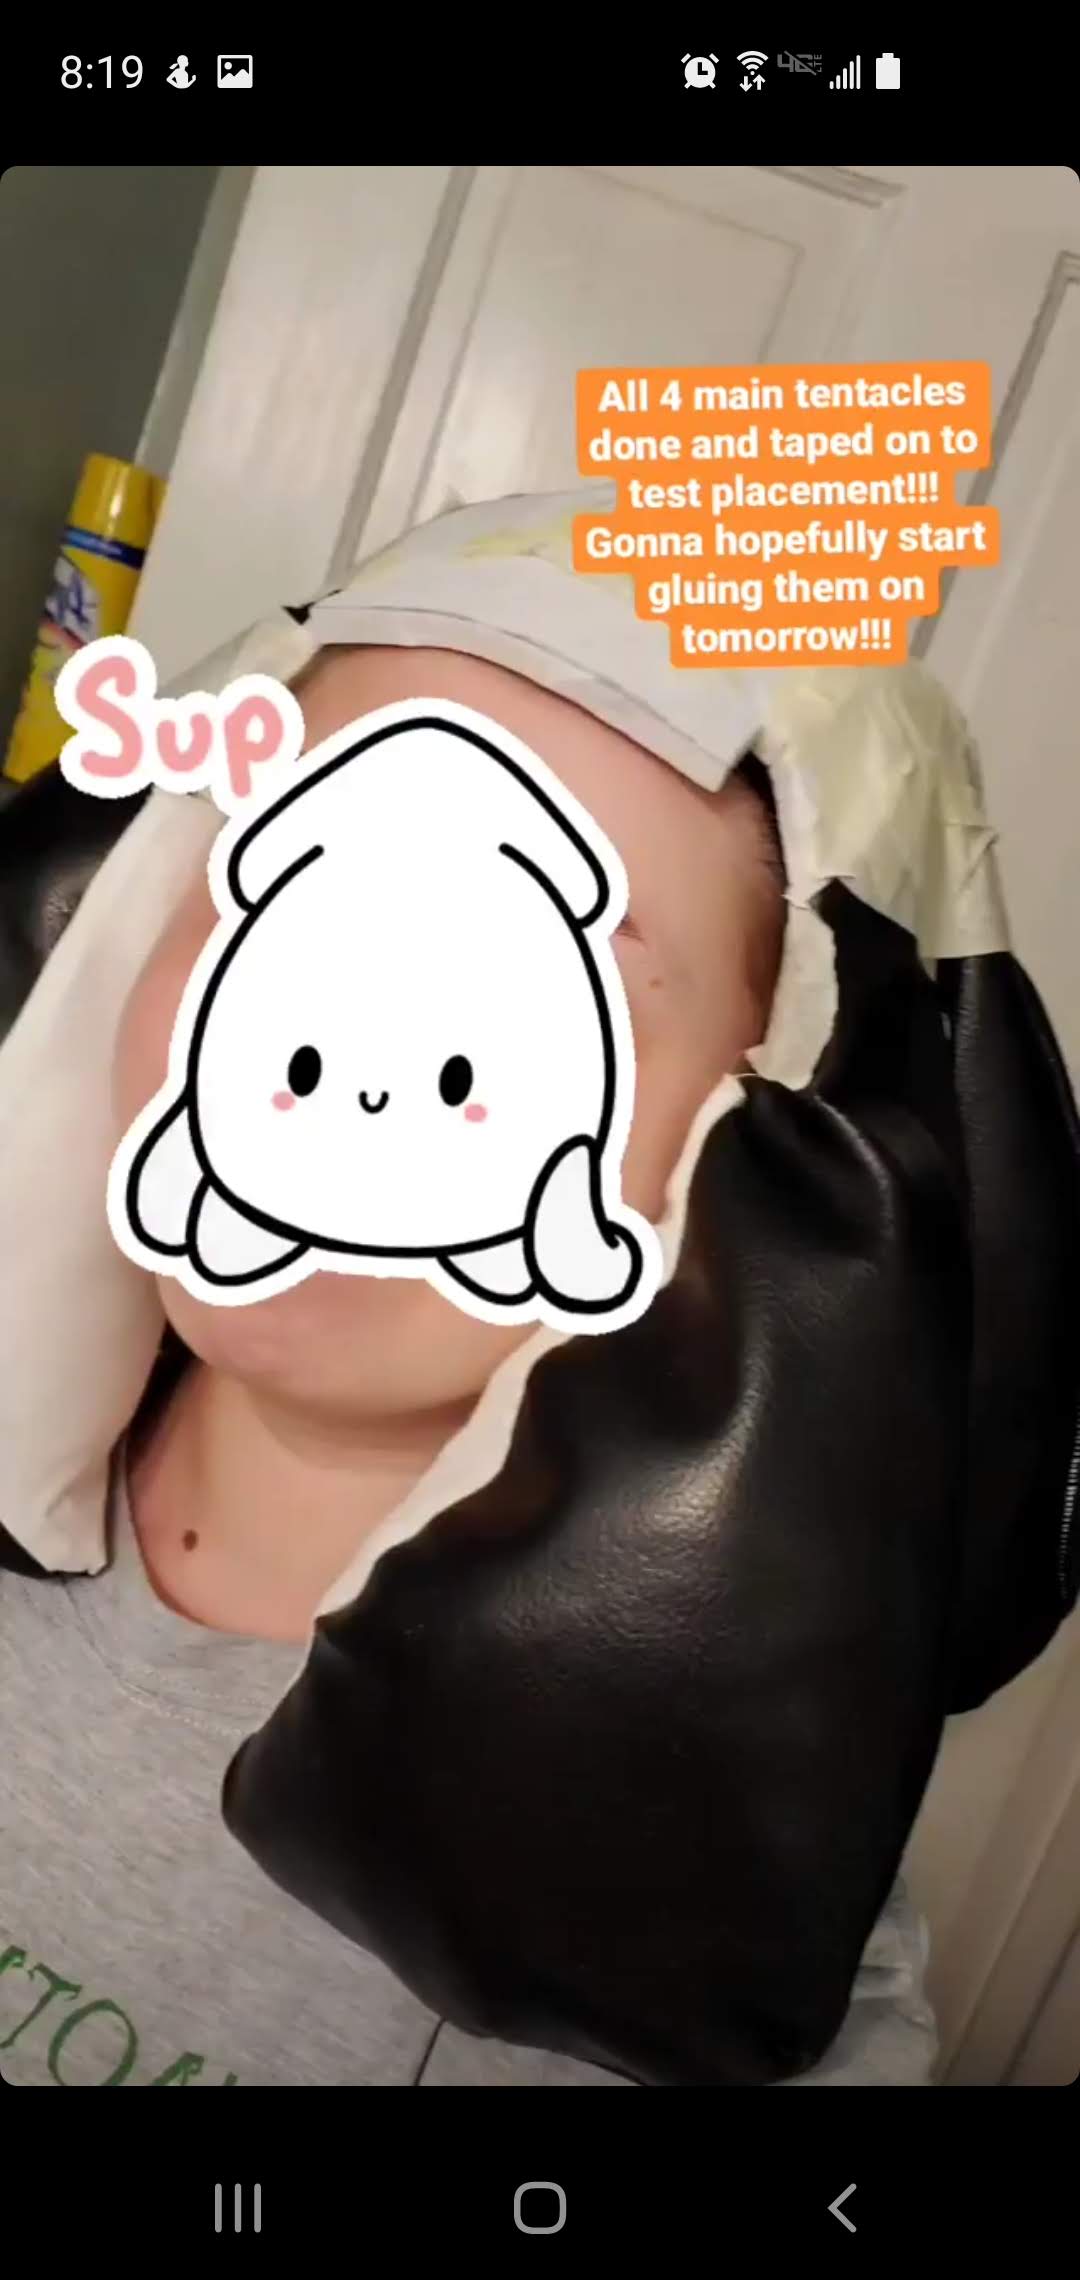
Attatching the Tentacles
Both the tentacles and the base are ready, it's time to attach! I left the tops of the tentacles open so I could slide them over the foam bit in front of my ears (the sideburn parts). The rest I just placed and glued on using E6000. Use as minimal glue as possible on the inner part since it may make a texture difference that could become uncomfortable during wear. (For my Pearl, the inner parts of her front tentacles are not glued at all, because this part is flush to my skin it isn't visible in wear, and I avoid having a scratchy dried-glue texture on my face for hours at a time. Consider what works best for you.)
You should only do 1-2 pieces at a time to make sure that you're getting everything in the right place, too much at once may cause stability issues while gluing, which can cause things to slide around.
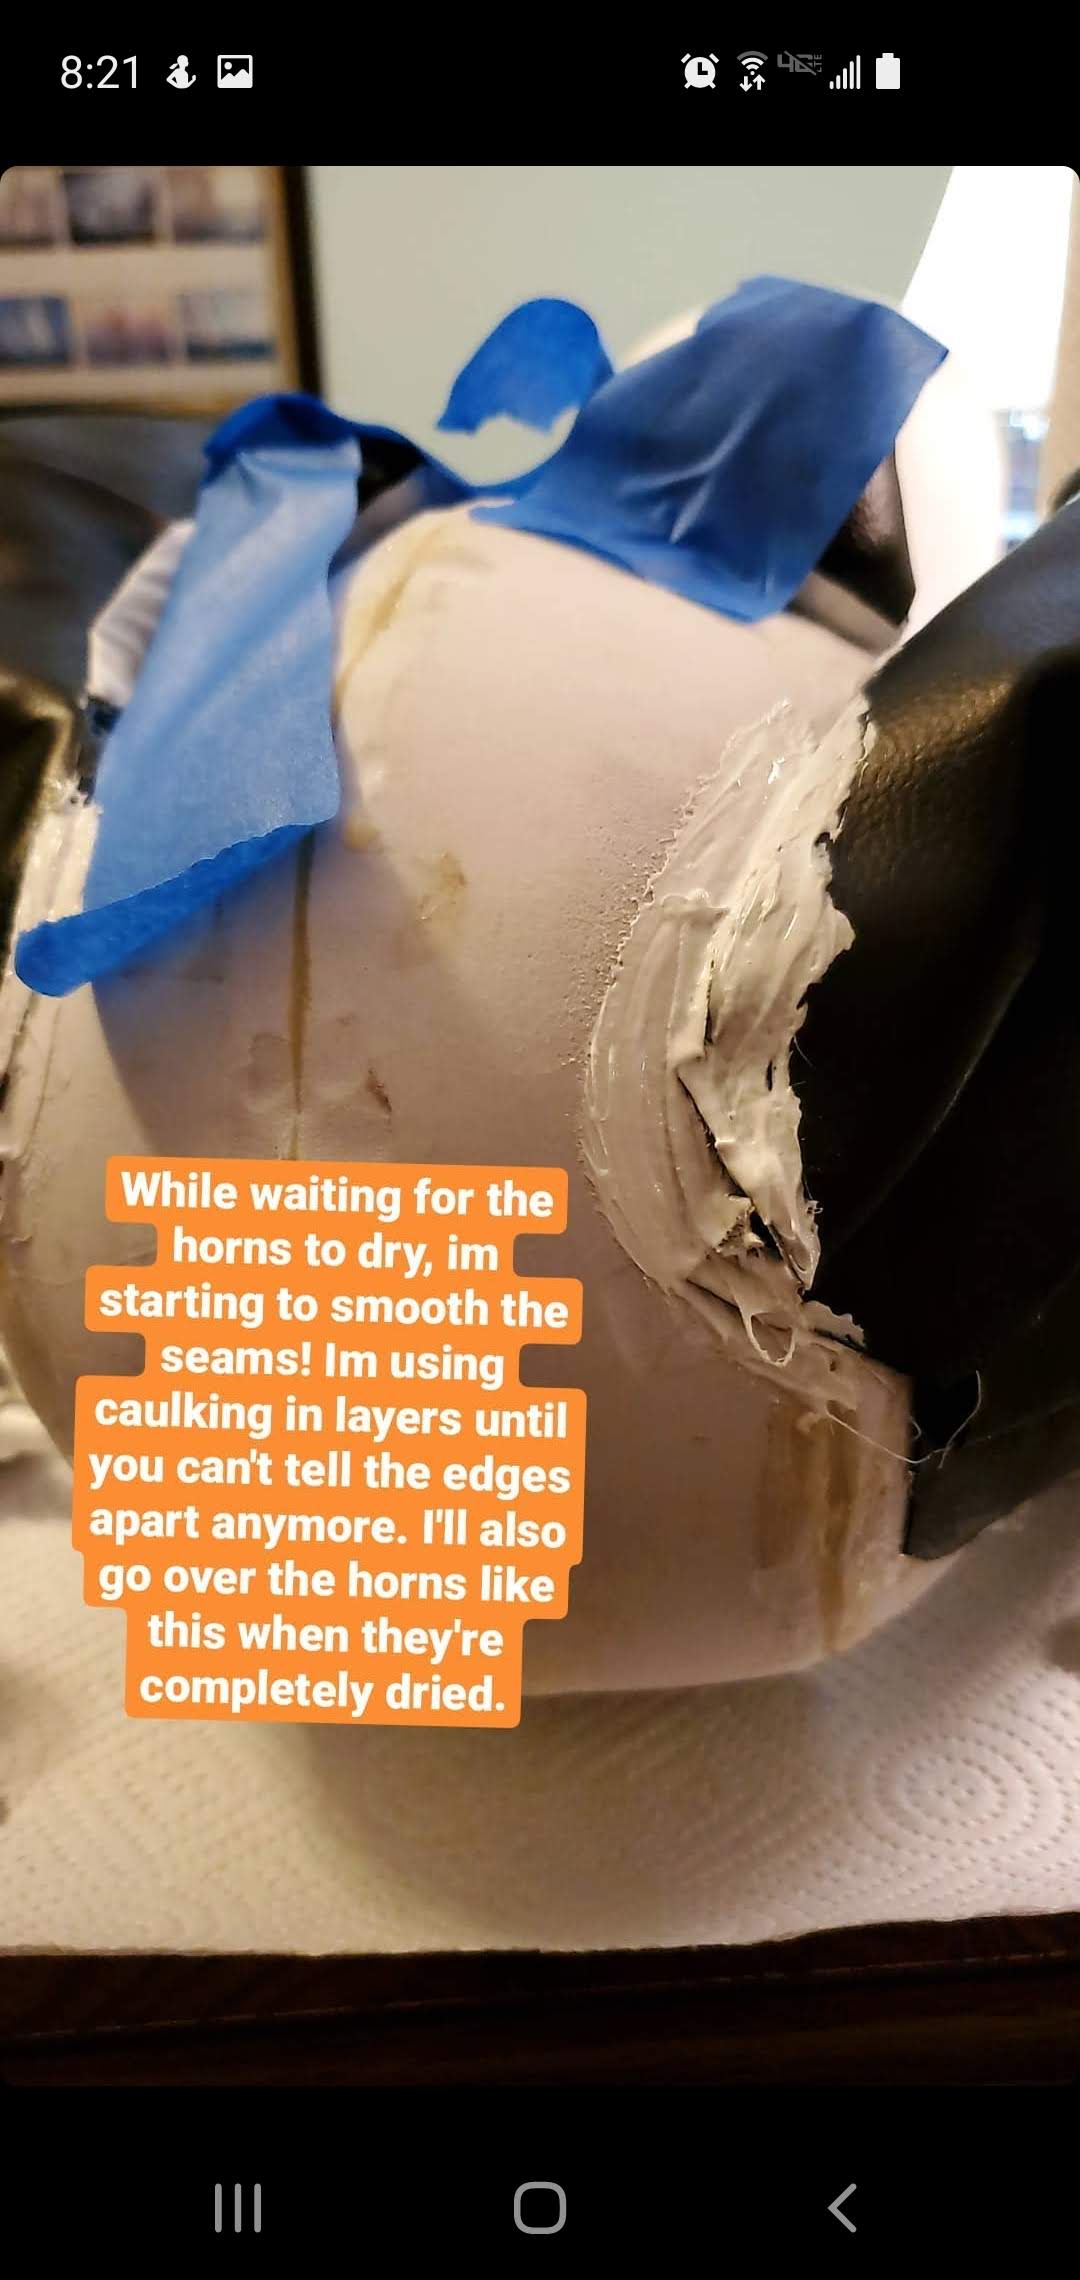
Clean Up
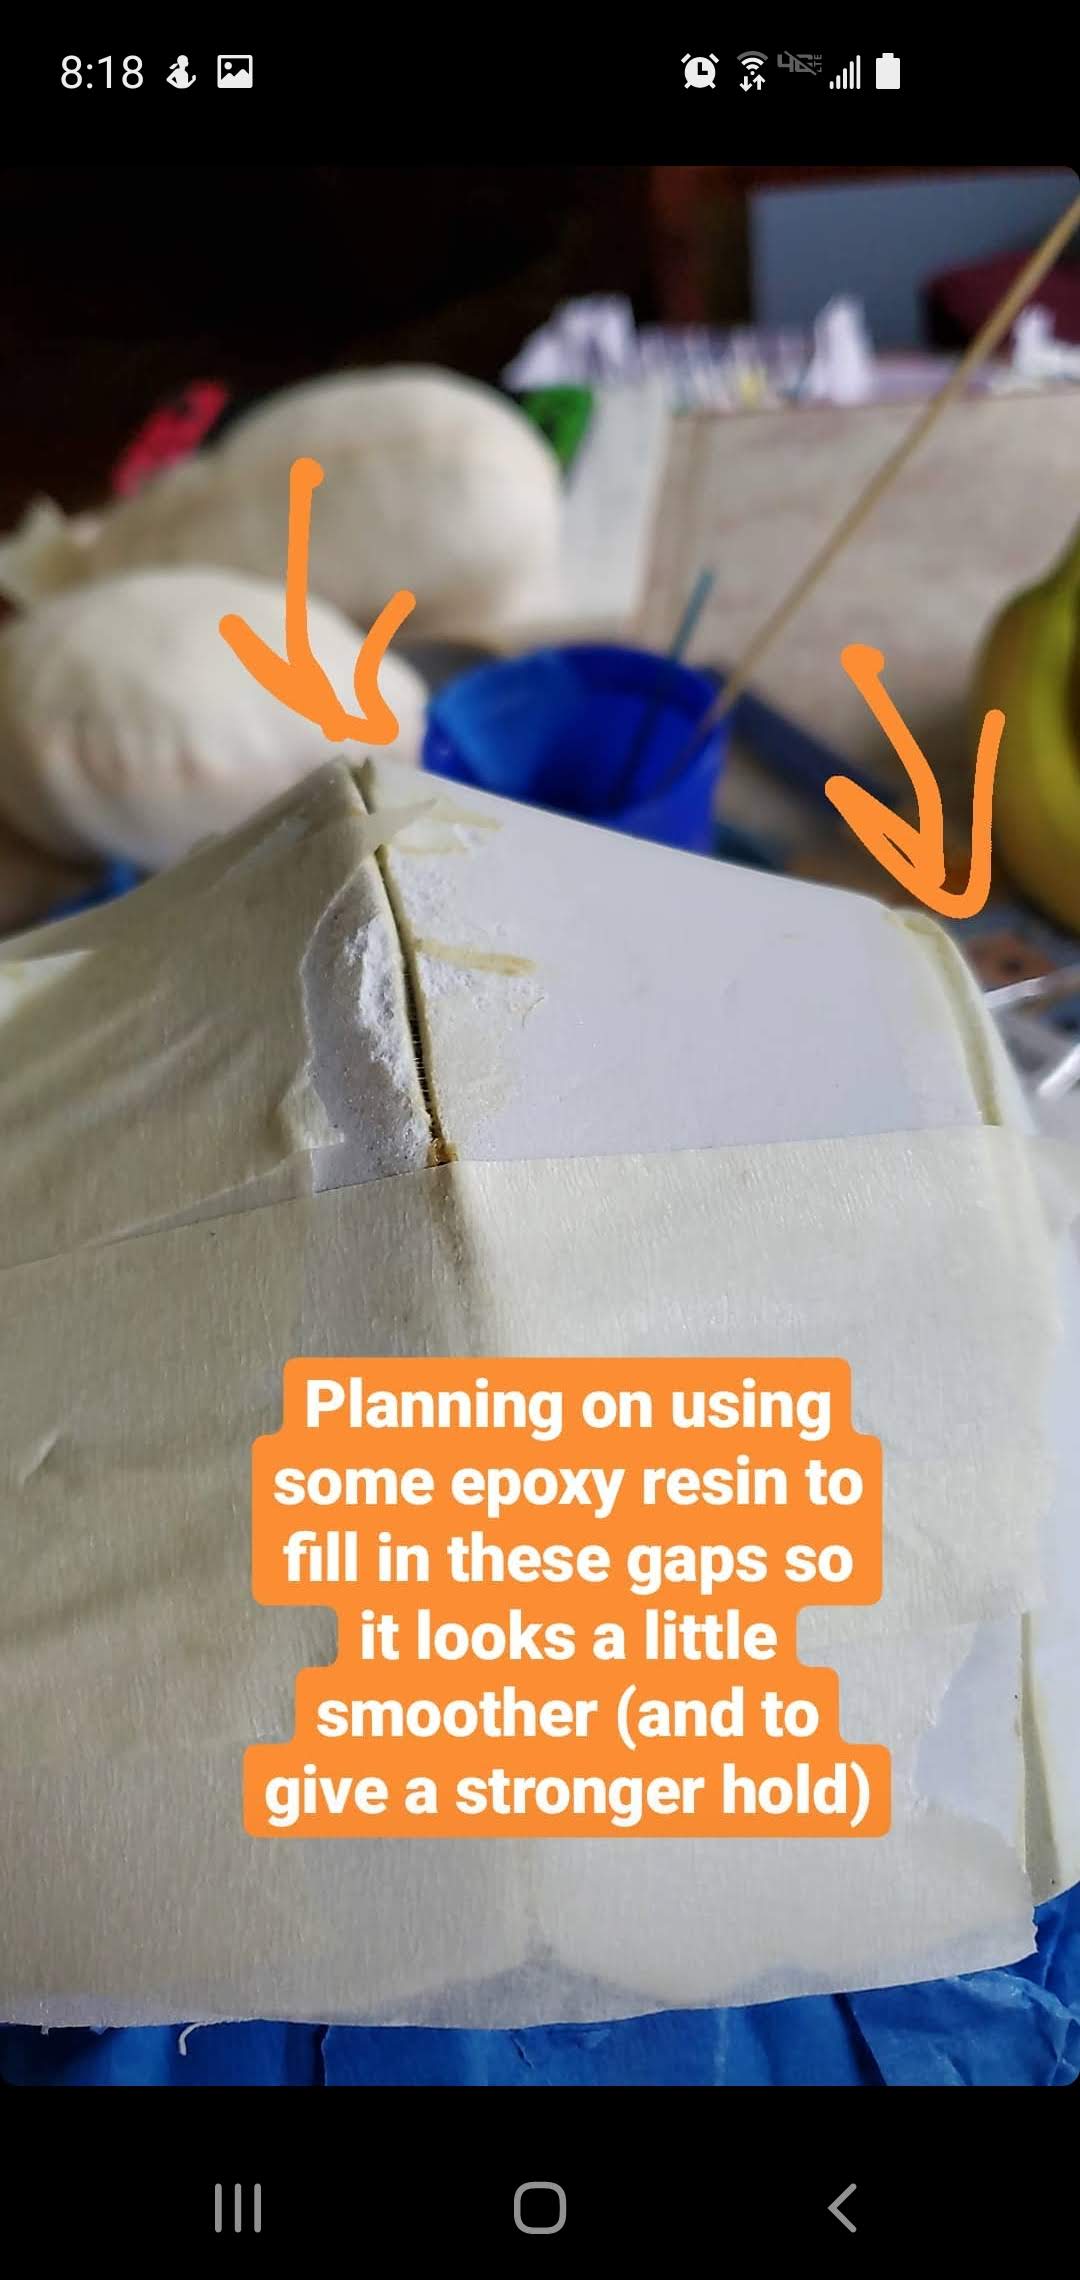
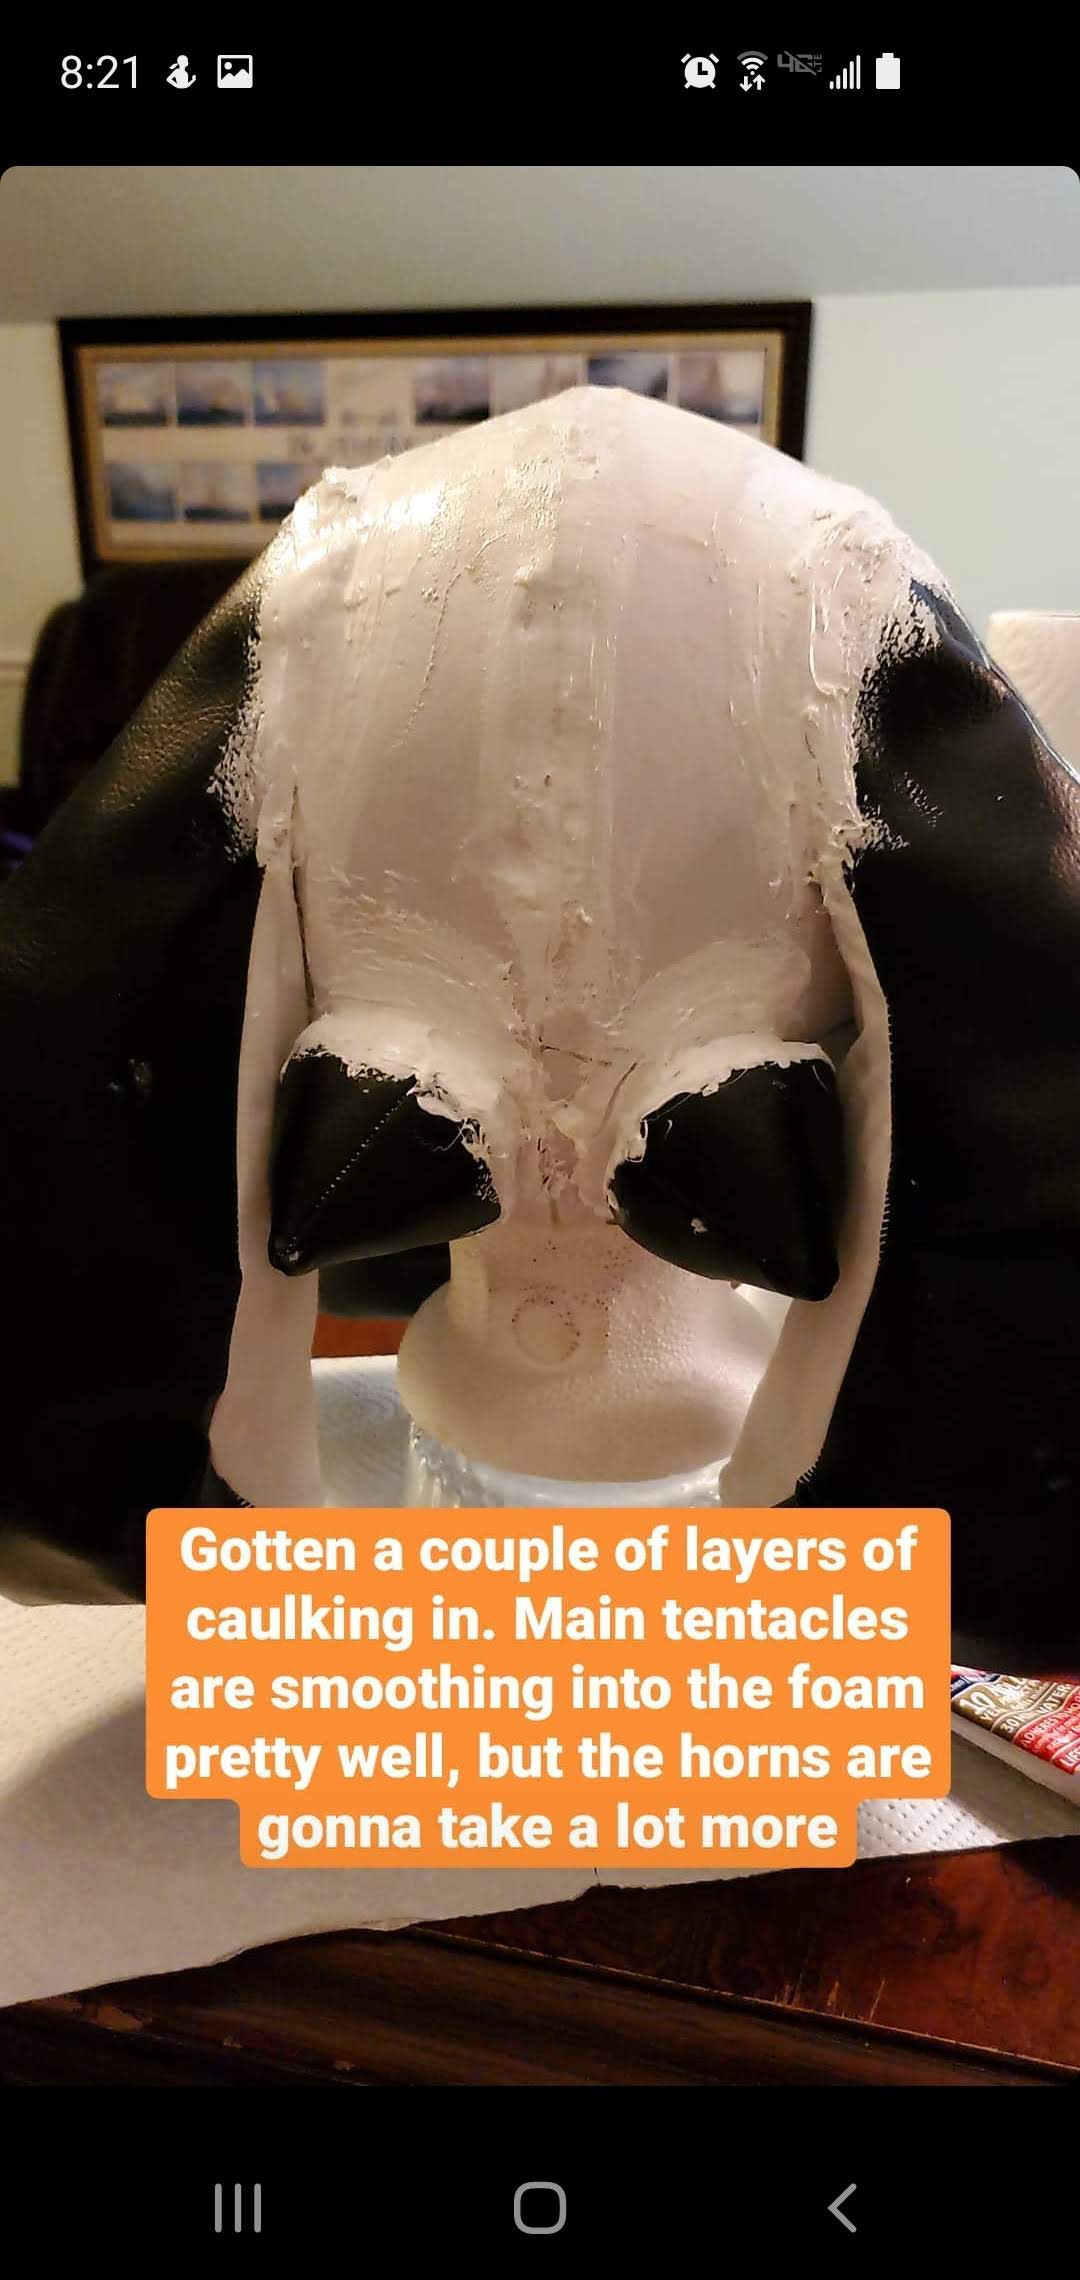
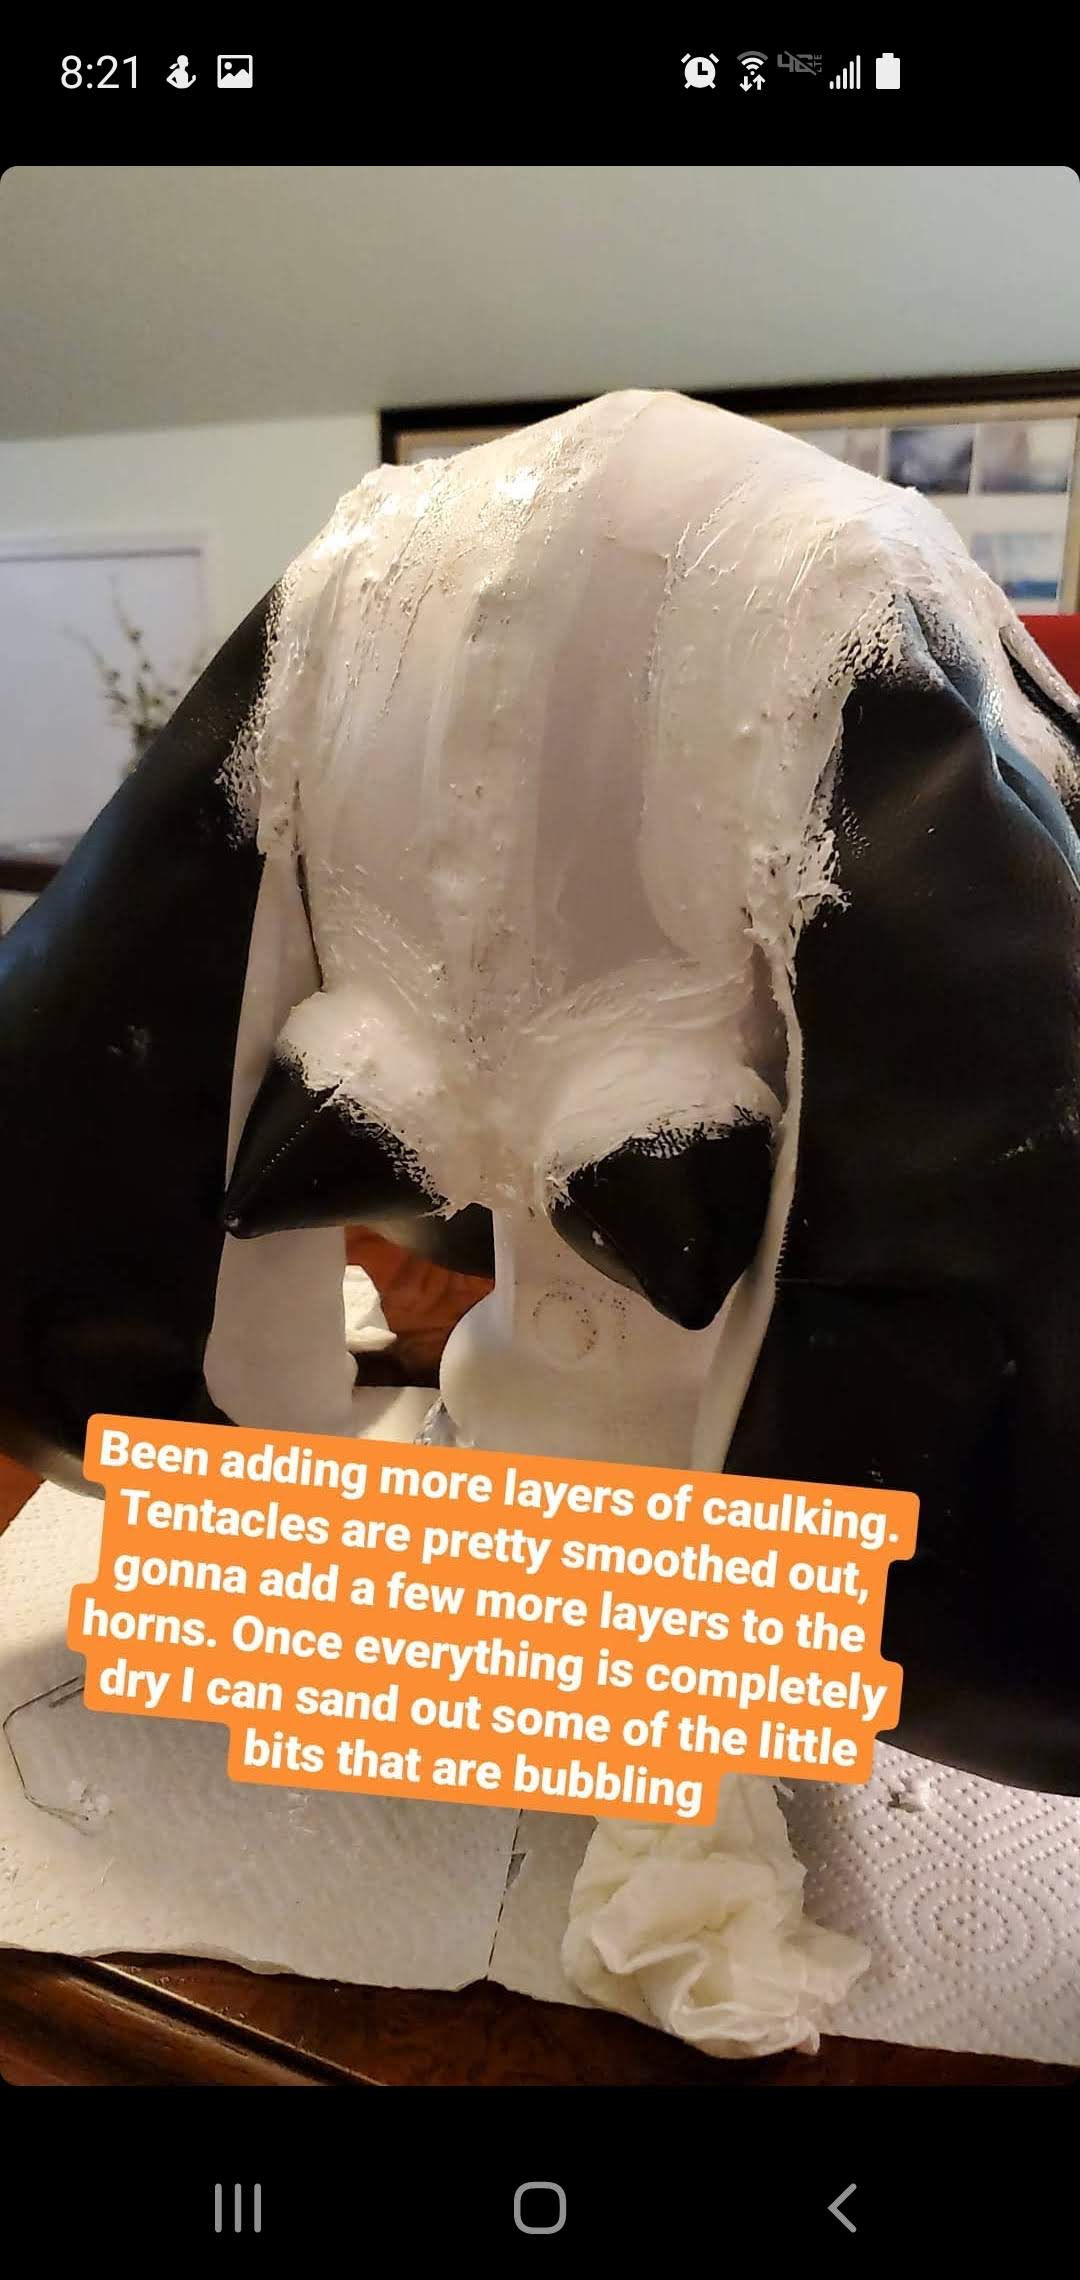
At this point you have probably noticed slight gaps in the foam or edges where you glued on your tentacles that aren't perfectly smooth, this is the time to fix it. Using your waterproof caulking, you're going to lay some on, wet your finger, and then smooth it out by hand.
This process is going to take a lot of time to do a lot of thin layers. DO NOT RUSH. This may take a few days between layering and dry-times to be as bulked out as you want, the goal is to cover the seams as smoothly as possible.
Once your caulking is perfectly dry, you may want to run over it with some sandpaper or a dremel to really smooth it out. Do not go back and forth between sanding and caulking, I made this mistake and had a bunch of weird spots that dried with little mircro-spikes, I've had to go back twice to fully clean them up. Do better than me
.
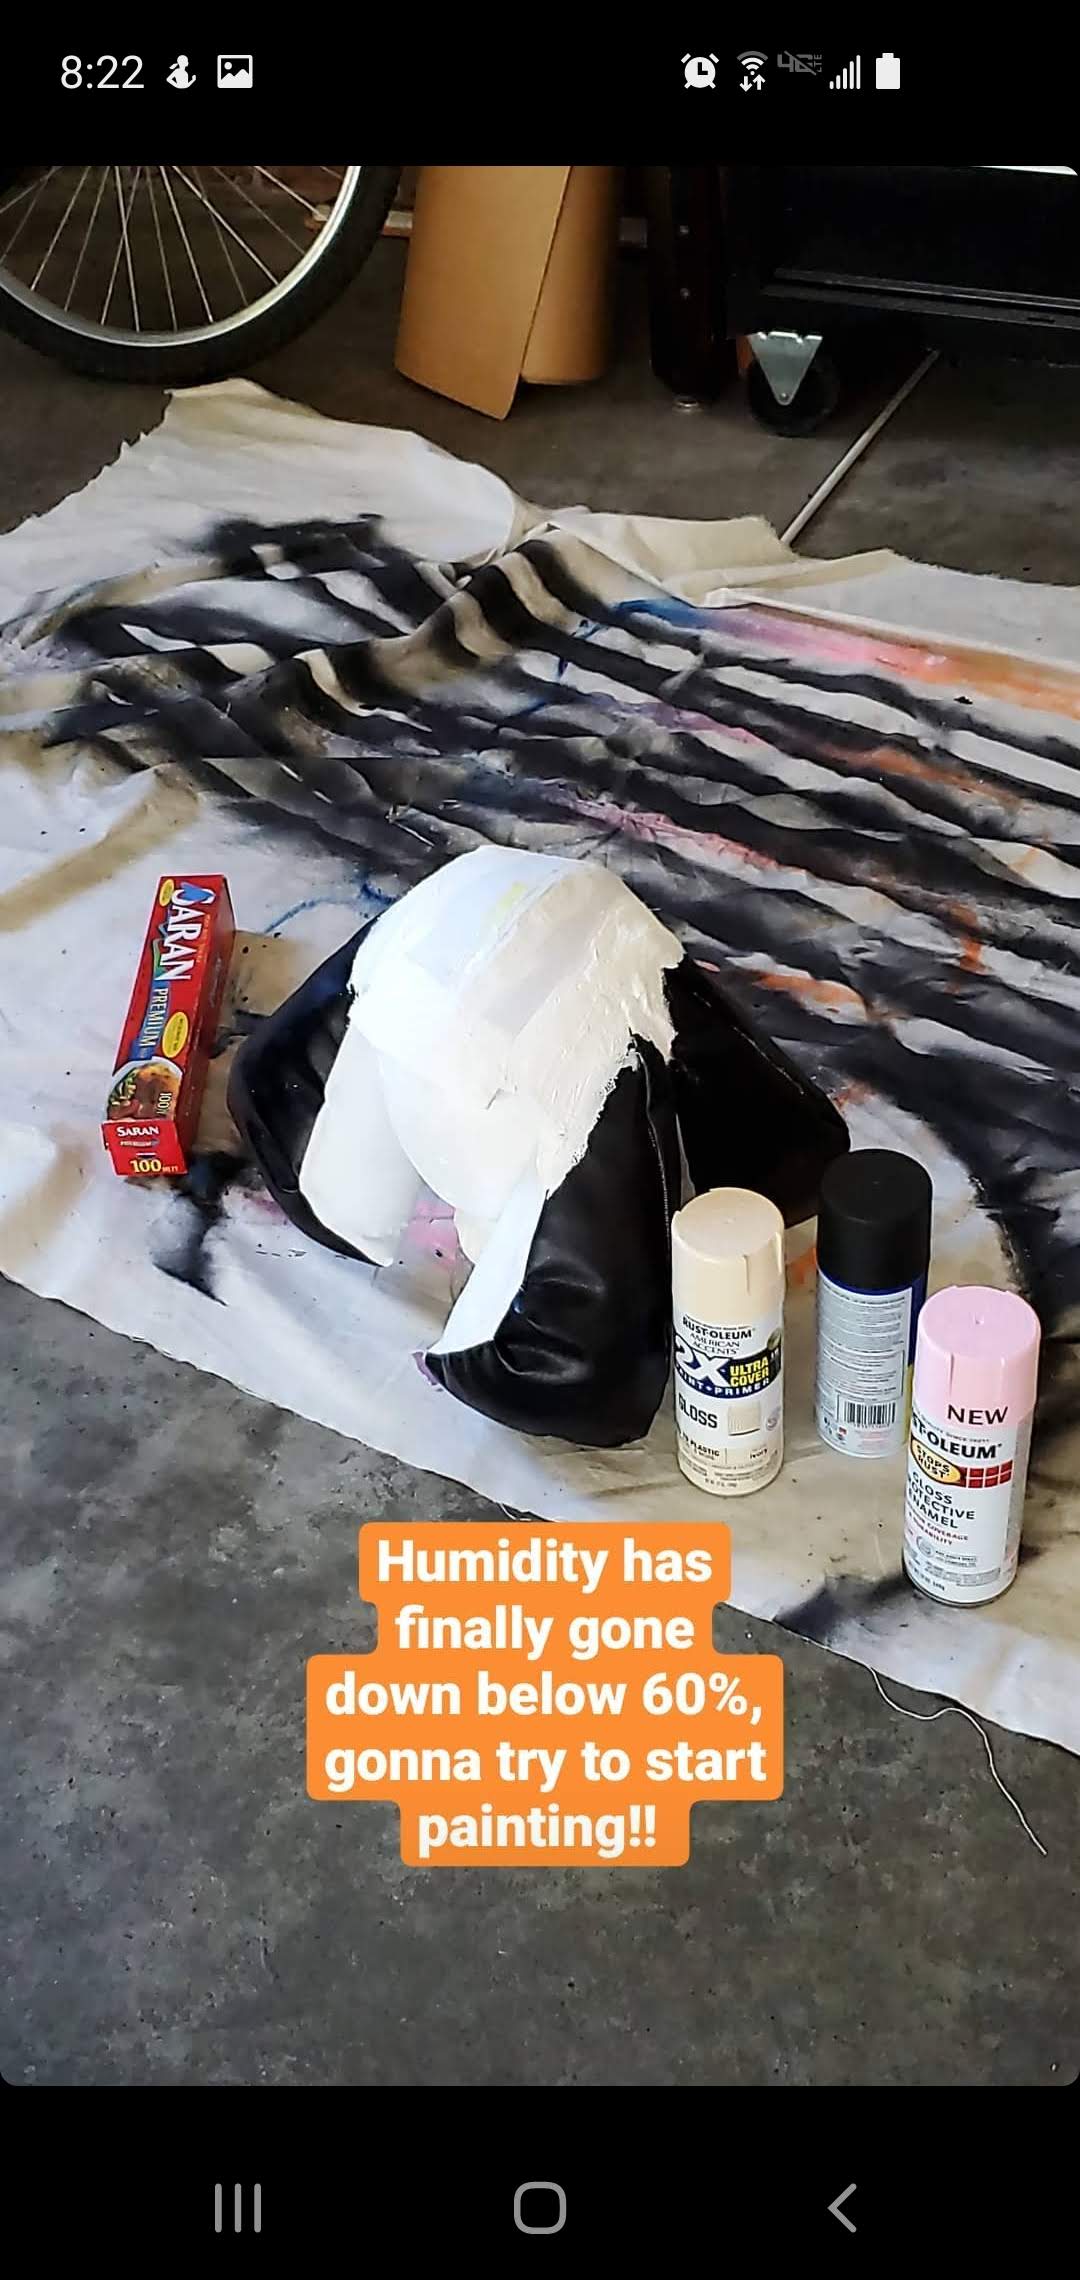
Prepping for Paint
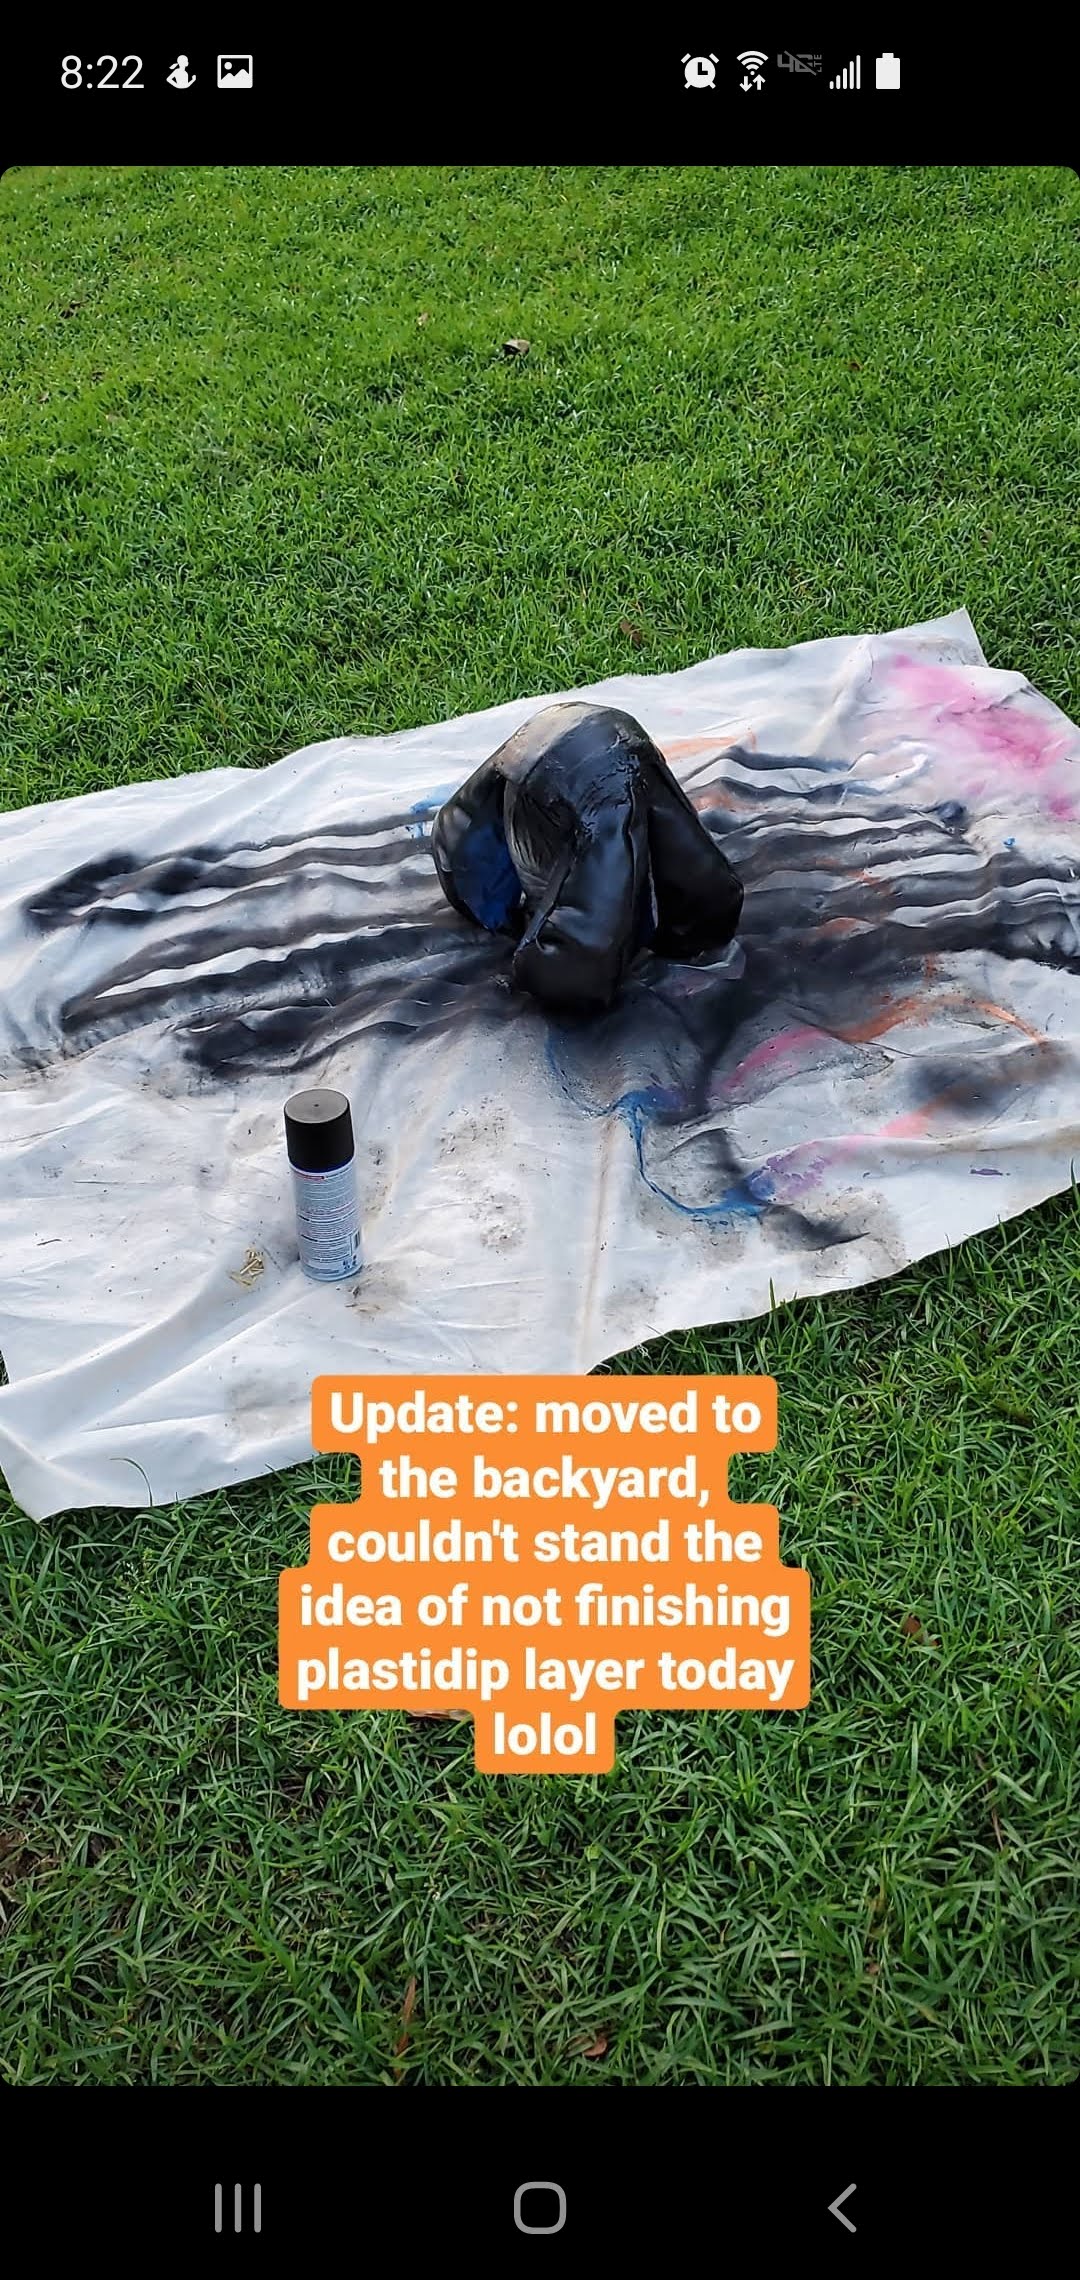
Your "wig" should be the right shape, size, and should fit (as well as be fully dry and smooth) by now. Grab your tape again and tape over anything you do not want to paint (like the inner cotton and whatever this will be resting on, in my case a stryrofoam head). Read over the instructions on your Plastidip, and get spraying on it! I did about 3-4 layers.
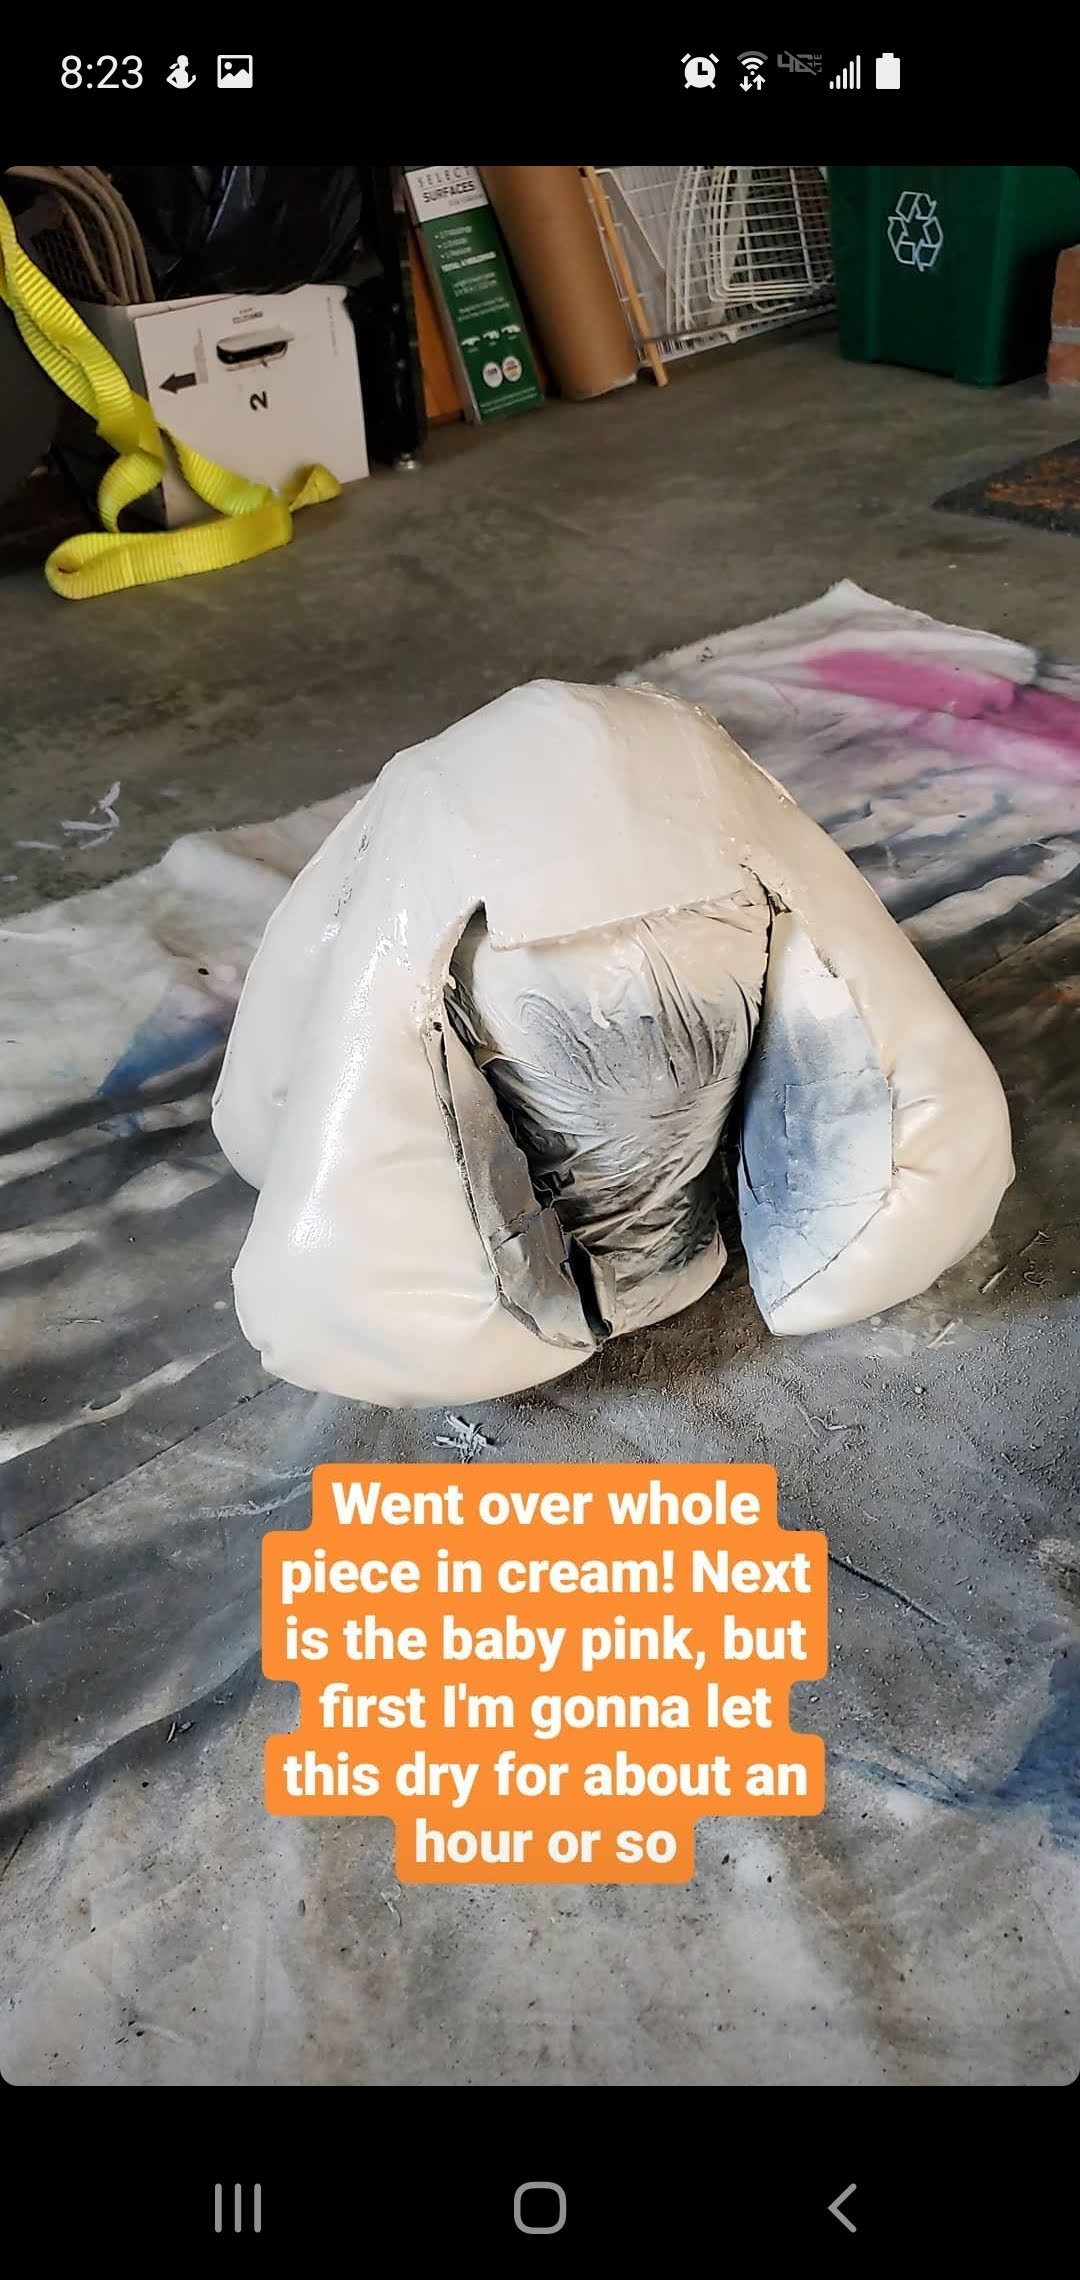
Paint and Finishing Touches
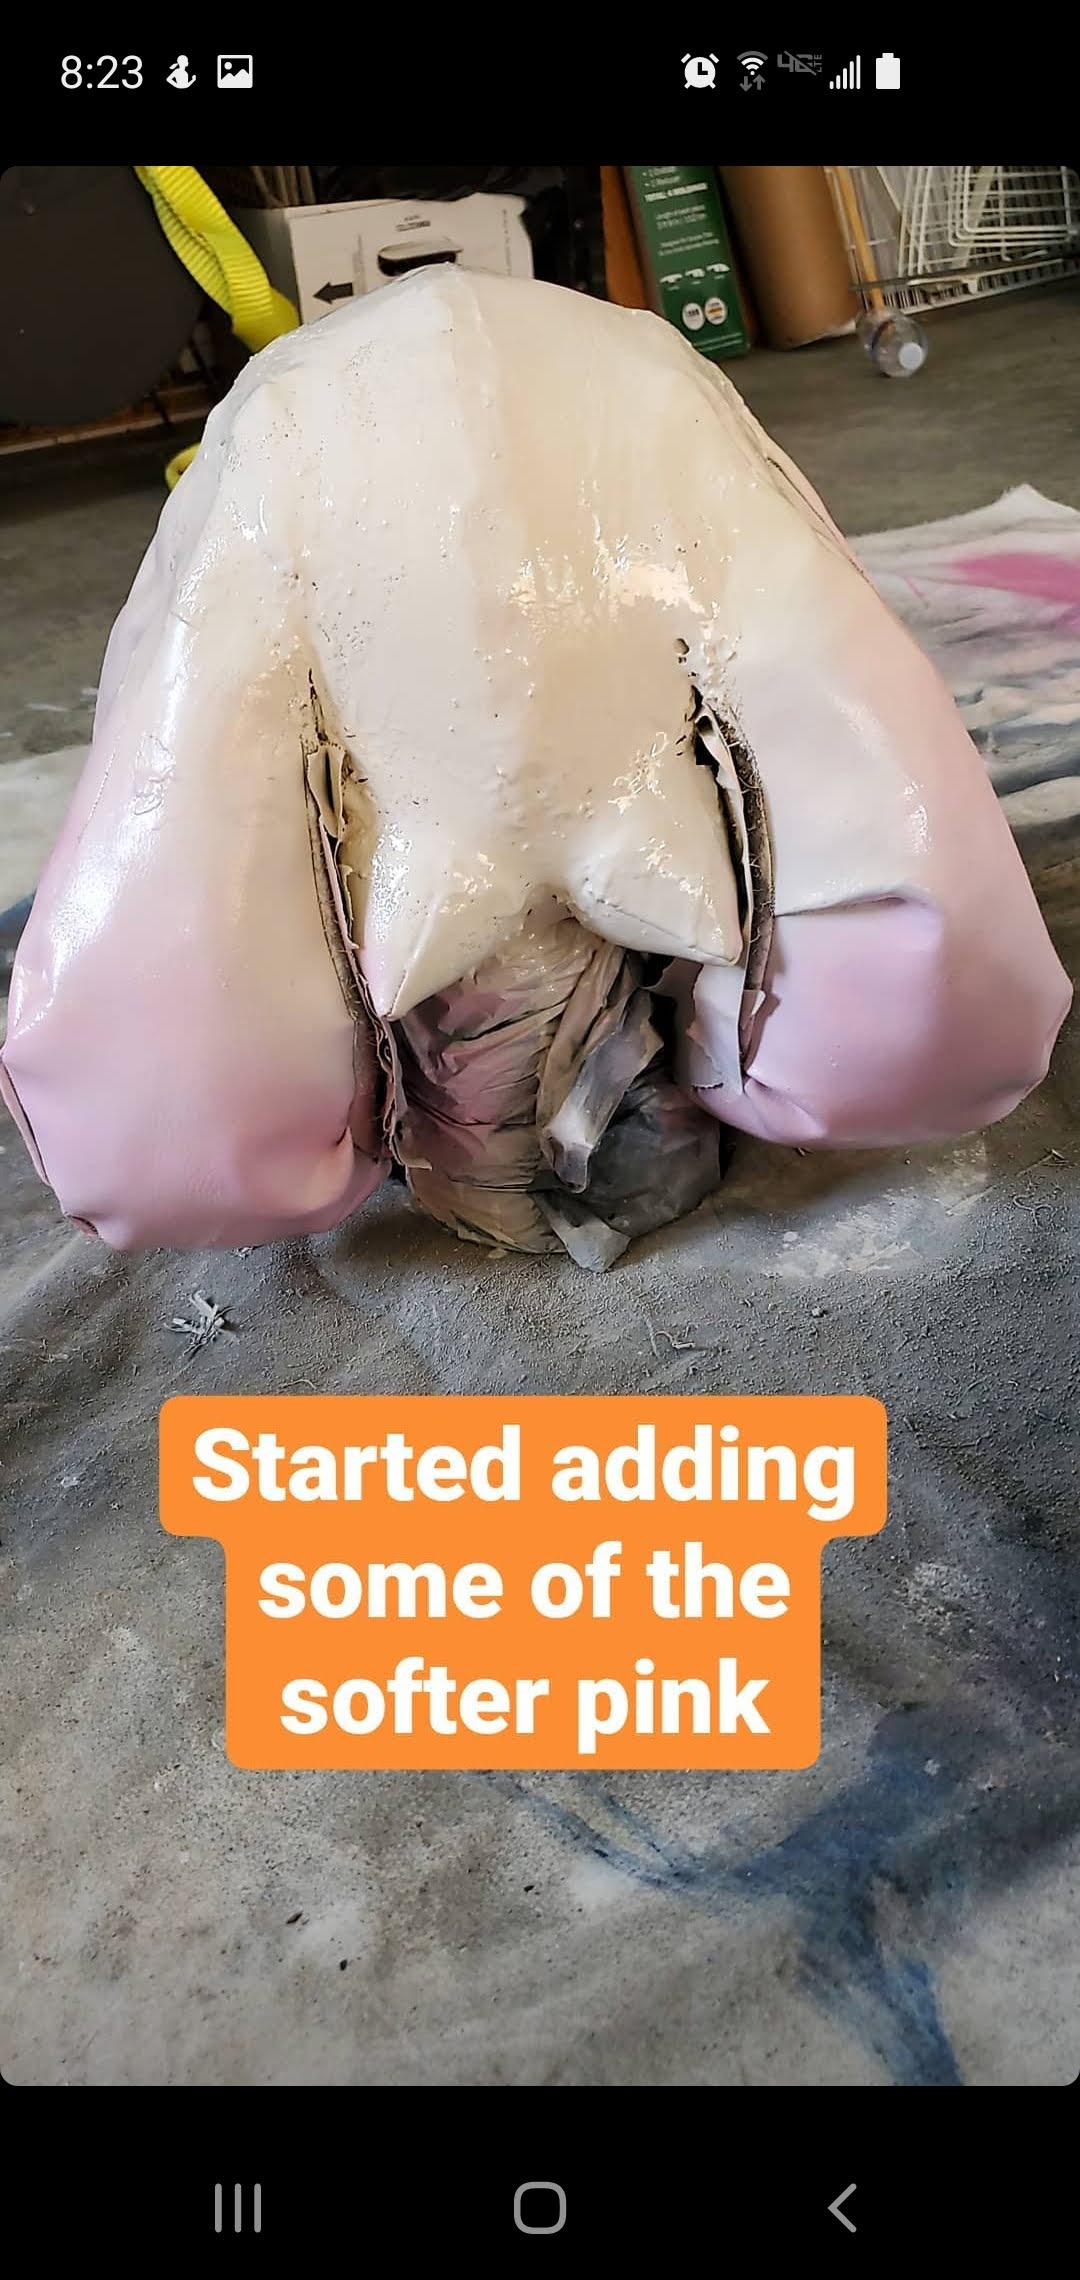
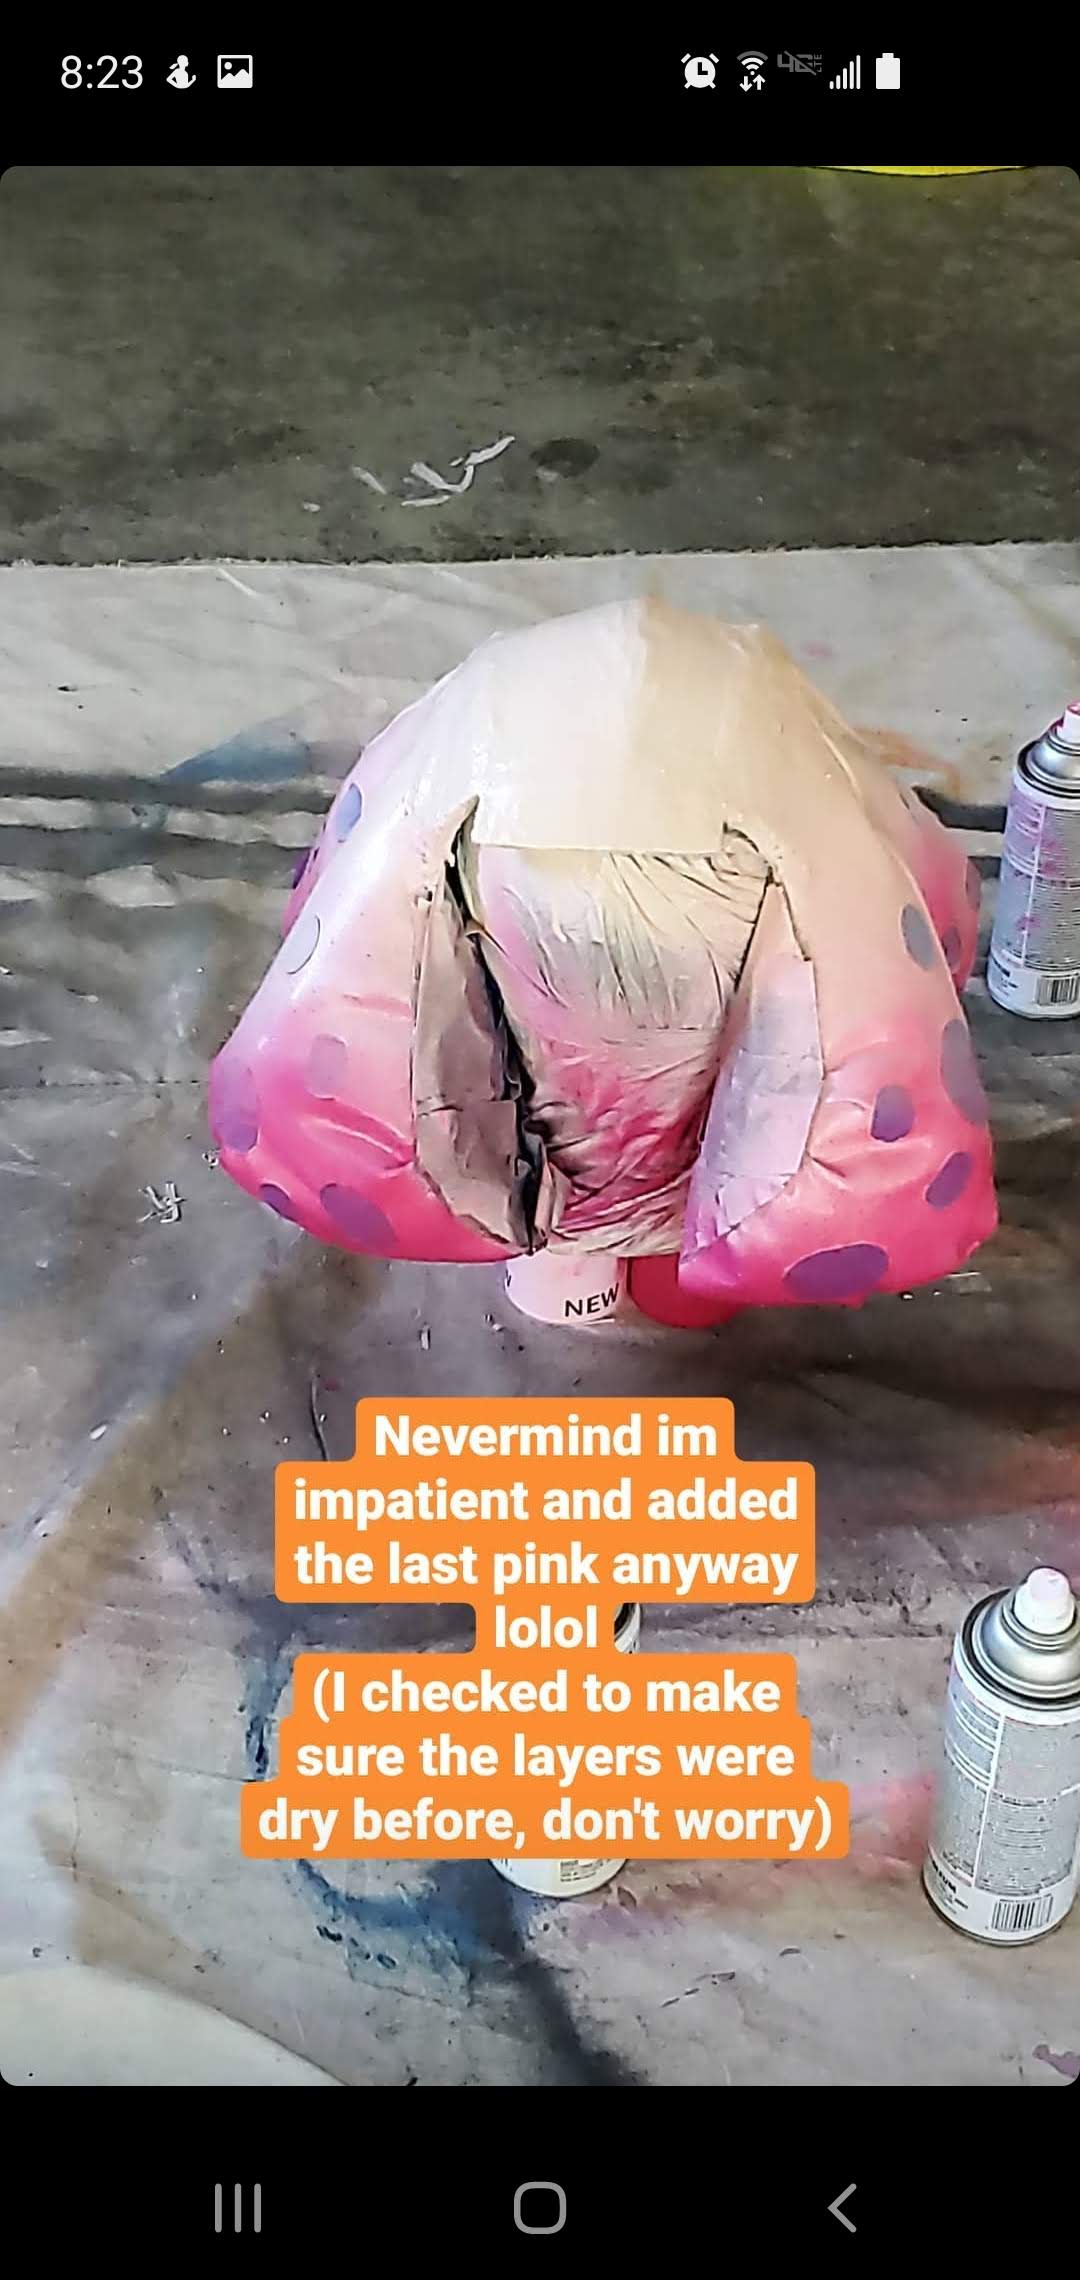
We're at the end now! Once your Plastidip layers are all dry and you have a good base, grab your spraypaint and get started (or an airbrush set if you have one, I'm not that fancy though so I just kinda winged it)!
Get a complete coat or two of your base color on, let it dry. While it's drying, you can make some rings/ circles out of your tape to be put on later, this will make the spots that will show through your gradient. Then just use your other colors on top, when all is dry take your rings/ circles off!
You shouldn't need to set the paint with anything, but one final step you can do is to grab some white paint, and touch up where the Plastidip/ Paint may have accidentally gotten onto the inner fabric.
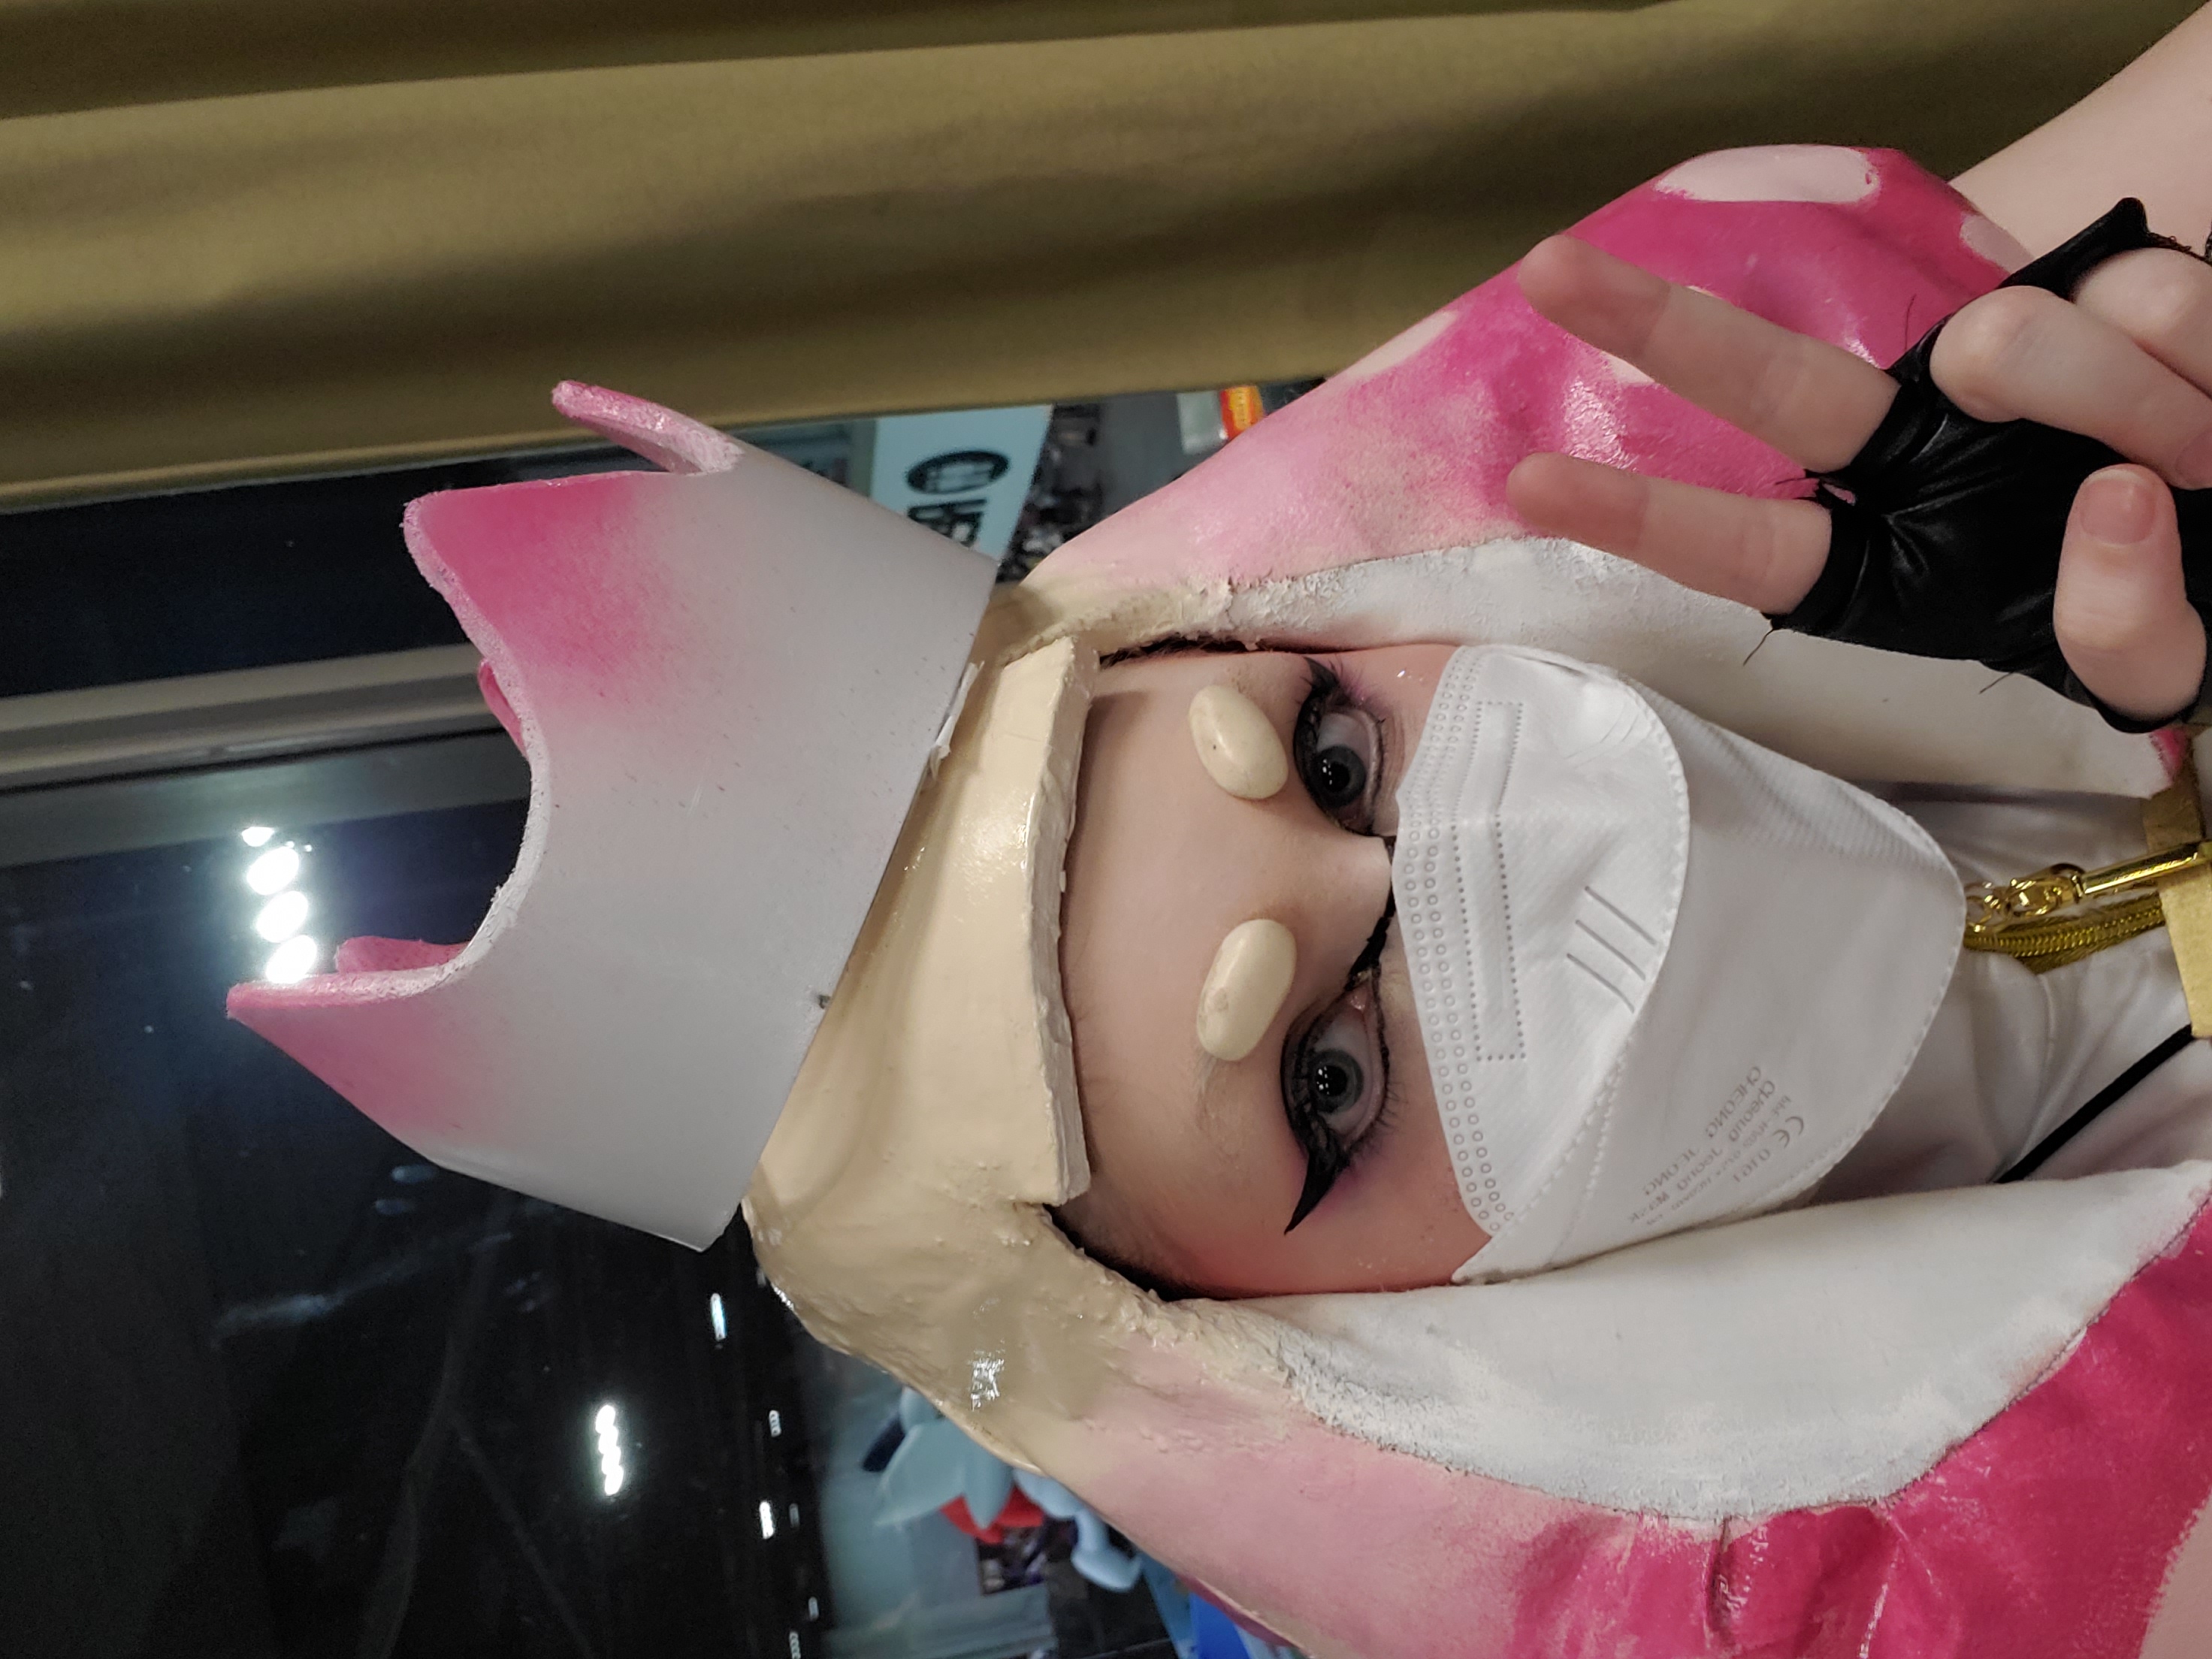
Now you should have your completed squid/octo wig!!!

And there you have it! A finished tentacle-squid-octo-wig-headpiece-thing!! I would love to see what you create with this, so please feel free to tag me on insta (@paradox_optimist), twitter (@ParadoxOptimist), or tumblr (@paradoxoptimist)!
Back to top of page.